ASSEMBLY (cont.)
TESTING the SPLASH RUNNER
Step 3.
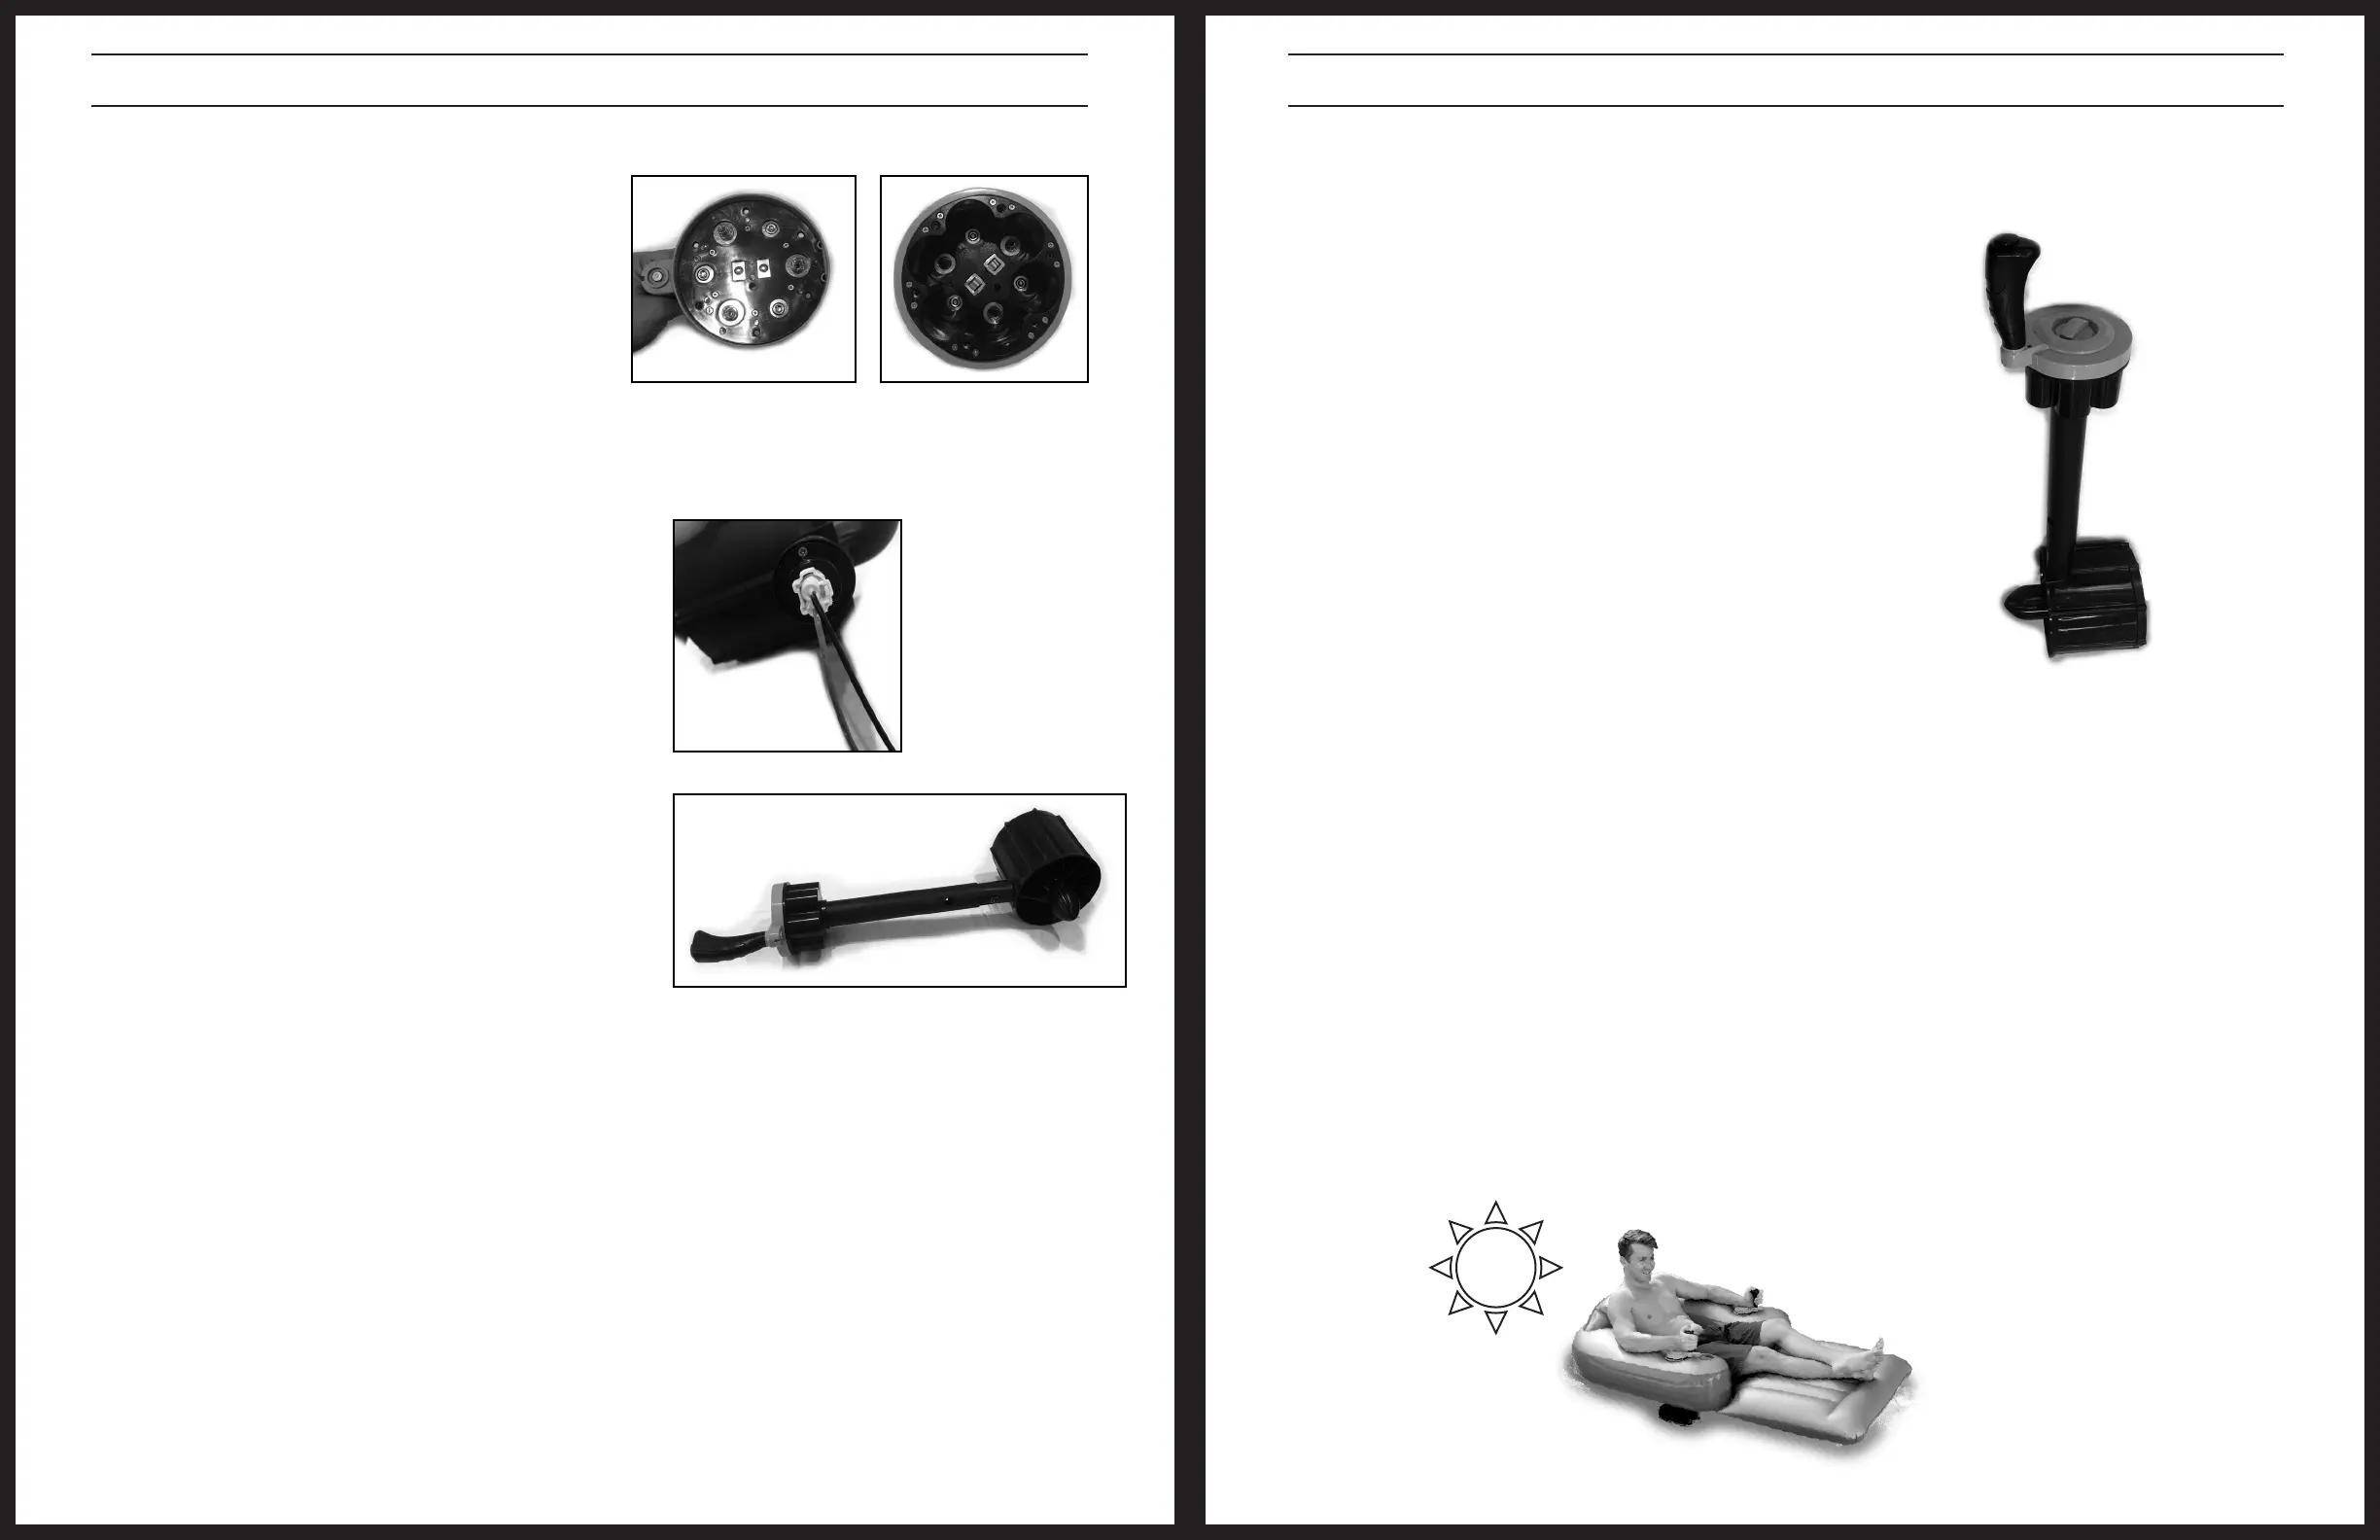
Unscrew the cap from the battery assembly and to open the battery
compartment. Insert 6 D-cell batteries (not included) into the
compartment, making sure to follow the polarity (+/-) as marked
inside the compartment. When all batteries are inserted, replace the
cover on the battery compartment, and secure the cover with the
cap by pressing down and tightening clockwise.
Step 4.
Connect the wires from the bottom of the battery compartment (which
should now be underneath your inflatable) to the propeller assembly by
inserting the male power plug from the battery into the female outlet on
the propeller. Be careful not to damage the wires.
Step 5.
Align the tabs on the propeller assembly with the openings in the
downrod of the battery compartment. Slide the top stem from the
propeller into the battery compartment downrod. Squeeze the tabs on
the sides of the top stem of the propeller to allow the stem to fully insert.
The propeller assembly and the battery compartment assembly should
‘click’ into place.
Step 6.
Repeat the steps above on the other side of the raft. Be careful not to damage the propeller when moving your Splash
Runner during assembly.
After completing the previous assembly steps, press the button on the handle to test the propeller. If the propeller doesn’t
move, check to make sure that all electrical connections are complete, and that the battery cover is correctly aligned and
completely closed.
DISASSEMBLY
To disassemble your Splash Runner, please follow these instructions:
First, unscrew the cap from the battery compartment and remove the cover. Remove all batteries. It is a good idea to
immediately replace the battery cover and cap so that you don’t lose them.
Next, separate the propeller from the battery compartment assembly by squeezing the tabs where they are connected.
Squeeze both tabs and pull the propeller down. Be careful not to pull the propeller out too fast or far, as this may damage
the electrical wires.
Finally, separate the electrical connection between the propeller and the wires from the battery compartment by pressing
the small tab on the male plug and pulling it away from the female connection. Once the propeller is disconnected from
the wiring on the battery compartment assembly, you can remove all parts from the inflatable.
Note: Be sure to disconnect the electrical by pulling the plastic plugs, not the wires themselves. Pulling on the wires can
damage the assembly.
REPAIRING the SPLASH RUNNER
Rough surfaces may puncture the Splash Runner. If the lounger gets punctured, use the glue and PVC from the repair kit to
seal the punctured surface. Apply the glue on the damaged area and apply the supplementary PVC sheet. Wait
approximately one minute after applying the PVC sheet for the glue to dry before handling your Splash Runner. You should
wait 24 hours before using the Splash Runner in the water again.
To move, press the buttons on both handles. These buttons will
operate your propellers.
To drive forward, turn both handles so they are facing forward and
press both buttons at the same time.
To drive in reverse, turn both handles so they are facing backward
and press both buttons.
To turn right, turn either handle to the right. The angle of your turn
will depend on how much you turn the handles to the right.
To turn left, turn either handle to the left. The angle of your turn will
depend on how much you turn the handles to the left.
To move laterally towards the right, turn both handles right and
press both buttons.
To move laterally towards the left, turn both handles left and press
both buttons.
To rotate in a circle, face one propeller forward and the other
backward and press the buttons.
•
•
•
•
•
•
•
•
Note: Make sure the cover is properly aligned with the battery compartment as you close the compartment. The cover and
compartment are designed with notches to ensure correct alignment. Rotate the cover until the notches in the cover fit into the
notches in the compartment itself.
HOW to USE YOUR SPLASH RUNNER
CONTROLLING the SPLASH RUNNER
Your Splash Runner is perfect for your backyard pool or a small lake. Because it contains propellers on either side, it enables
you to move in all directions.
 Loading...