The product has been designed to aid in the detection of unwanted
intrusions into unsupervised areas. POOLGUARD DAPT-2 IS A
SAFETY ALARM SYSTEM AND NOT A LIFE SAVING DEVICE. It
should be used in conjunction with the safety equipment currently in use
and should not affect existing safety procedures.
WARRANTY AND REPAIRS
POOLGUARD is sold with a limited warranty to cover defects in parts
and workmanship for one year from date of purchase. (Retain proof of
purchase). If Poolguard exhibits a defect, please call our Customer
Service department at 1-800-242-7163. Unauthorized returns will not be
accepted. Proper repair is only ensured when the unit is returned to the
manufacturer. Visit our website at www.poolguard.com to fill out your
warranty registration information.
SWIMMING POOL SAFETY TIPS
CONNECTING DOOR ALARM TO SENSOR SWITCHES
READ THE DOOR ALARM MANUAL FOR INSTALLATION ON ONE DOOR FIRST:
THE SENSOR WIRES ARE PERMANENTLY CONNECTED TO THE DOOR
ALARM. CONNECT BOTH SENSOR WIRES COMING FROM THE DOOR ALARM
TO THE SENSOR SWITCH ON THE DOOR FRAME. THEN USE THE SUPPLIED
JUMPER WIRES TO CONNECT TO THE SCREEN DOOR SENSOR SWITCH
(SEE DIAGRAM BELOW). THE TWO SENSORS SHOULD BE HOOKED UP IN
PARELLEL WITH EACH OTHER.
• THE PLASTIC COVERS ON THE SENSOR SWITCHES & SENSOR
MAGNET MUST BE REMOVED BEFORE INSTALLATION
• SWITCHES GO ON THE FRAME BY THE DOOR
• MAGNETS GO ON THE DOOR ITSELF – SEE PICTURE IN MANUAL
EQUIPMENT NEEDED
A. ONE DOOR ALARM AND 2 MOUNTING SCREWS
B. ONE SET OF SENSOR SWITCH AND SENSOR MAGNET AND 4 SCREWS
FOR DOOR FRAME & DOOR
C. ONE SET OF SENSOR SWITCH AND SENSOR MAGNET, JUMPER WIRES,
AND 4 SCREWS
– FOR SCREEN DOOR FRAME AND SCREEN DOOR
IF YOU HAVE ANY QUESTIONS CALL US AT 1-800-242-7163
LOW BATTERY FUNCTION
5.
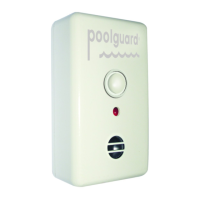
MODEL DAPT-2
MEETS UL 2017
• Supervise children at all times.
•Never permit swimming alone. Never leave a child alone, even
to answer the telephone.
•Always remove the entire solar cover from a pool before
swimming.
•Remember that alcohol and water safety do not mix.
•Have your pool area fenced and the gate locked to prevent
unauthorized entry to the pool, and install a gate alarm.
•Lock and secure all doors in the house which permit easy
access to the pool, and install a door alarm.
•Have a responsible adult teach swimming and water safety to
your children.
•Maintain clean, clear water in the pool.
• Do not swim during electrical storms.
•Do not permit bottles, glass, or sharp objects to be used
around the pool.
•Ask your pool dealer how you can improve your pool
safety––they will be glad to assist you.
•Above all: remember that common sense, awareness, and
caution will allow you to enjoy your pool.
Figure 1
When the 9-volt battery is low, the door alarm horn will chirp once every
10 seconds–this means it is time to install a new battery, Battery life is
approximately 1 year. Test your door alarm weekly by opening the door
and allowing the alarm to sound.
INSTALLATION OF OPTIONAL SCREEN DOOR KIT
6.
Figure 5
www.poolguard.com