return line. Warranty will be null
and void if a bypass is not fitted
with pumps more than 1.5Hp
1.2Kw
STEP 2
Ensure that the pool pump
has been switched off.
Turn the multi-port valve to
the closed position.
STEP 3
If the pool pump is below
the water level of the pool,
block the return outlet in
the pool.
This is done by
unscrewing the nozzle
on the outlet and placing
a plastic bag over
the opening and then
replacing the nozzle
STEP 4
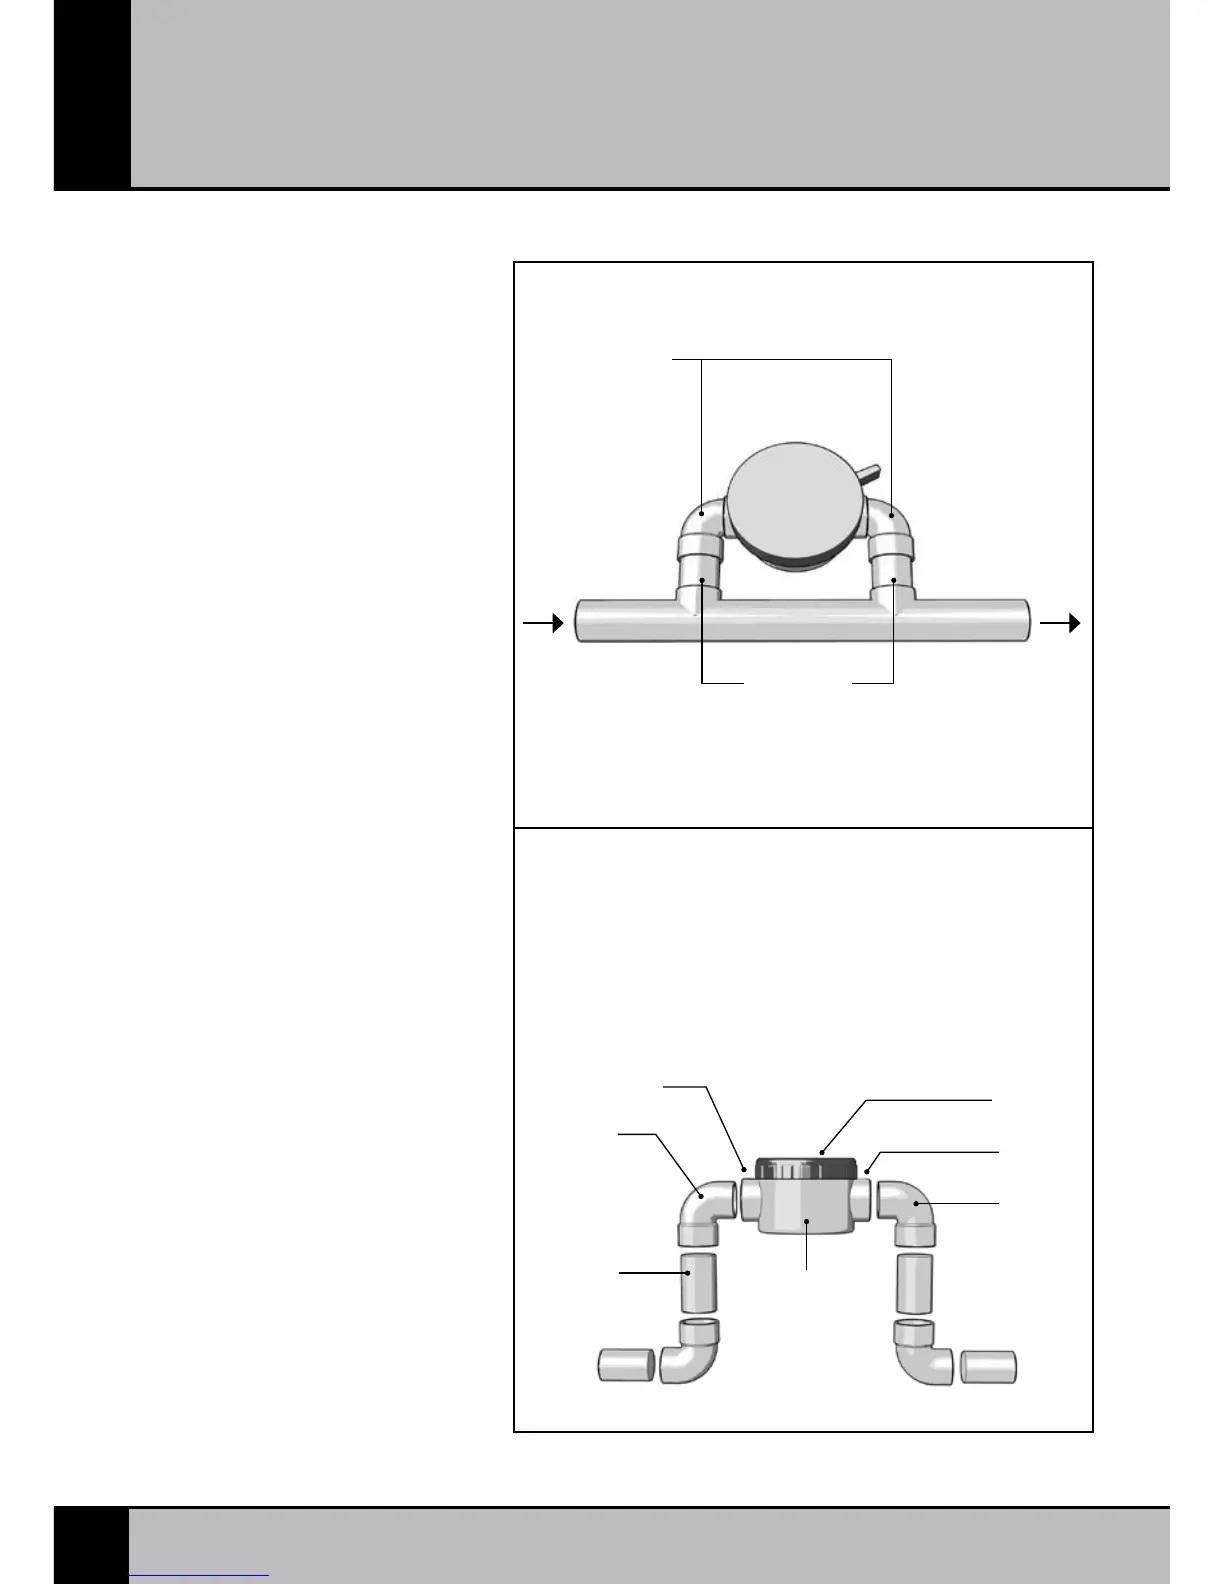
When having planned
where to fit the chlorinator
in the return line, cut
the pipe and using
combinations of elbows,
9O° bends and pipe.
Assemble the whole
installation without gluing
at first, to ensure that the
assembly fits together.
Use PVC pressure cement
a.
b.
a.
b.
a.
b.
Cell
Poolmaid
Elbows
By-pass
Pump Pool
50mm
PVC pipe
Poolmaid
elbow
Cell out-
let (10)
Ring nut
Pool-
maid
elbow
Cell inlet (10)
The “Poolmaid Elbows” are supplied in the box.•
Typical poolmaid salt chlorinator
installation
Return Line
Cell housing
(8)


 To Next Page