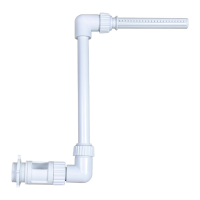
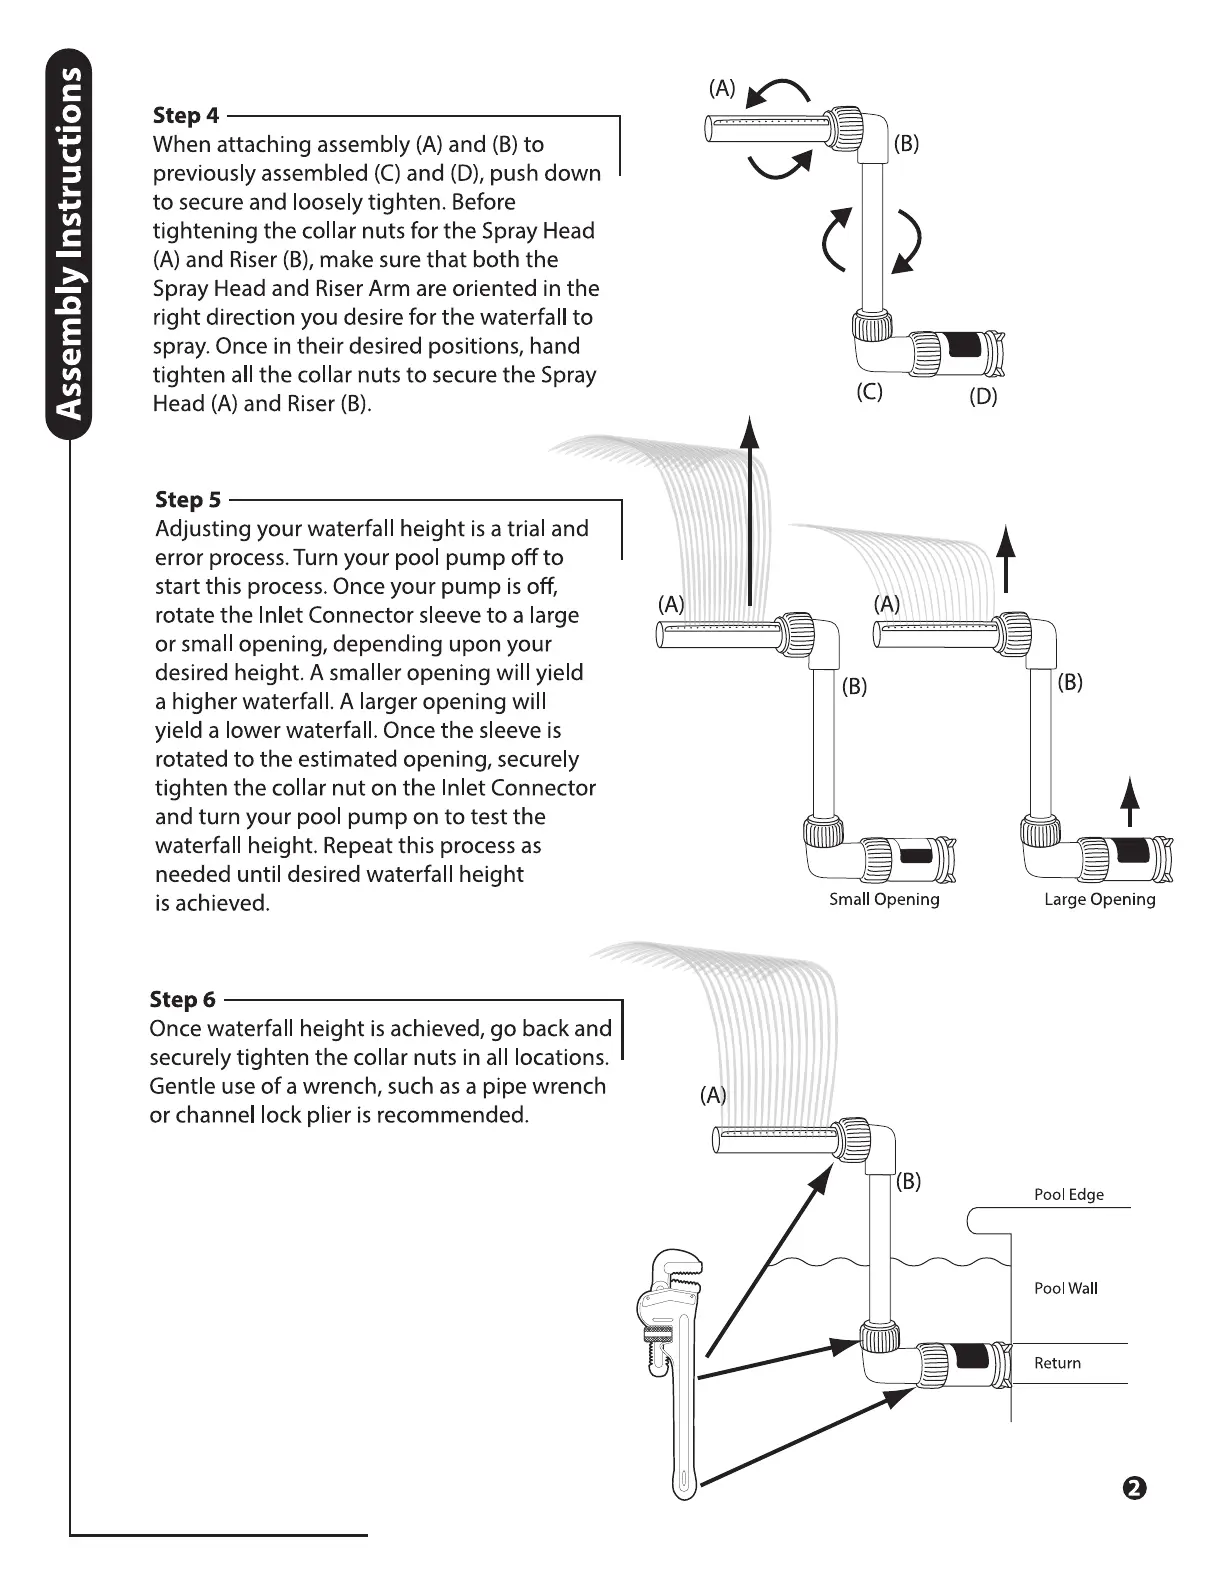
Step 4
When attaching assembly (A) and (B) to
previously assembled (C) and (D), push down
to secure and loosely tighten. Before
tightening the collar nuts for the Spray Head
(A) and Riser (B), make sure that both the
Spray Head and Riser Arm are oriented in the
right direction you desire for the waterfall to
spray.Once in their desired positions, hand
tighten all the collar nuts to secure the Spray
Head (A) and Riser (B).
Step 5
Adjusting your waterfall height is a trial and
error process.Turn your pool pump off to
start this process. Once your pump is off,
rotate the Inlet Connector sleeve to a large
or small opening, depending upon your
desired height. A smaller opening will yield
a higher waterfall. A larger opening will
yield a lower waterfall. Once the sleeve is
rotated to the estimated opening, securely
tighten the collar nut on the Inlet Connector
and turn your pool pump on to test the
waterfall height. Repeat this process as
needed until desired waterfall height
is achieved.
Step 6
Once waterfall height is achieved, go back and
securely tighten the collar nuts in all locations.
Gentle use of a wrench, such as a pipe wrench
or channel lock plier is recommended.
(D)
(A)
(B)
(C)
(A)
(B)
Small Opening
(A)
Large Opening
Pool Edge
Pool Wall
Return
 Loading...