PK6-20-GBwww.zraysports.com4
5 www.zraysports.com PK6-20-GB
Hull ination:
1.Unfold and flatten the canoe and
install the footrest.
2.Check the air valves
①
,
②
and
③
and the bottom water drainage plug,
which must be in the closed positions.
Installation
• Ensure you know and understand the local laws, regulations and hazards
associated with water sports and inatable kayak operations.
• Please check local weather forecasts, local currents, tides and wind conditions
before use and only paddle in calm conditions.
• Regardless of the weather conditions, you must wear PFDs in good condition and
in line with local laws and regulations.
• Learn about the basic safety self-help methods: How to ip the kayak over? How
to get on the kayak again?
• Tell someone when you plan to return.
• Ensure all passengers understand the basic operations of the inatable kayak.
• Make sure at least one passenger can operate the inflatable kayak in an
emergency.
• Wear suitable clothing (helmets, shoes, sunscreen). Take enough water and food
and towing cables along with all items required by law.
Preparation before departure
Maintenance
1. After use, please clean your inflatable kayak to prevent it from being
damaged by sand, salt water or sunlight.
2. Clean the inatable kayak with a soft detergent and water.
3. Do not use solvents such as gasoline as they can corrode the surface
materials or plastic parts of the kayak.
4. Make sure that the hull is completely cleaned and dry before storing
otherwise it may develop mold.
5. Once deated, fold the kayak, place in the backpack and store in a dry,
ventilated place above 15°C.
Repair
Small holes or punctures can be repaired with the repair kit that is provided
in conjunction with the kayak.
1. Do not inate the kayak
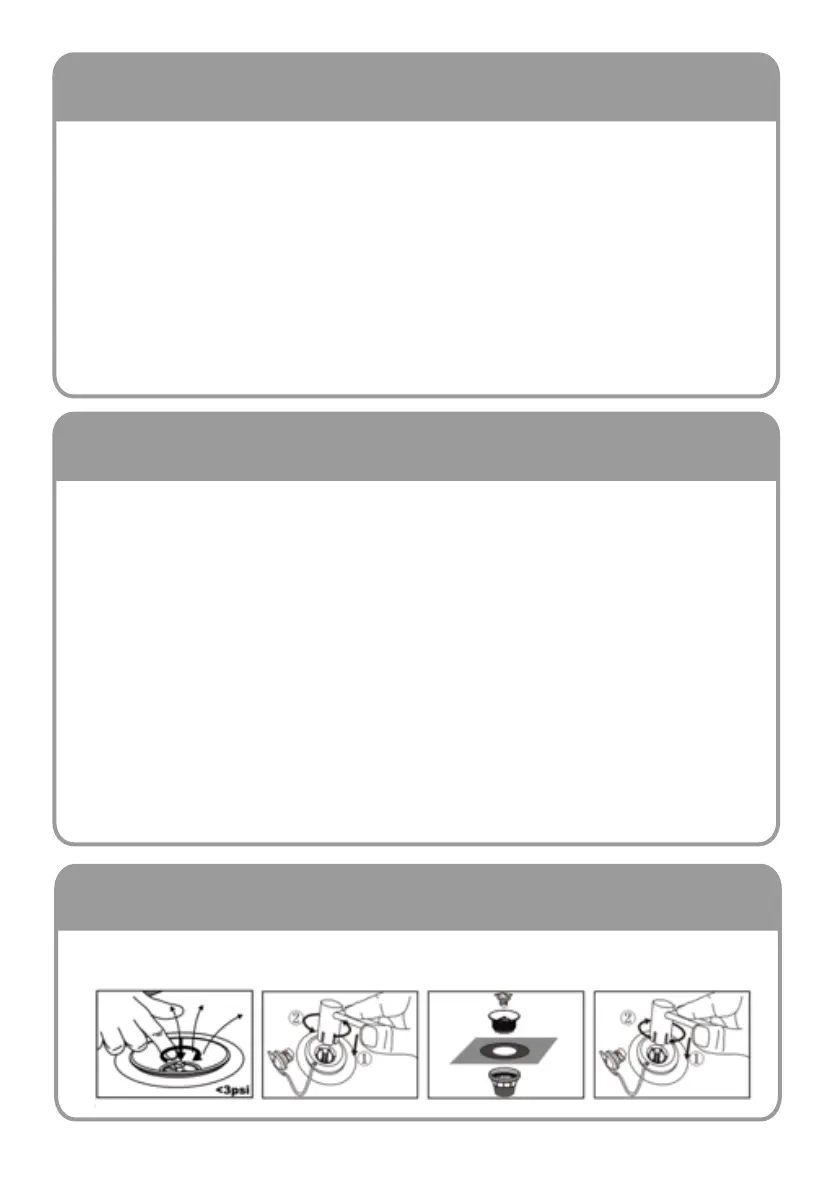
2. Wipe the hull with soap and water to nd holes in the kayak. The soap will
bubble over the hole.
3. Clean the area around the hole with water or alcohol.
4. Use a pencil to sketch out the outline of the patch.
5. Cut a patch of a suitable size.
6. Apply glue evenly to the damaged area and patch and then press and
hold the patch to the damaged area.
7. Leave the kayak for at least 24 hours or more before inating it.
If the valve is damaged, please follow the below instructions for replacing it.
Valve Replacement
Hull installation:
1. Inate the seat, until you feel the seat is 100% inated. Be careful not to make the seat
overinated.
2. Install the seat.
3. Install the n.
4. Install the paddle.
3.Inate the air chambers
①
,
②
and
③
to 100% (8 PSI) respectively in turn
.
11