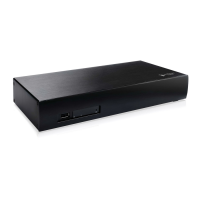
A-300 Hard Disk Installation Guide
25.5 cm (H)
38 cm (W)
Hard Drive Installation Guide For Popcorn Hour A-300
Step 1
What you need:
1) Phillips head screw driver.
2) 3.5” HDD or 2.5” HDD.
3) Popcorn Hour A-300.
Step 5
Slide the hard drive carriage bay to the right.
Step 2
Tur n over the A- 3 0 0 and place t h e bottom
on top of your d e sk. Lo c ate t h e 5 screws
to unsc rew wi t h your Phil l ips he a d screw
dr iver.
Step 6
Sli d e yo u r 3.5” hard dr ive to the bay,
en s ure t h at the top side i s plac ed on
the open area of the bay. For 2.5”
hard drive, skip to Step 10
Step 3
Place the screws aside and make sure it
is very easy to locate them later.
Step 7
Locate the 4 screw holes where you need to
secure the hard drive.
Step 4
Tilt the bottom panel with your right hand
and slide it to the left to expose the hard
drive carriage bay which is underside of
the panel.
Step 8
Sli d e bac k the hard dr i ve c ar r i a g e bay to the
bo t tom pa n e l and make sure it is secur e, to
avoid any vibration sound from the hard drive.
Step 9
Pl ac e the bottom panel b ac k to the
A-300 case and slide the panel towards
the SATA connector, you should feel a
nu d g e ind i c a t ing t h a t it is n ow in s e r te d.
Replace all 5 screws to secure the panel.
Note: 1) Disconnect all cables from the A-300 before proceeding.
2) The hard disk drive (HDD) is not provided.
Step 10
Sli d e yo u r 2.5” hard dr ive to the bay, ensure
that the top side is placed on the open area
of the bay.
Step 13
Comp l ete t h e assemb l y and assure all
screws are tightened.
Step 11
Sli d e bac k the hard dr i ve c ar r i a g e bay to the
bo t tom pa n e l and make sure it is secur e, to
avoid any vibration sound from the hard drive.
Step 12
Place the bottom panel back to the A-300
case and slide t he pan e l tow ards t h e SATA
conne c t o r, you should feel a nu d g e indi c a t ing
tha t it is n ow in s e r te d. R eplace a l l 5 screws
to secure the panel.