9
ASSEMBLE PADDING AND ENCLOSURE PANELS TO FRAME AS FOLLOWS
17. Position base pads around base so that front pad (#24) extends over edges of long side pads (#25). Side pads (#25) will extend
over edges of rear pad (#26). Assemble front pad (#24) to front of base (#1) using 1/4" x 4" lg. hex head lag screw (#14). Next
attach side pads (#25) to base (#1) using #12 x 1" lg. phillips pan head S.M.S. (#15). Rear pad (#26) will be attached to base (#1)
using either #12 x 1" lg. phillips pan head S.M.S. (#15), or Velcro peel and stick, depending on base (#1) weight configuration.
18. Front mast pad (#27) is positioned on top of front base pad and attached with 1/4" x 4" lg. hex head lag screws (#14).
19. Place top base pads (#28-#29) in position. Also check fit of rear wrap around brace pads (#30). Note - Both top base pads and
rear brace pads need to be removed when lowering unit so damage does not occur.
20. Attach glass backboard padding (#23) per instructions with pads.
21. Touch up any scratches that may have occurred during shipping or assembly with white touch up paint.
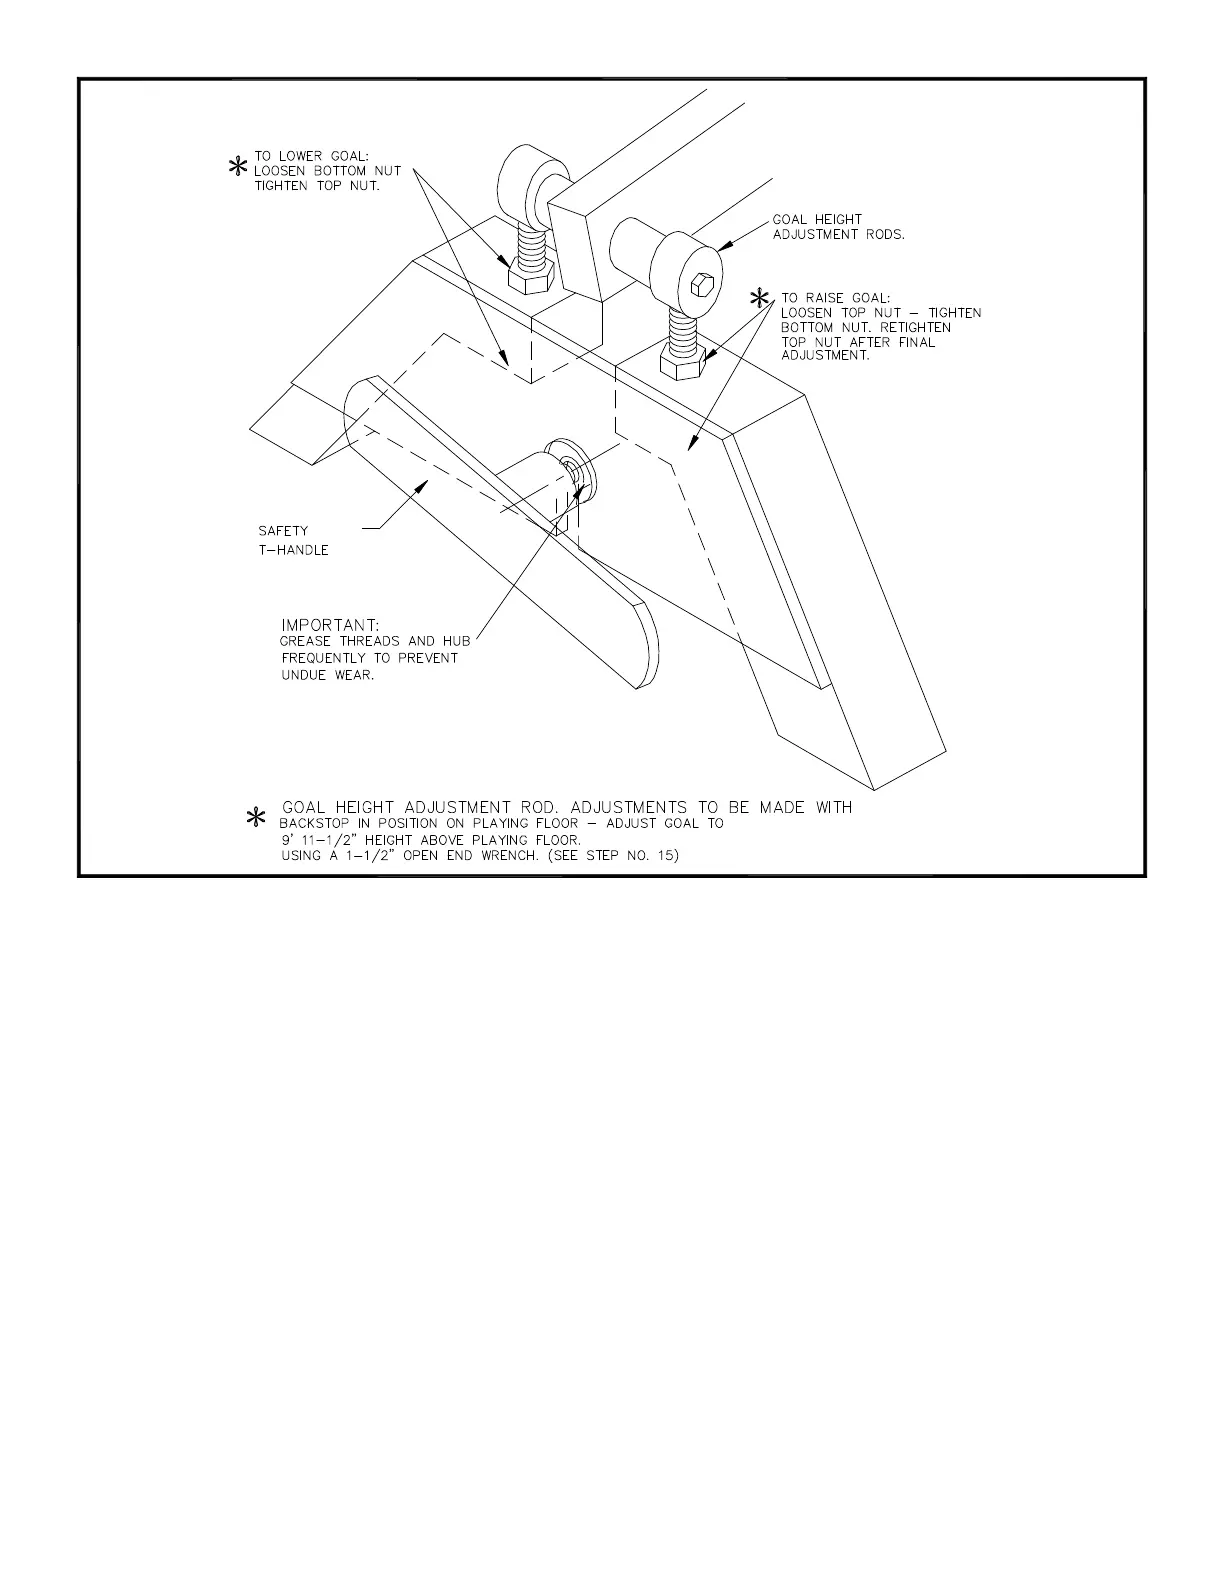
ILLUSTRATION "D"
 Loading...