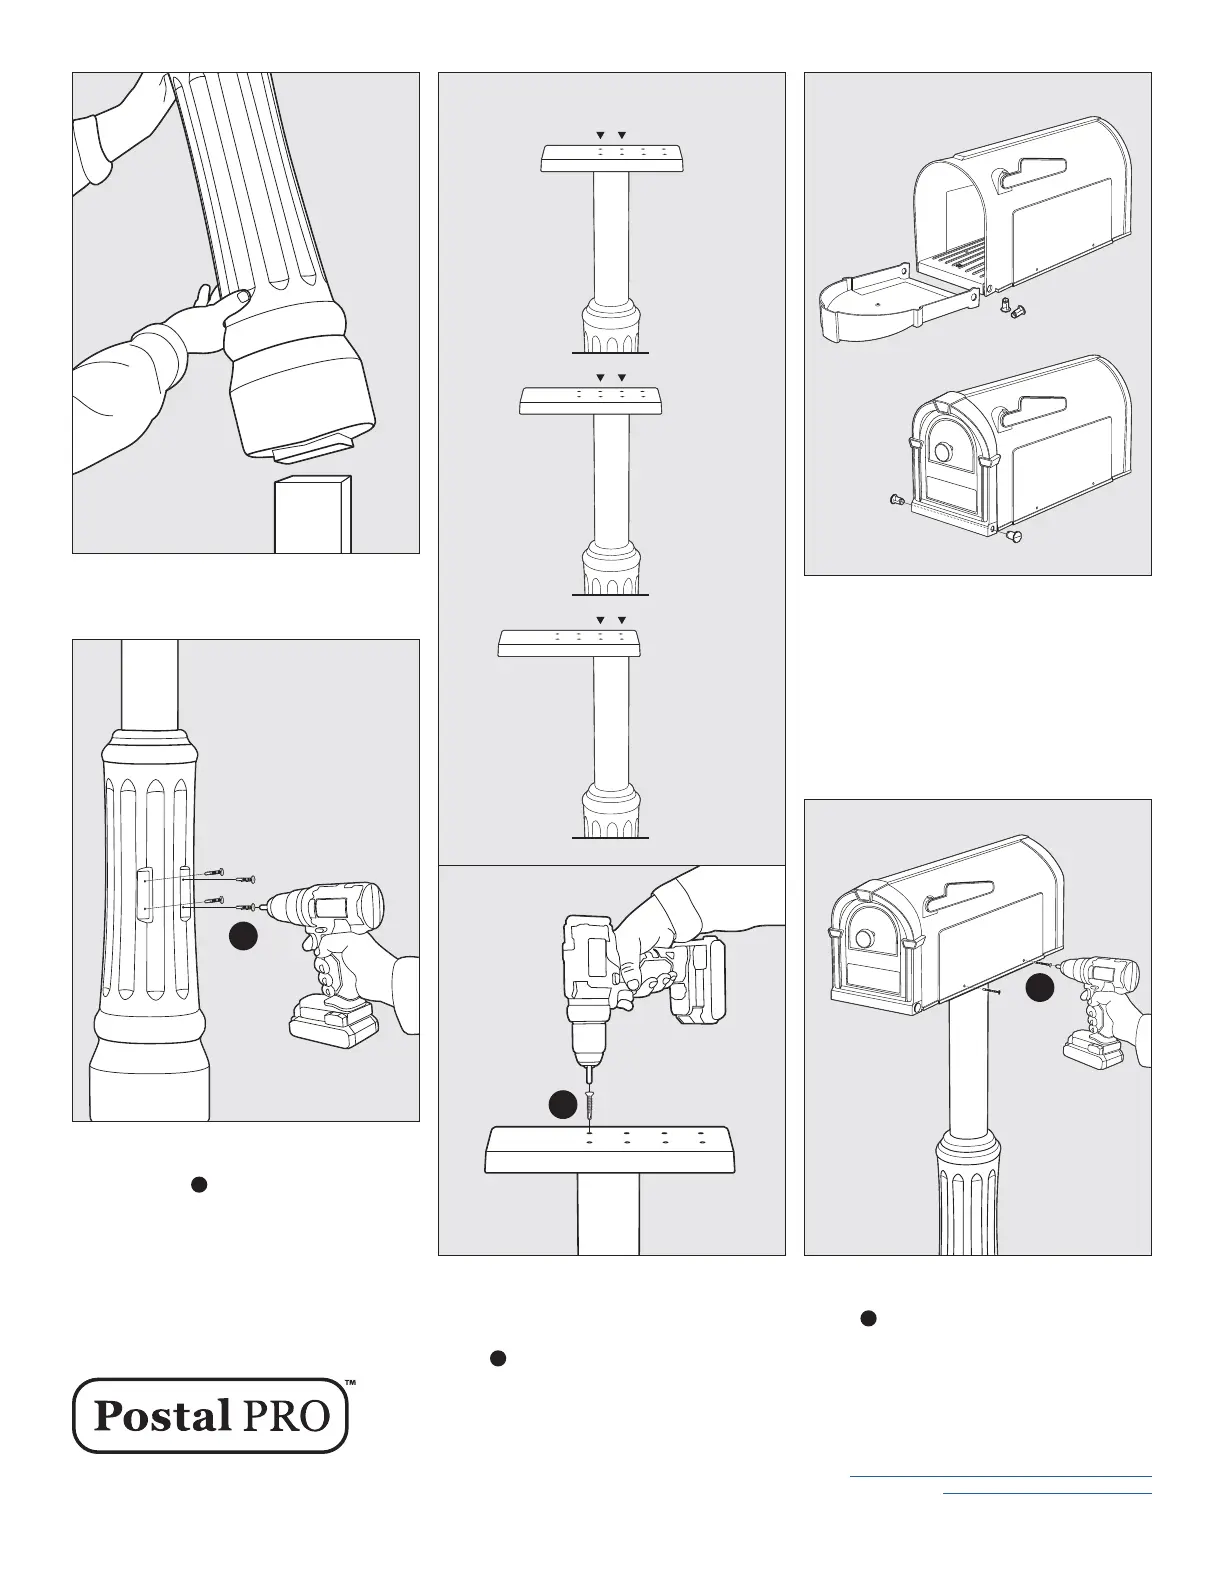
STEP 2 Slide Mailbox Post Sleeve over 4x4
treated pine post.
STEP 3 Secure the Mailbox Post Sleeve section
to the 4x4 treated pine post using the (4) #12 x 1"
Pan Head screws
A
included in the kit.
STEP 5 Assemble your mailbox by using (2) pins
to attach Mailbox Door to holes in Mailbox Body.
Pins can be snapped into place by pressing rmly
with thumb or tapped in using a rubber mallet.
TIP: Make sure the pins are fully snapped into
place. If they are installed correctly, you will not
be able to remove the pins with your ngers.
TIP: Holes in door will be positioned outside of
holes on mailbox body before insertion of pins.
STEP 4 Based on personal preference, mailbox
can be mounted in 3 optional positions shown
above. Attach Mounting Bracket to top of Mailbox
Post Sleeve using the (4) #6 x 1-1/4" Bugle Head
screws
B
secure the Mounting Bracket to the
Post Sleeve. Do not over tighten screws.
A
3 Optional Mounting Positions
B
Postal Pro is a Creative Solutions, LLC Product
Manufactured in Purvis, MS
Customer Service 877-544-5220
customerservice@creativesolutionscp.com
www.postalpromailboxes.com
05/22
STEP 6 Place Mailbox on to top of Mailbox Post
Bracket and secure with (4) 10 x 1-1/2" Pan Head
screws.
C
Screws will self tap into bracket.
C
3
2
1