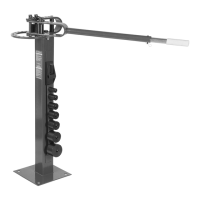
This document describes the 196cc Plate Compactor, a robust tool designed for compacting various granular materials.
Function Description:
The 196cc Plate Compactor is engineered to compact granular soils, crushed aggregates, asphalt, paving stones, bricks, and other materials. It operates by vibrating a base plate, which forces the surface material into a smaller physical space. This process is ideal for light-duty tasks such as compacting trenches, retaining walls, and other confined areas where less aggressive compaction is required. The compactor is equipped with a 3.7-gallon water tank and sprinkler bar system, which is particularly useful for asphalt applications and helps to control dust. For compacting delicate surfaces like concrete paving slabs, stones, and bricks without marring, a transparent rubber paving pad can be attached to the base plate. The unit also features a foldable handle for easy storage and a retractable wheel kit to facilitate movement around the job site.
Important Technical Specifications:
- Compacting Plate Dimensions (LxW): 20-7/8 x 14-5/8 inches
- Vibrations/Minute: 5,500 VPM (Vibrations Per Minute)
- Travel Speed: 82 ft/min
- Compaction Force: 2,473 lb
- Compaction Depth: 9-3/4 inches
- Compaction Area/Hour: 6,002 sq. ft
- Water Tank Volume: 3.7 gallons (14 litres)
- Operation Weight: 139 lb (63 kg)
- Engine: 196cc gasoline engine (specific details to be found in the separate engine instruction manual)
Usage Features:
The plate compactor is designed for forward travel only, requiring users to plan their compacting route accordingly, especially when working near structures.
- Starting and Operation: The compactor starts with the throttle lever in low gear, where the base plate does not vibrate. As the throttle lever is opened, the vibrator assembly engages, and the base plate begins to vibrate, propelling the tool forward. Increasing the throttle further increases the centrifugal force, leading to deeper compaction and faster movement.
- Paving Pad Kit: A transparent rubber paving pad can be easily attached to the base plate using lock washers and M10 x 30 bolts. This pad protects delicate surfaces from chipping or grinding during compaction.
- Water Tank: The water tank is pressed into an opening at the front of the machine and secured between the upright struts before filling with water. This system is crucial for wet compaction, particularly on asphalt, to prevent material from sticking.
- Surface Preparation:
- Dry Surface: Water should be sprinkled over the soil and allowed to soak in to reduce dust during compaction, extending the engine's air filter life. For gravel, only enough water to keep dust down is needed.
- Wet Surface: Excessively wet soil should be dried or allowed to dry, as it can stick to the base plate, increase the tool's weight, stress the engine, and hinder proper compaction.
- Asphalt: Wetting the asphalt surface and the base plate prevents sticking.
- Stones/Broken Concrete: Large stones or chunks of concrete should be removed as the compactor cannot break them apart, and smaller objects compact more effectively.
- Obstacles: The work area must be cleared of natural (stumps, buried stones) and man-made (construction waste, power cords, hoses) obstacles before operation.
- Compacting High Clay Content Soil: For soils with high clay content, a dry intermediary material can be used to prevent sticking. The operator should reduce speed, maintaining vibration without the base plate leaving the surface, and apply gentle pressure to compensate for lost natural momentum. More passes (double the usual) are required for effective compaction.
- Compacting on an Incline: The maximum incline angle is 20°. Operating on steeper inclines can cause the tool to topple and may damage the engine's lubrication system. The recommended method is to start at the top and move down. The speed should be adjusted for comfort. When repositioning, the throttle should be moved to idle to stop vibration, and the compactor pulled back up the incline. The optional wheel assembly makes pulling the compactor uphill easier. Side-to-side compaction is possible on shallow inclines, with the operator applying light pressure to maintain forward momentum.
- Safety: Always maintain a firm grip on the tool when under power, as it moves independently. Never stand below the compactor on an incline. Stop immediately if control is difficult on an incline.
Maintenance Features:
Regular maintenance is crucial for the compactor's efficiency, control, and longevity.
- General Maintenance:
- Inspect components periodically for damage or wear, using only identical replacement parts.
- Follow instructions for lubrication and accessory changes.
- Keep handles clean, dry, and free from oil/grease.
- Maintain legible labels and nameplates; contact Princess Auto Ltd. for replacements if needed.
- Have the compactor inspected at least once a year.
- Consult the engine instruction manual for engine care.
- Only qualified service personnel should repair the tool.
- Preventative Maintenance (Daily/Regular):
- Turn off the engine and allow it to cool.
- Set the throttle lever to SLOW and remove the spark plug wire.
- Inspect the compactor for loose screws, misalignment, binding, cracked/broken parts, or other conditions affecting safe operation.
- Remove debris with a soft brush, vacuum, or compressed air, then lubricate all moving parts with premium quality lightweight machine oil.
- Clean the bottom of the compactor base as soon as it starts picking up soil to ensure smooth and effective operation.
- Return the spark plug wire.
- WARNING: Never use a pressure washer to clean the compactor, as water can damage internal components like spindles, pulleys, bearings, and the engine, shortening its lifespan.
- V-Belt Maintenance:
- Checking: Inspect V-belts for cracks, fraying, or glazing. Check tension by squeezing them in the center; normal deflection is 9-13 mm (3/8-1/2 in.) with moderate thumb pressure.
- Tensioning: Proper tension is critical for performance and belt life. Loosen engine mount bolts and jam nuts. Push the engine towards the back of the plate and turn adjustment bolts to remove slack. Ensure the clutch pulley is aligned with the vibrator pulley. Tighten jam nuts and engine mount bolts once tension is correct. Replace belts when adjustment bolts can no longer tension them.
- Replacement: Replace both V-belts one at a time. Loosen engine mount bolts and jam nuts. Slide the engine forward, remove old belts, install new ones, position them over the engine pulley, move the engine back, and tighten bolts and nuts once tension is correct.
- Schedule: Check belt tension after the first 20 hours of operation (for new machines or after belt replacement), then every 50 hours thereafter.
- Vibrator System Lubrication:
- The vibrator housing contains extreme pressure oil to lubricate the rotary shaft. Use automatic transmission fluid.
- Replacing Oil (Every 200 hours/2 months): Run the tool briefly to mix and warm the oil. Remove the belt guard and V-belts. Remove bolts holding the deck to the housing. Lift the entire deck with the engine from the housing. Place a receptacle below the opening. Remove the plug on top of the vibrator housing and tilt the housing upside down to drain waste oil. Examine oil for metal chips. Return the housing to an upright position. Fill with 80 ml of gear oil API GL-4 80W/90 or 75W/90. Apply pipe sealant to the plug and reinstall. Reattach the engine to the frame.
- Engine Oil: Change engine oil after the first 20 operating hours, then every 50 hours/week.
- Air Filter: Inspect and replace if needed daily. Clean the air cleaner element every 50 hours/week.
- Fuel System: Check fuel level and lines daily. Clean the fuel strainer every 100 hours/month.
- Spark Plug: Check and clean every 50 hours/week.
- Valve Clearance: Check and adjust every 300 hours/year.
- Cylinder Head: Clean every 300 hours/year.
- Lubrication Oil: Change every 300 hours/year.
Storage:
- Short-Term: Apply a thin coat of lubricant to steel parts to prevent rust; remove before next use.
- Long-Term (over 30 days):
- Remove foreign objects (stones, dirt) from the compactor and engine.
- Consult the engine manual for storage procedures.
- Wipe down the compactor with clean cloths, ensuring air vents are clear.
- Carefully fold the upper handle down, avoiding pinched or bent control cables.
- Store upright in a clean, dry area, covered with a dry cloth.
Transporting:
- Safety: Transport with an empty fuel tank or with the fuel shut-off valve in the OFF position. Allow the engine to cool to prevent burns or fire hazards. Do not attempt to load alone due to the tool's weight; use a crane or assistance to prevent back injury.
- Procedure: Lift the unit by the handles on the front and back of the frame, avoiding holding by the main handle to prevent impact injury. Secure the tool upright to prevent movement or toppling.
- Fuel: Remove fuel from the engine's fuel tank if possible before transportation.
- Spark Plug: Do not transport with the spark plug facing down, as this can lead to hard starting or engine smoking.