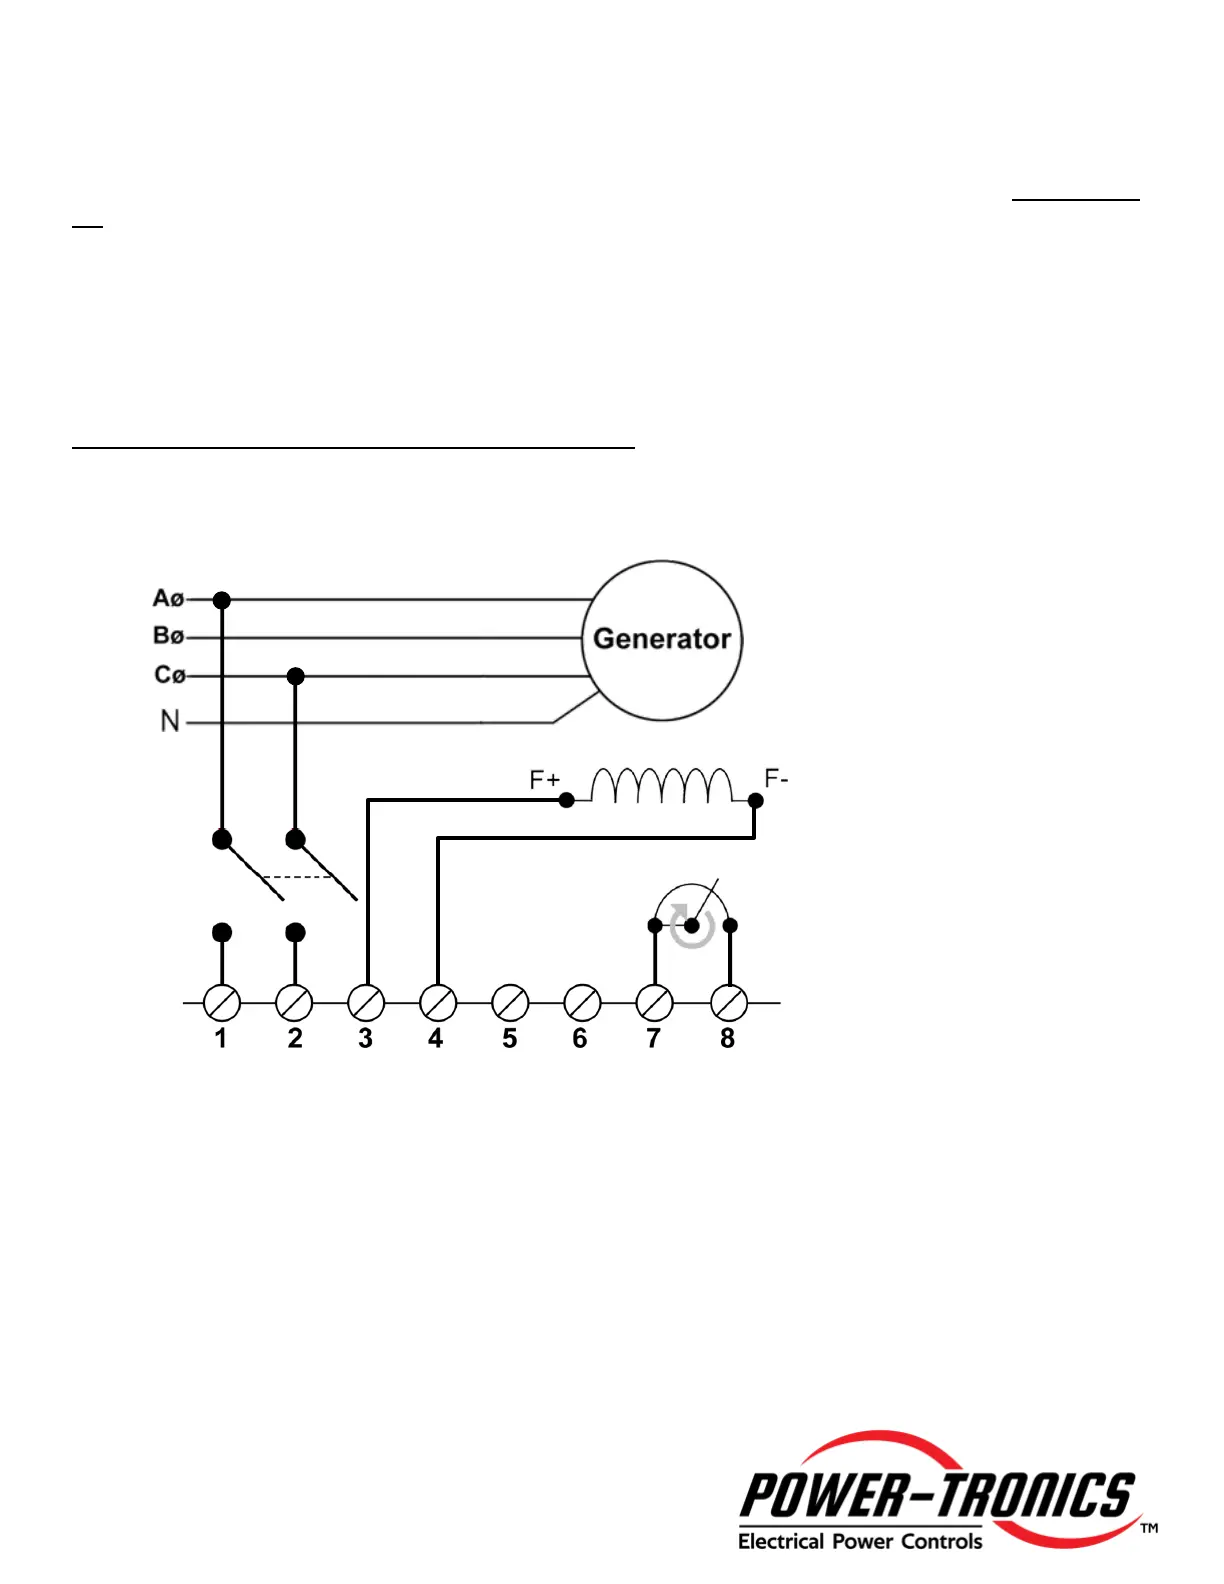
Connection A
(See page 9 if the generator will be paralleled using this connection)
Connection A is a Full-Wave rectified configuration, which allows a continuous output of 125VDC @
8A with an input voltage of 240VAC.
This connection is typically used on higher voltage excitation fields (generally referred to as 125V
fields) or on shunt control fields where the full-load excitation voltage is greater than 63VDC.
Note that the maximum input voltage to the XR8 Universal Voltage regulator is 240VAC!
DO NOT input 277VAC into the XR8! Severe damage to the unit will result! For use on 480V
systems, either connect the regulator to the winding center taps T7 and T9 (See Page 6) or use a
480-240V step-down transformer rated at 1.5KVA.
Connecting the input of the XR8 to 2 different legs of the generator as shown in the diagram below
will result in greater regulation accuracy than when connecting line-neutral.
with the incoming power to terminals #1 and #2 on the XR8.
NEVER install a switch or breaker on the DC or Exciter side of the voltage regulator!