Troubleshooting • Solución de problemas • Guide de dépannage Î service. sher-price.com
13
1100757335
ASSEMBLY MONTAJE ASSEMBLAGE
x1
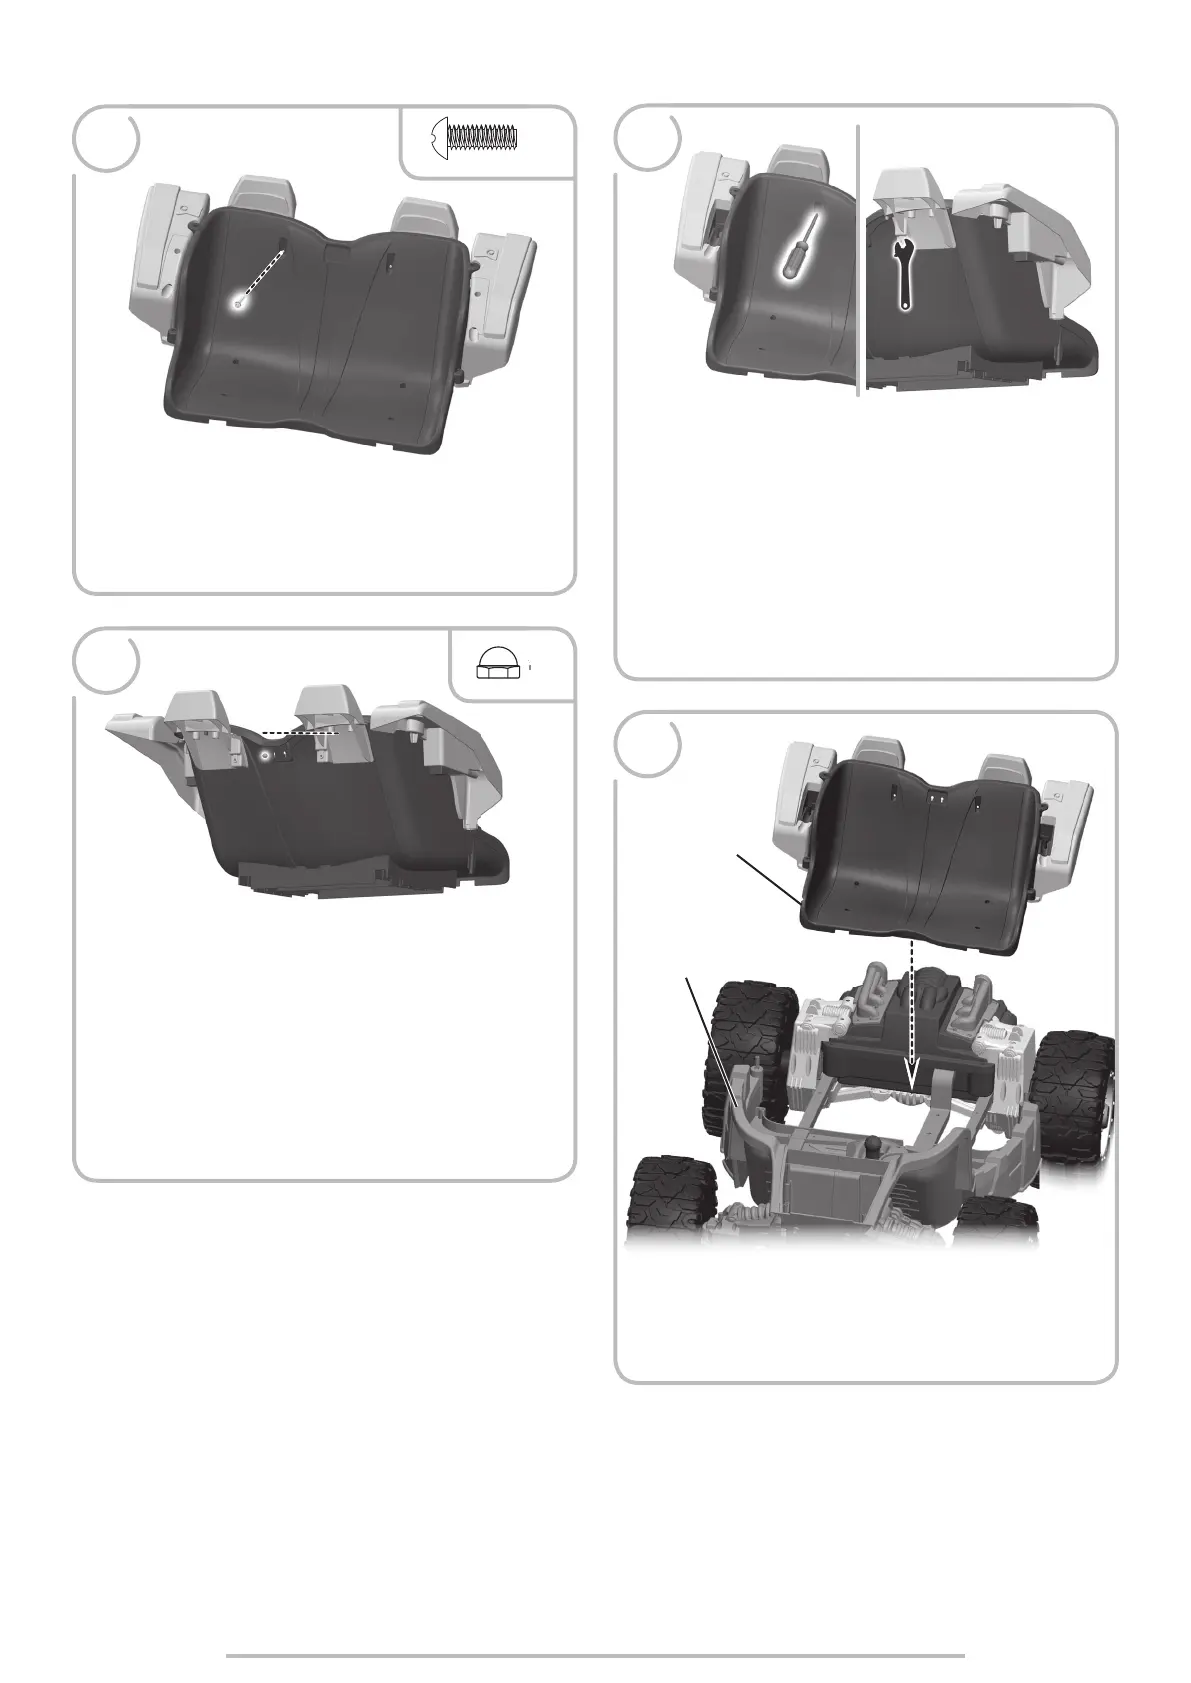
19
• Insert a #8-32 x ½" (1,3 cm) screw into a hole in the front of the
seat back.
• Insertar un tornillo № 8-32 x 1,3 cm en un orificio en el frente del respaldo.
• Insérer une vis nº 8-32 de 1,3 cm dans le trou situé à l’avant du dossier.
• From behind the seat back, fit a #8-32 acorn nut onto the end of
the screw.
• Desde la parte de atrás del asiento, ajustar una tuerca de retención
№ 8-32 en el extremo del tornillo.
• De l’arrière du dossier, insérer un écrou-capuchon nº 8-32 au bout de
la vis.
• While holding the acorn nut in place with the adjustable wrench, tighten
the screw with a Phillips screwdriver.
• Repeat assembly steps 19-21 to assemble the remaining #8 x ½" (1,3 cm)
screw and #8-32 acorn nut to the seat back.
• Mientras sujeta la tuerca de retención en su lugar con la llave inglesa,
apretar el tornillo con un desatornillador de cruz.
• Repetir los pasos de montaje 19-21 para ensamblar en el respaldo el
tornillo № 8 x 1,3 cm y tuerca de retención № 8-32 restantes.
• Tout en maintenant l’écrou-capuchon en place avec la clé à molette,
serrer la vis avec un tournevis cruciforme.
• Répéter les étapes 19 à 21 pour assembler l’autre vis nº 8 de 1,3 cm et
l’autre écrou-capuchon nº 8-32 au dossier.
BACK VIEW
VISTA DE ATRÁS
VUE ARRIÈRE
x1
20
21
• Fit the seat onto the vehicle frame.
• Ajustar el asiento en el armazón del vehículo.
• Mettre la banquette sur la carrosserie.
Vehicle Frame
Armazón del vehículo
Carrosserie
Seat
Asiento
Banquette
22