5
5000 Hours - Valve Inspection /
Replacement
Per OSHA regulations, ALL
power must be locked out
before performing any maintenance.
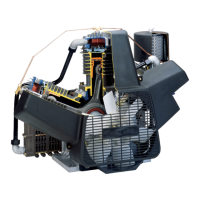
INSPECT VALVE SET
1. Remove head bolts from cylinder head.
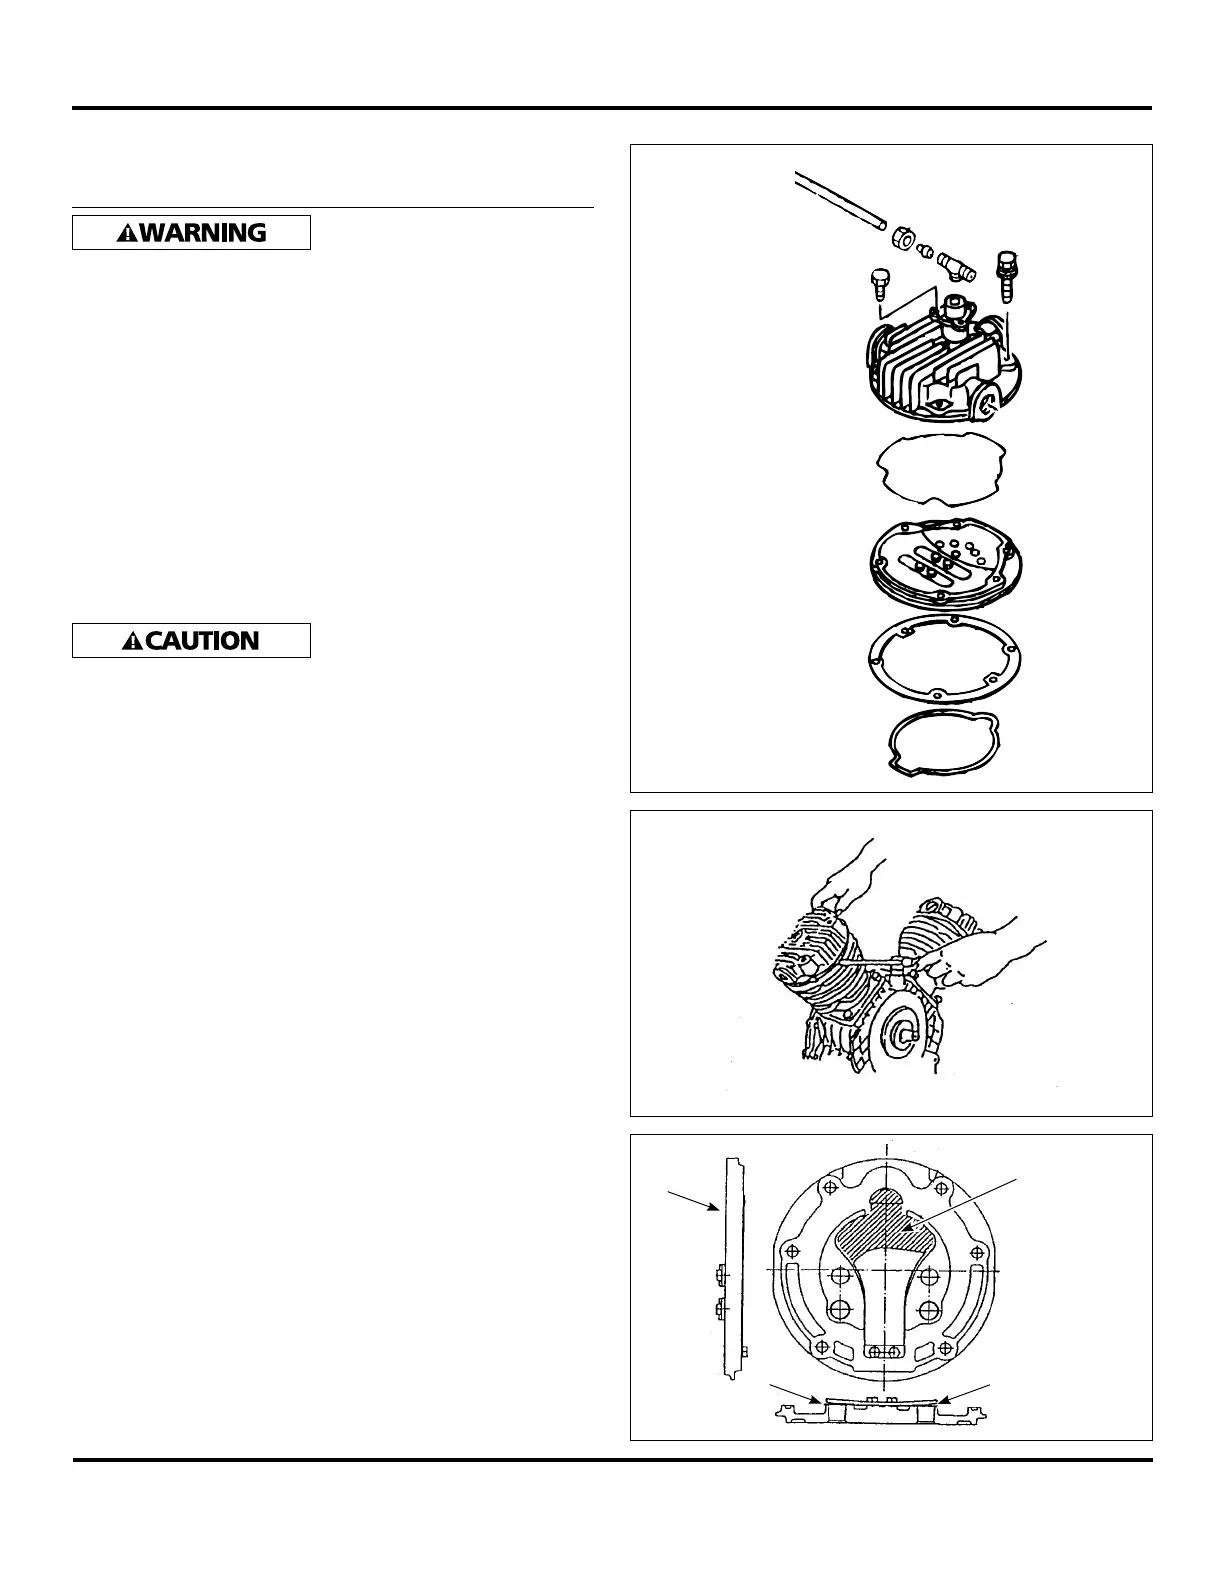
2. Remove cylinder head and valve set. If it is difficult to
remove by hand, insert screwdriver between cylinder and
valve set and remove (See Figure 6 and 7).
INSPECTION AND MAINTENANCE
1. Check if exhaust valve (A) sticks to seat or is damaged
(See Figure 8).
2. Check if there is breakage, gouge or damage to
appearance of intake valve (B).
3. Lift intake valve 10 mm (3/8 inch) and check if there is
peeling and/or wear on coating surface of valve set (C).
Lifting intake valve too much
can cause damage to intake
valve.
4. Replace intake valve set if valve plate or valves are worn
or wear is over 0.5 mm (0.020 inches) in depth.
If exhaust valve rises upwards, clean seat surface of
foreign matter.
5. Clean the whole valve set taking care not to damage seat
surface and remove dust.
6. If viton seals (upper and lower) reach inspection time,
replace them. Even if its not time to inspect, be sure to
replace if they do not protrude from groove or seal has
hardened or been damaged.
7. Be sure to replace plastic seat in cylinder (See Figure 10).
8. Install valve set while paying attention to black plastic
seat of intake valve installed in cylinder (so that you do
not drop seat or insert tip of valve under seat).
9. Install cylinder head and tighten head bolts with
designated torque.
NOTES:
• Whenusingvalvesetagain,replaceupperandlower
viton seals.
• Whenreplacingvalveset,replacewithupperandlower
viton seals (valve set with packing set). You cannot reuse
disassembled valve set.
We are not responsible for any problems caused by reuse of
disassembled valve set.
REASSEMBLY
Assemble in reverse order of disassembling. Tighten each
section with designated tightening torque (See Chart on
page 6).
Oilless Reciprocating Air Compressor Pumps
Figure 6
Figure 7
Figure 8
Check for
peeling or
wear (C)
(A)
(A)
(B)
 Loading...