6
Cylinder Inspection / Replacement
Per OSHA regulations, ALL
power must be locked out
before performing any maintenance.
INSPECTION / REPLACEMENT
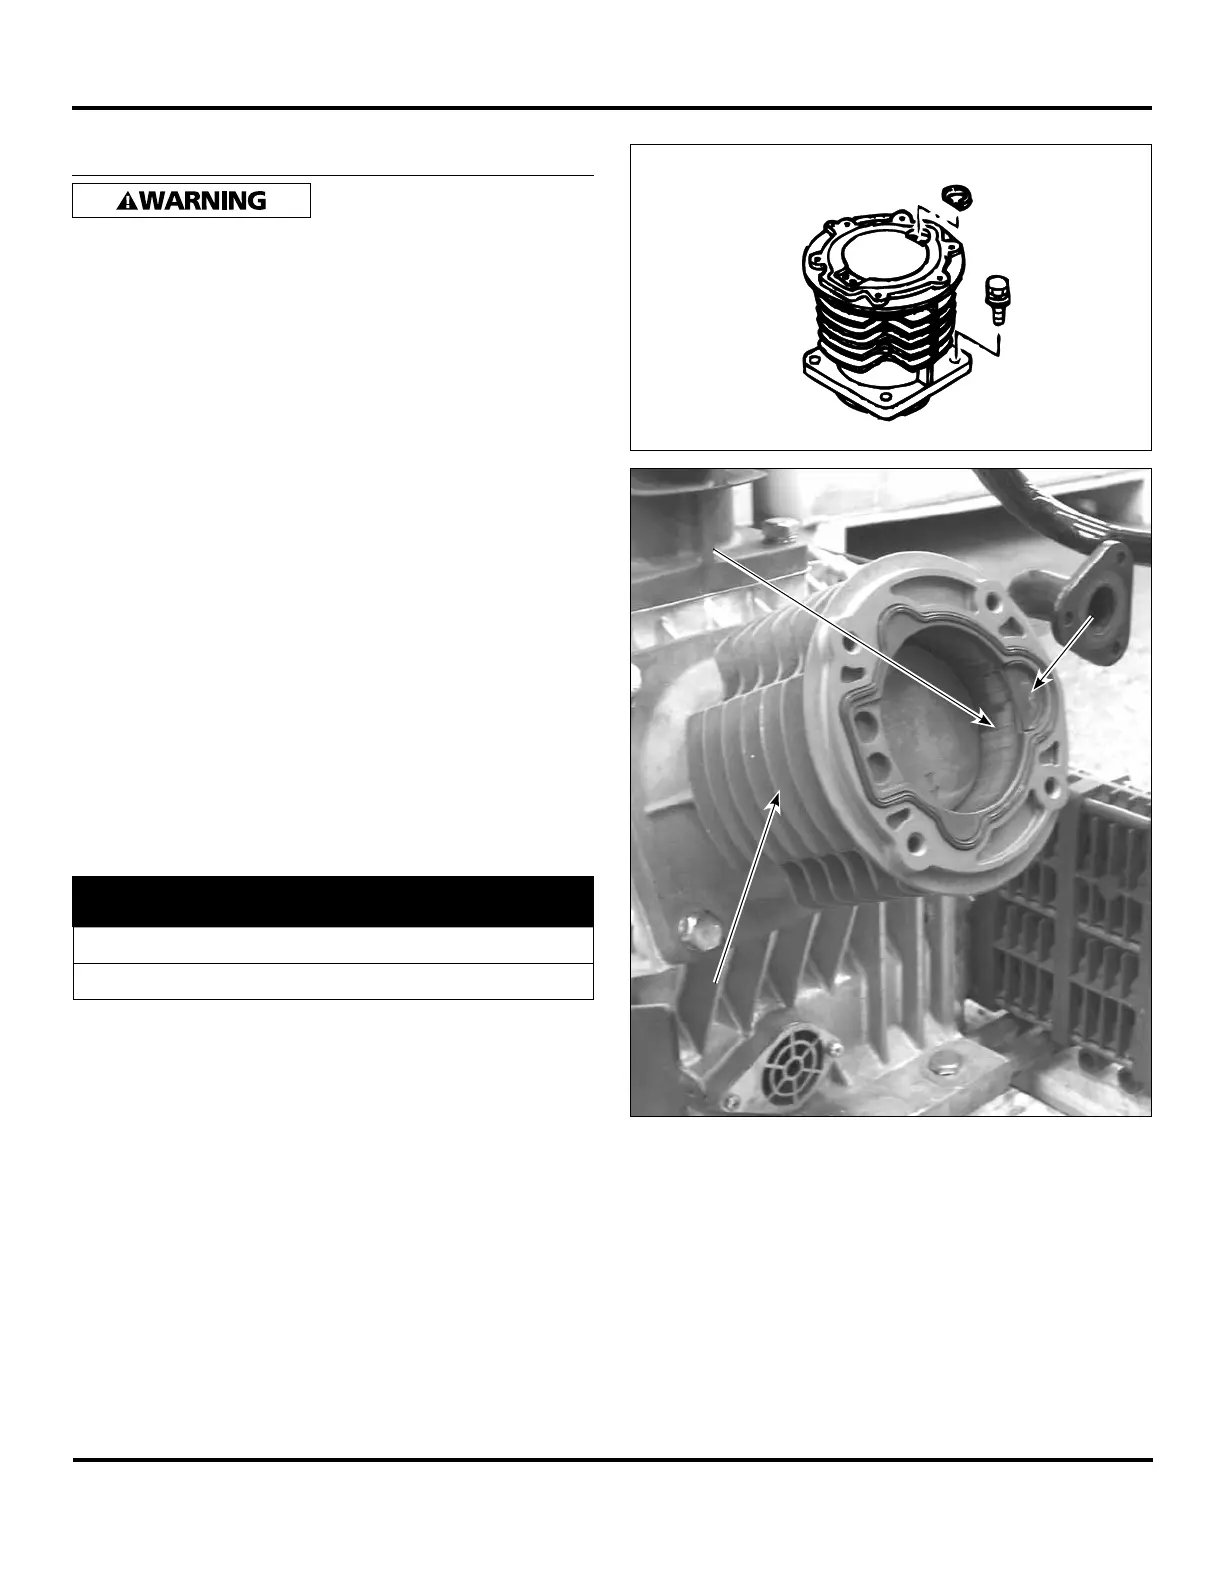
1. Remove cylinder head and valve set. Pay attention not
to lose semicircular (black plastic) seat inserted at top
surface of cylinder (see Figure 9).
2. Remove cylinder bolts and pull off cylinder slowly. Make
sure piston does not drop down and get damaged. Note
cylinder orientation.
3. Inspect cylinder surface. If treated area is worn and metal
is exposed, replace. If there are several vertical scratches
at a narrow distance, replace (see Figure 10).
NOTE: Blackish streaks you can feel with your nail or finger
are not damage but sliding marks of piston and piston ring.
You do not need to replace the piston set or cylinder even
if there are several marks on the whole diameter of the
cylinder.
REASSEMBLY
1. Assemble in reverse order of disassembling cylinder.
2. Direction of cylinder is set so that semicircular spot
facing, to which seat (black plastic) is inserted, faces
toward flywheel side.
3. Tighten cylinder bolts with designated torque (refer to
chart below).
Model
Cylinder Bolt
Torque
Head Bolt
Torque
OPS010 / OPS030 156 in. lb. 156 in. lb.
OPT050 / OPT100 / OPT150 295 in. lb. 156 in. lb.
Oilless Reciprocating Air Compressor Pumps
Figure 9
Figure 10
Seat
Replace if it
is scratched
Cylinder
 Loading...