A
d
j
u
s
t
the
i
m
age
1
If you
don’t
see an image, press the Source Search
button
on
the
projector
or the remote control to select the image source.
Note: If you still see a blank screen or have other display problems, see
the
troubleshooting
tips on the back of this sheet.
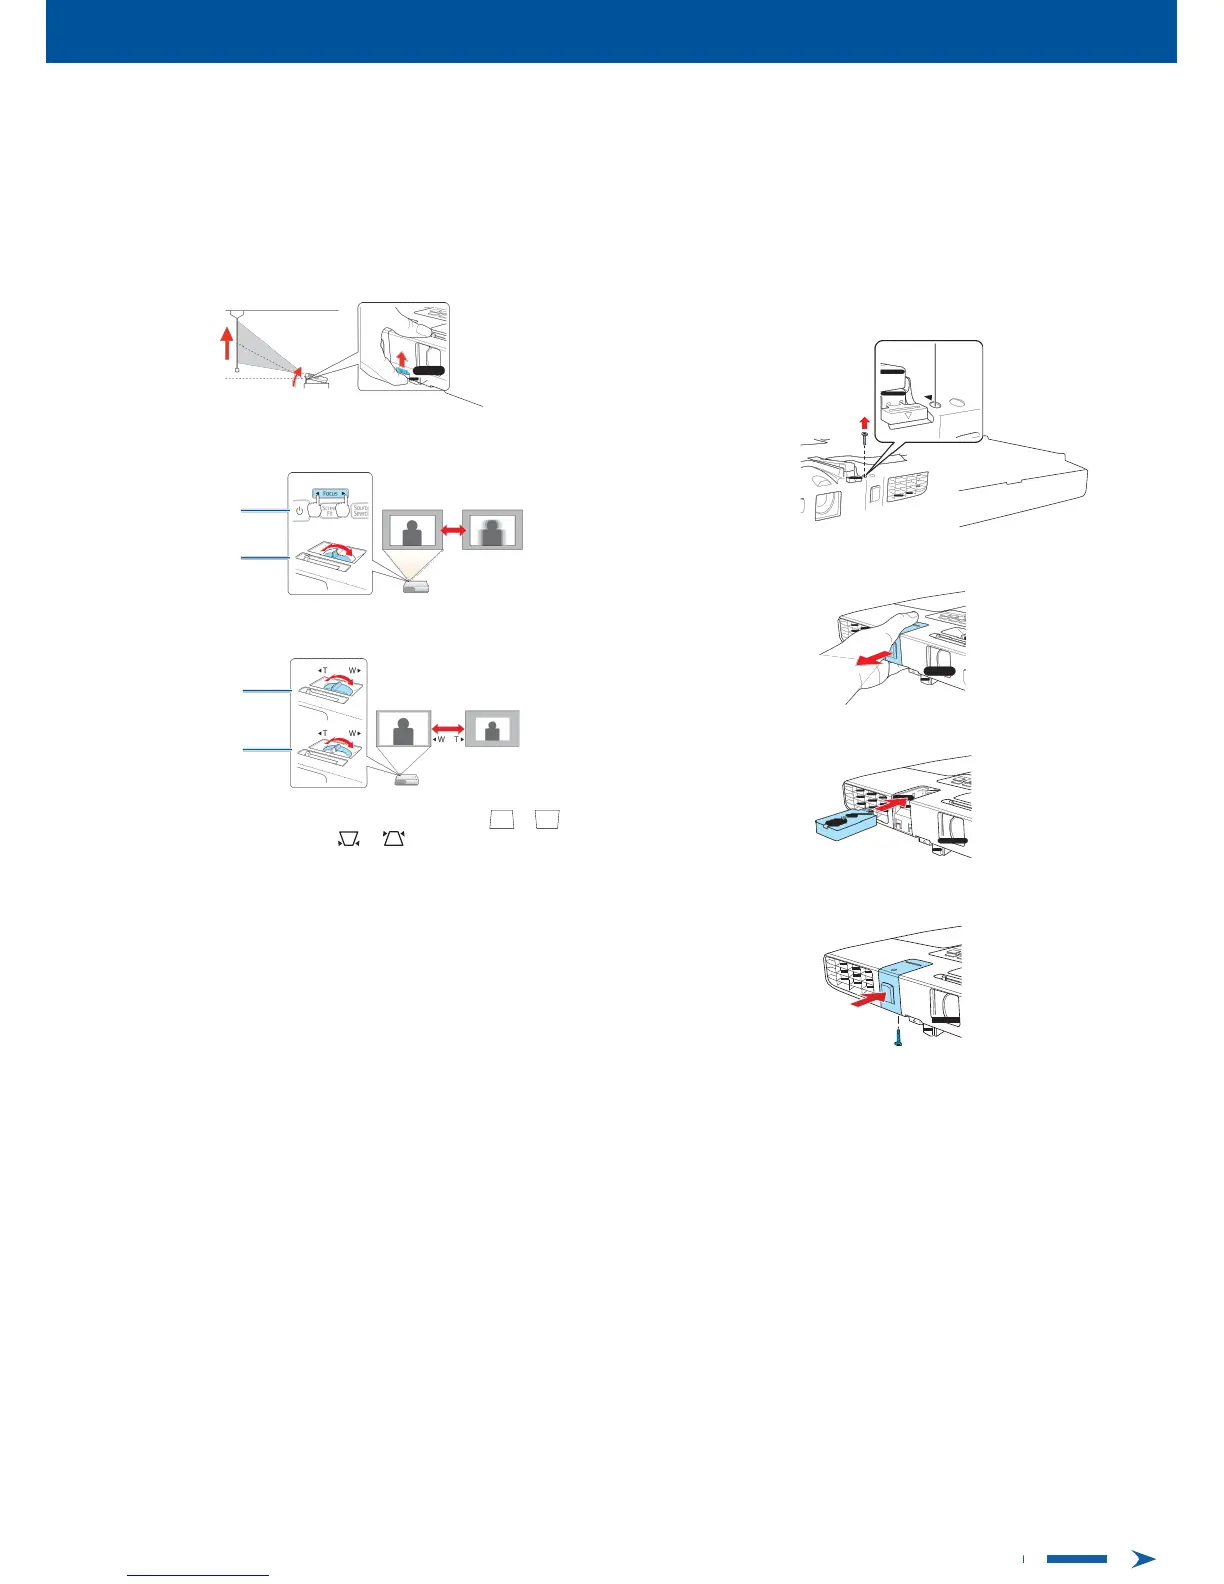
2
To raise the image, press the foot release
button
and
lift
the
front
of
the
projector.
Release
the
button
to lock the foot in
position.
P
r
o
j
e
c
t
w
i
r
e
l
e
ss
l
y
Follow the steps here to connect the
projector
wirelessly over an 802.11n,
802.11g, or 802.11b wireless
network.
Your computer must have a wireless
card or
built-in
wireless interface, and be
running
Windows 7, Windows V
ista
®
,
Windows XP Professional x64, Windows
XP,
or Windows 2000,
or
Mac
OS
X 10.4 to 10.7.
1
Turn
off
the
projector
and unplug the power
cord.
2
To install the wireless LAN module, turn the
projector
over and
remove
the screw securing the wireless LAN module cover.
3
PowerLite
1776W:
Press
the Focus buttons to sharpen the
image.
PowerLite 1761W/1771W:
Rotate the focus ring to sharpen the
image.
PowerLite
1776W
PowerLite
1761W/1771W
3
Remove the wireless LAN module cover.
4
Turn the zoom ring to reduce or enlarge the
image.
PowerLite
1776W
PowerLite
1761W/1771W
4
Insert the wireless LAN module into the
port.
5
Your
projector automatically
adjusts images that look like or ,
but if
necessary
you can press the or buttons on the
projector
to
correct
it.
5
Replace the cover and secure
it
using thecrew.
6
Plug in and turn on the
projector
.
7
To
configure
your
projector
for
your wireless
network,
do one of
the
following:
•
If you’re using the
optional
Quick
Wireless Connection
USB
key
,
insert
it
into the
projector’
s
USB
TypeA port,
wait for the
displayed
message,
remove the key, and connect
it
to a
USB
port on
your
computer. Follow the
on-screen instructions to install the
driver,
then
run your
presentation.
For
details, see the online User’
s
Guide
.
•
If you’re not using the key, continue
with the
following
steps.
 Loading...