29
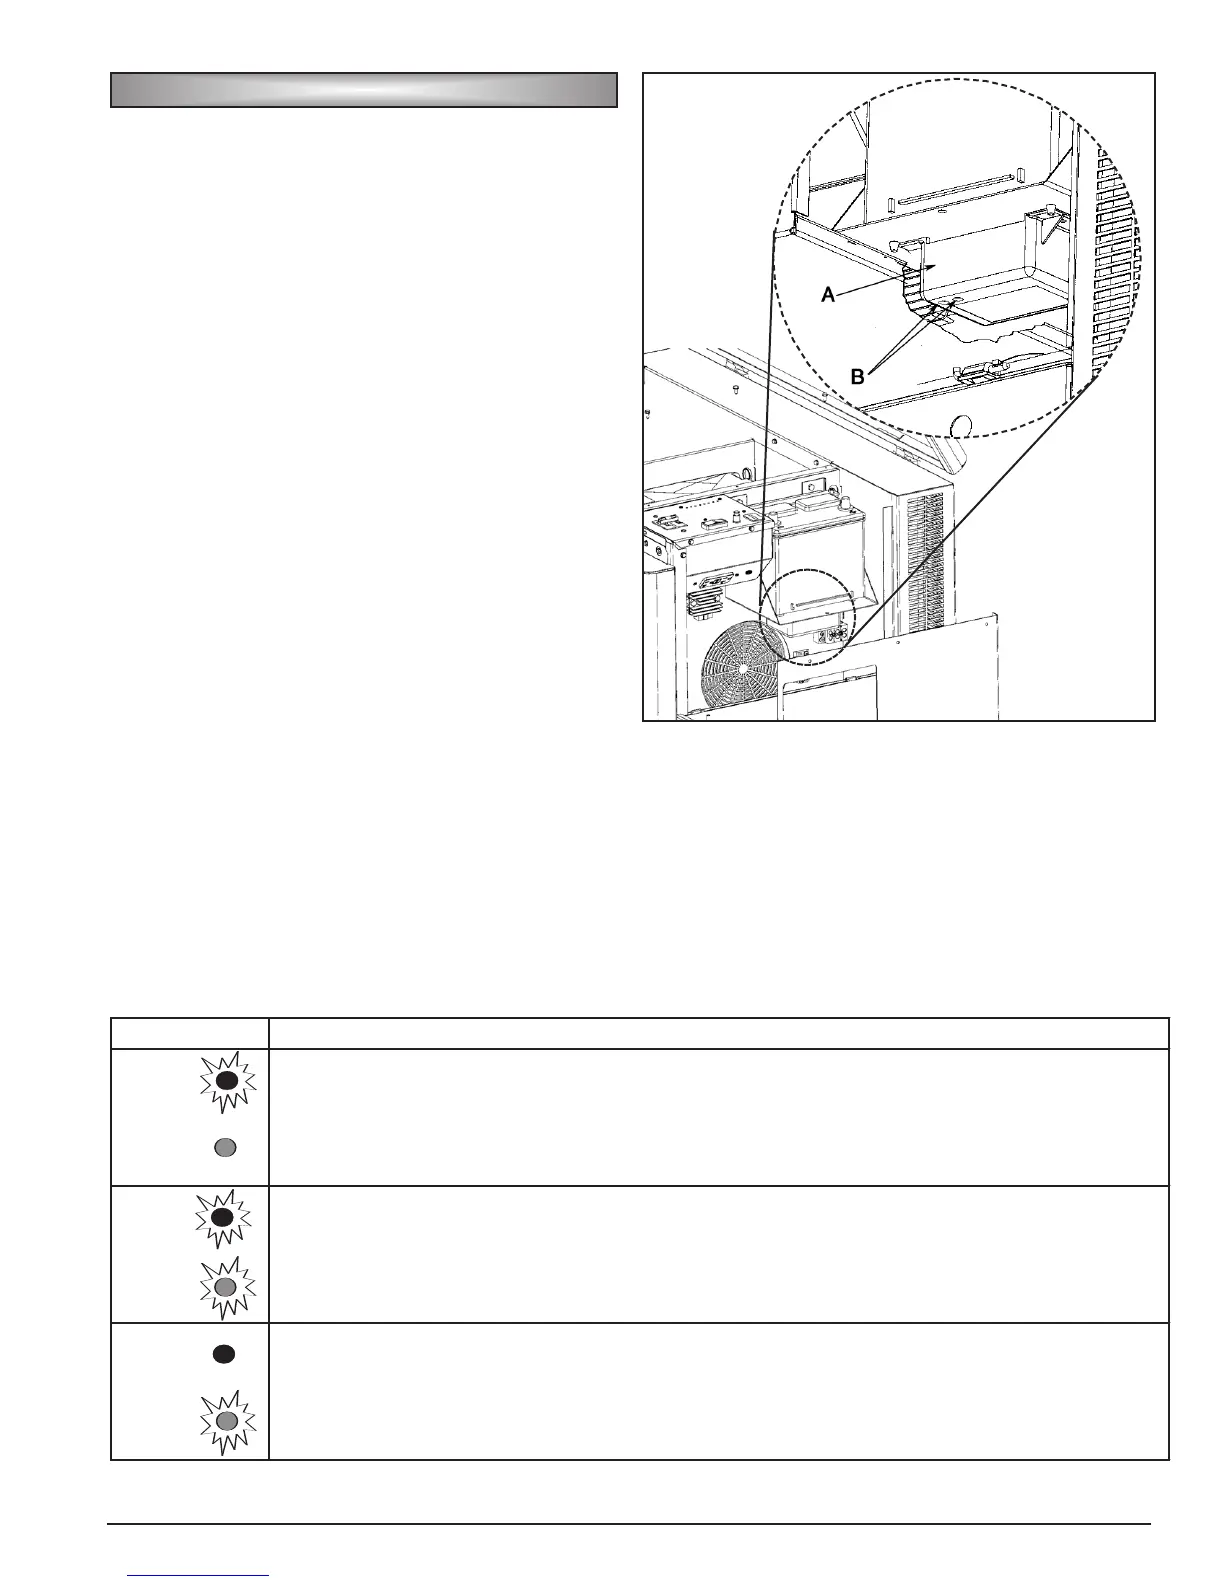
5. Insure the the battery charger is powered and
functioning properly. A correctly operating battery
charger displays lights on the face of the charger to
relay the state of the charger. To locate the battery
charger (A) and check the lights (B) (see note below)
refer to Fig F. Refer to Table A to assess the mode
the charger is operating in.
Note: For easy viewing of the battery charger
lights, use a small handheld mirror held
under the charger.
BB
BB
AA
AA
TT
TT
TT
TT
EE
EE
RR
RR
YY
YY
MM
MM
AA
AA
II
II
NN
NN
TT
TT
EE
EE
NN
NN
AA
AA
NN
NN
CC
CC
EE
EE
((
((
cc
cc
oo
oo
nn
nn
tt
tt
..
..
))
))
Fig. F
Table A
Operating Condition
Red
Green
Red
Green
Red
Green
•When the red LED is on, it indicates that your battery is discharged and the charger is recharging at
the "BULK" rate of 6 Amps. •While the red LED is on, the voltage measured will be 11.8 to 14 volts. •If
the red LED stays on for more than 24 hours, refer to the troubleshooting section of this manual.
•When both the green and the red LED's are on, the charger is charging at an "ABSORPTION" rate of
between 1.5 and 5 Amps. This mode of charging gradually "tops off" the battery, and reduces harmful
sulfating. •While both LED's are on, the voltage measured should be approx. 14.0 to 14.5VDC. •If
both LED's stay on longer than 24 hours, refer to the troubleshooting section in this manual.
•When the green LED is on, the charger is charging at a "FLOAT" rate of less than 1.5 Amps. •This
"float" charging current will gradually decrease to as low as 0.1 Amps as the battery reaches 100%
charge. It will now be kept at full charge without over-charging. •If the green LED stays on when the
battery is known to be low, refer to the troubleshooting section of this manual.
 Loading...