alignment tool. See Figure 6. The tapered tip automatically centers the plate for you.
While maintaining light pressure on the ram holding the base plate in place, turn the cap
screws clockwise to tighten them using the included hex key. See Figure 7. The plate
screws only need to be tightened enough to prevent lateral (side-to-side) movement.
Over-tightening these cap screws is not necessary.
Ram to Threaded Anvil Holder Alignment
There will be times when you will need the extended length of the threaded anvil holder,
and with it, need to accurately align the center of the anvil holder to the centerline of the
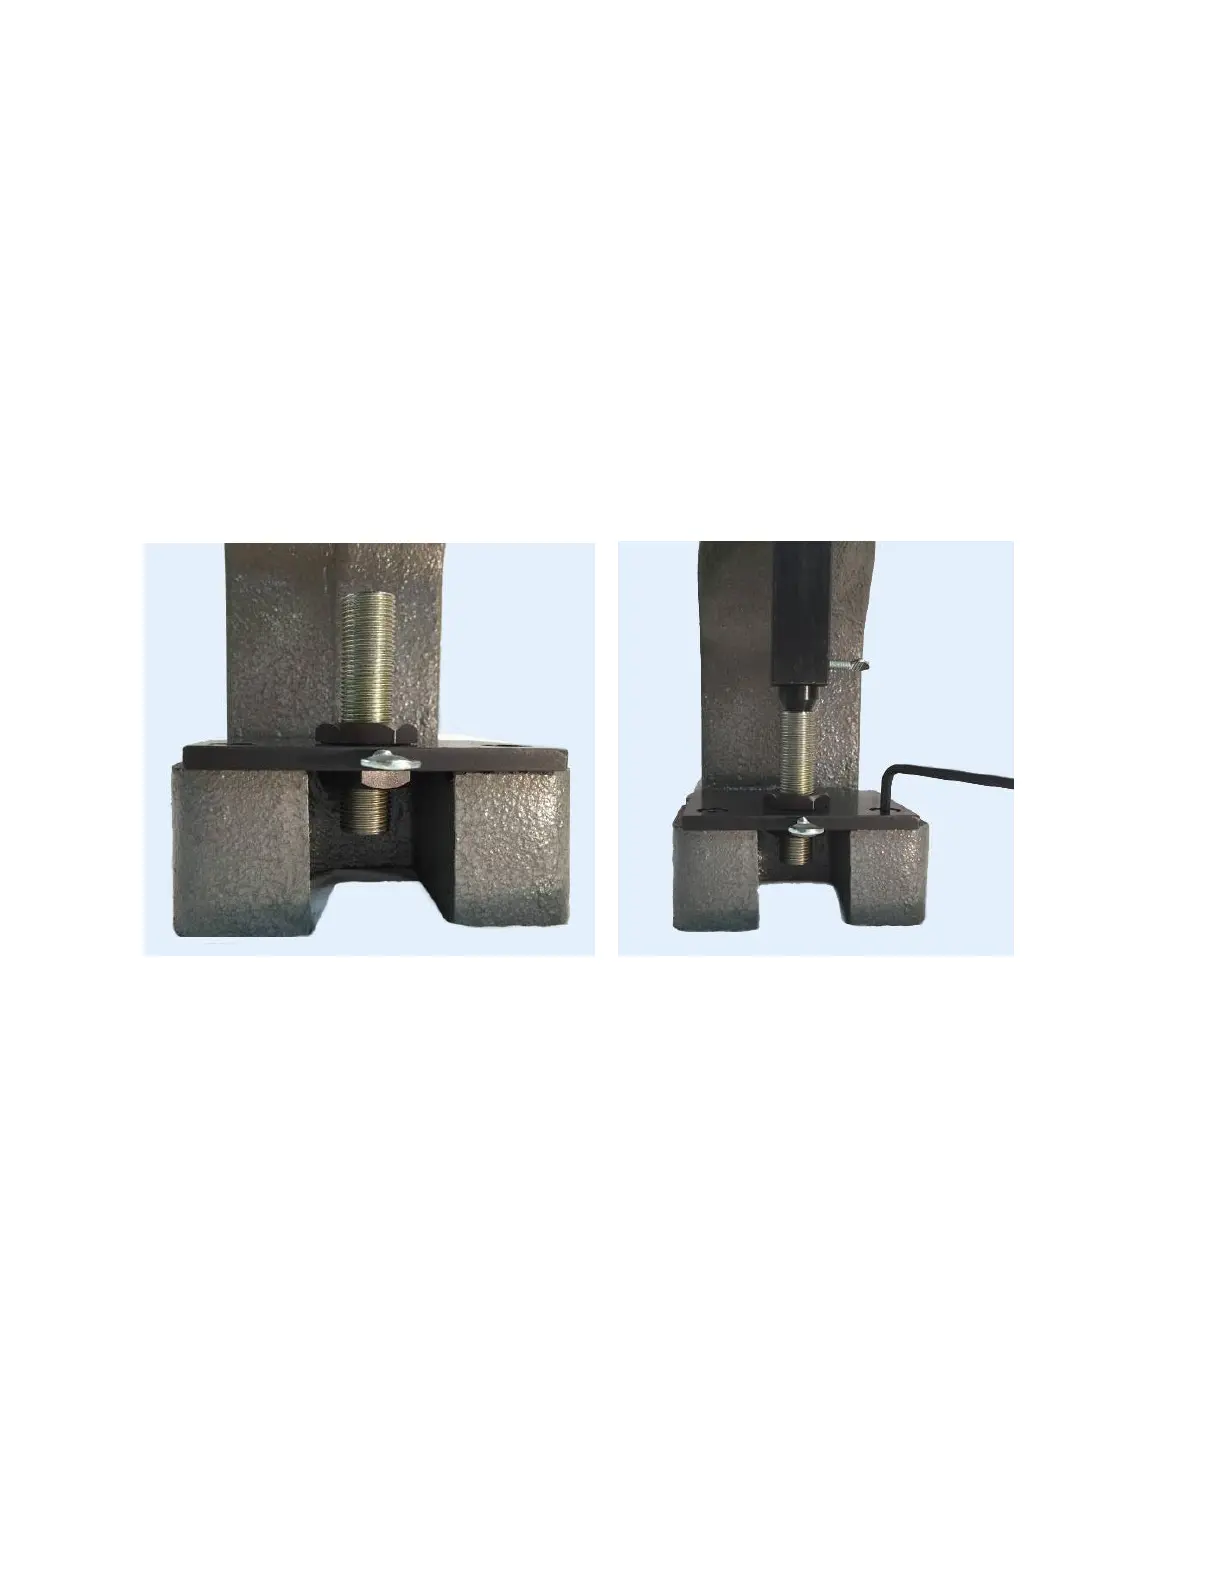
ram. Take the threaded anvil holder with one of its two lock nuts removed and insert it
into the hole in the base plate with the end you wish to use facing upwards. Add the
bottom lock nut and adjust both lock nuts to set the height of the anvil holder to the
height you need and then tighten the top lock nut. See Figure 8 below.
Figure 8 – Threaded anvil secured to base plate Figure 9 – Aligned anvil assembly
Loosen the 2 cap screws in the base plate. Place the tapered alignment tool into the
ram until seated and tighten the thumbscrew to hold it in place. Now lower the ram so
that alignment tool engages the hole in the threaded anvil holder with light pressure
causing the base plate with the anvil holder to center around the alignment tool. Once
center is established, and while maintaining pressure on the ram to hold the base plate
centered, tighten the two cap screws to secure the position of the base plate.
See Figure 9
This process enables you to center the tip of any tool used in the ram to the center of
the anvil using the extended length of the threaded anvil holder. Any tolerance slack
between the hole in the base plate and the outside diameter of the threaded anvil holder
has been removed.
 Loading...