4
Assembly Instructions
Tools Needed For Cart Assembly
(2) 7/16” Wrenches
(2) 1/2” Wrenches
(1) 9/16” Wrench
(1) Pair Pliers
(1) Large Standard or Flat Screwdriver
Remove from Carton
Remove all parts and hardware packages from the
carton. Lay out all parts and hardware and identify
them using the illustrations pages 2 and 3.
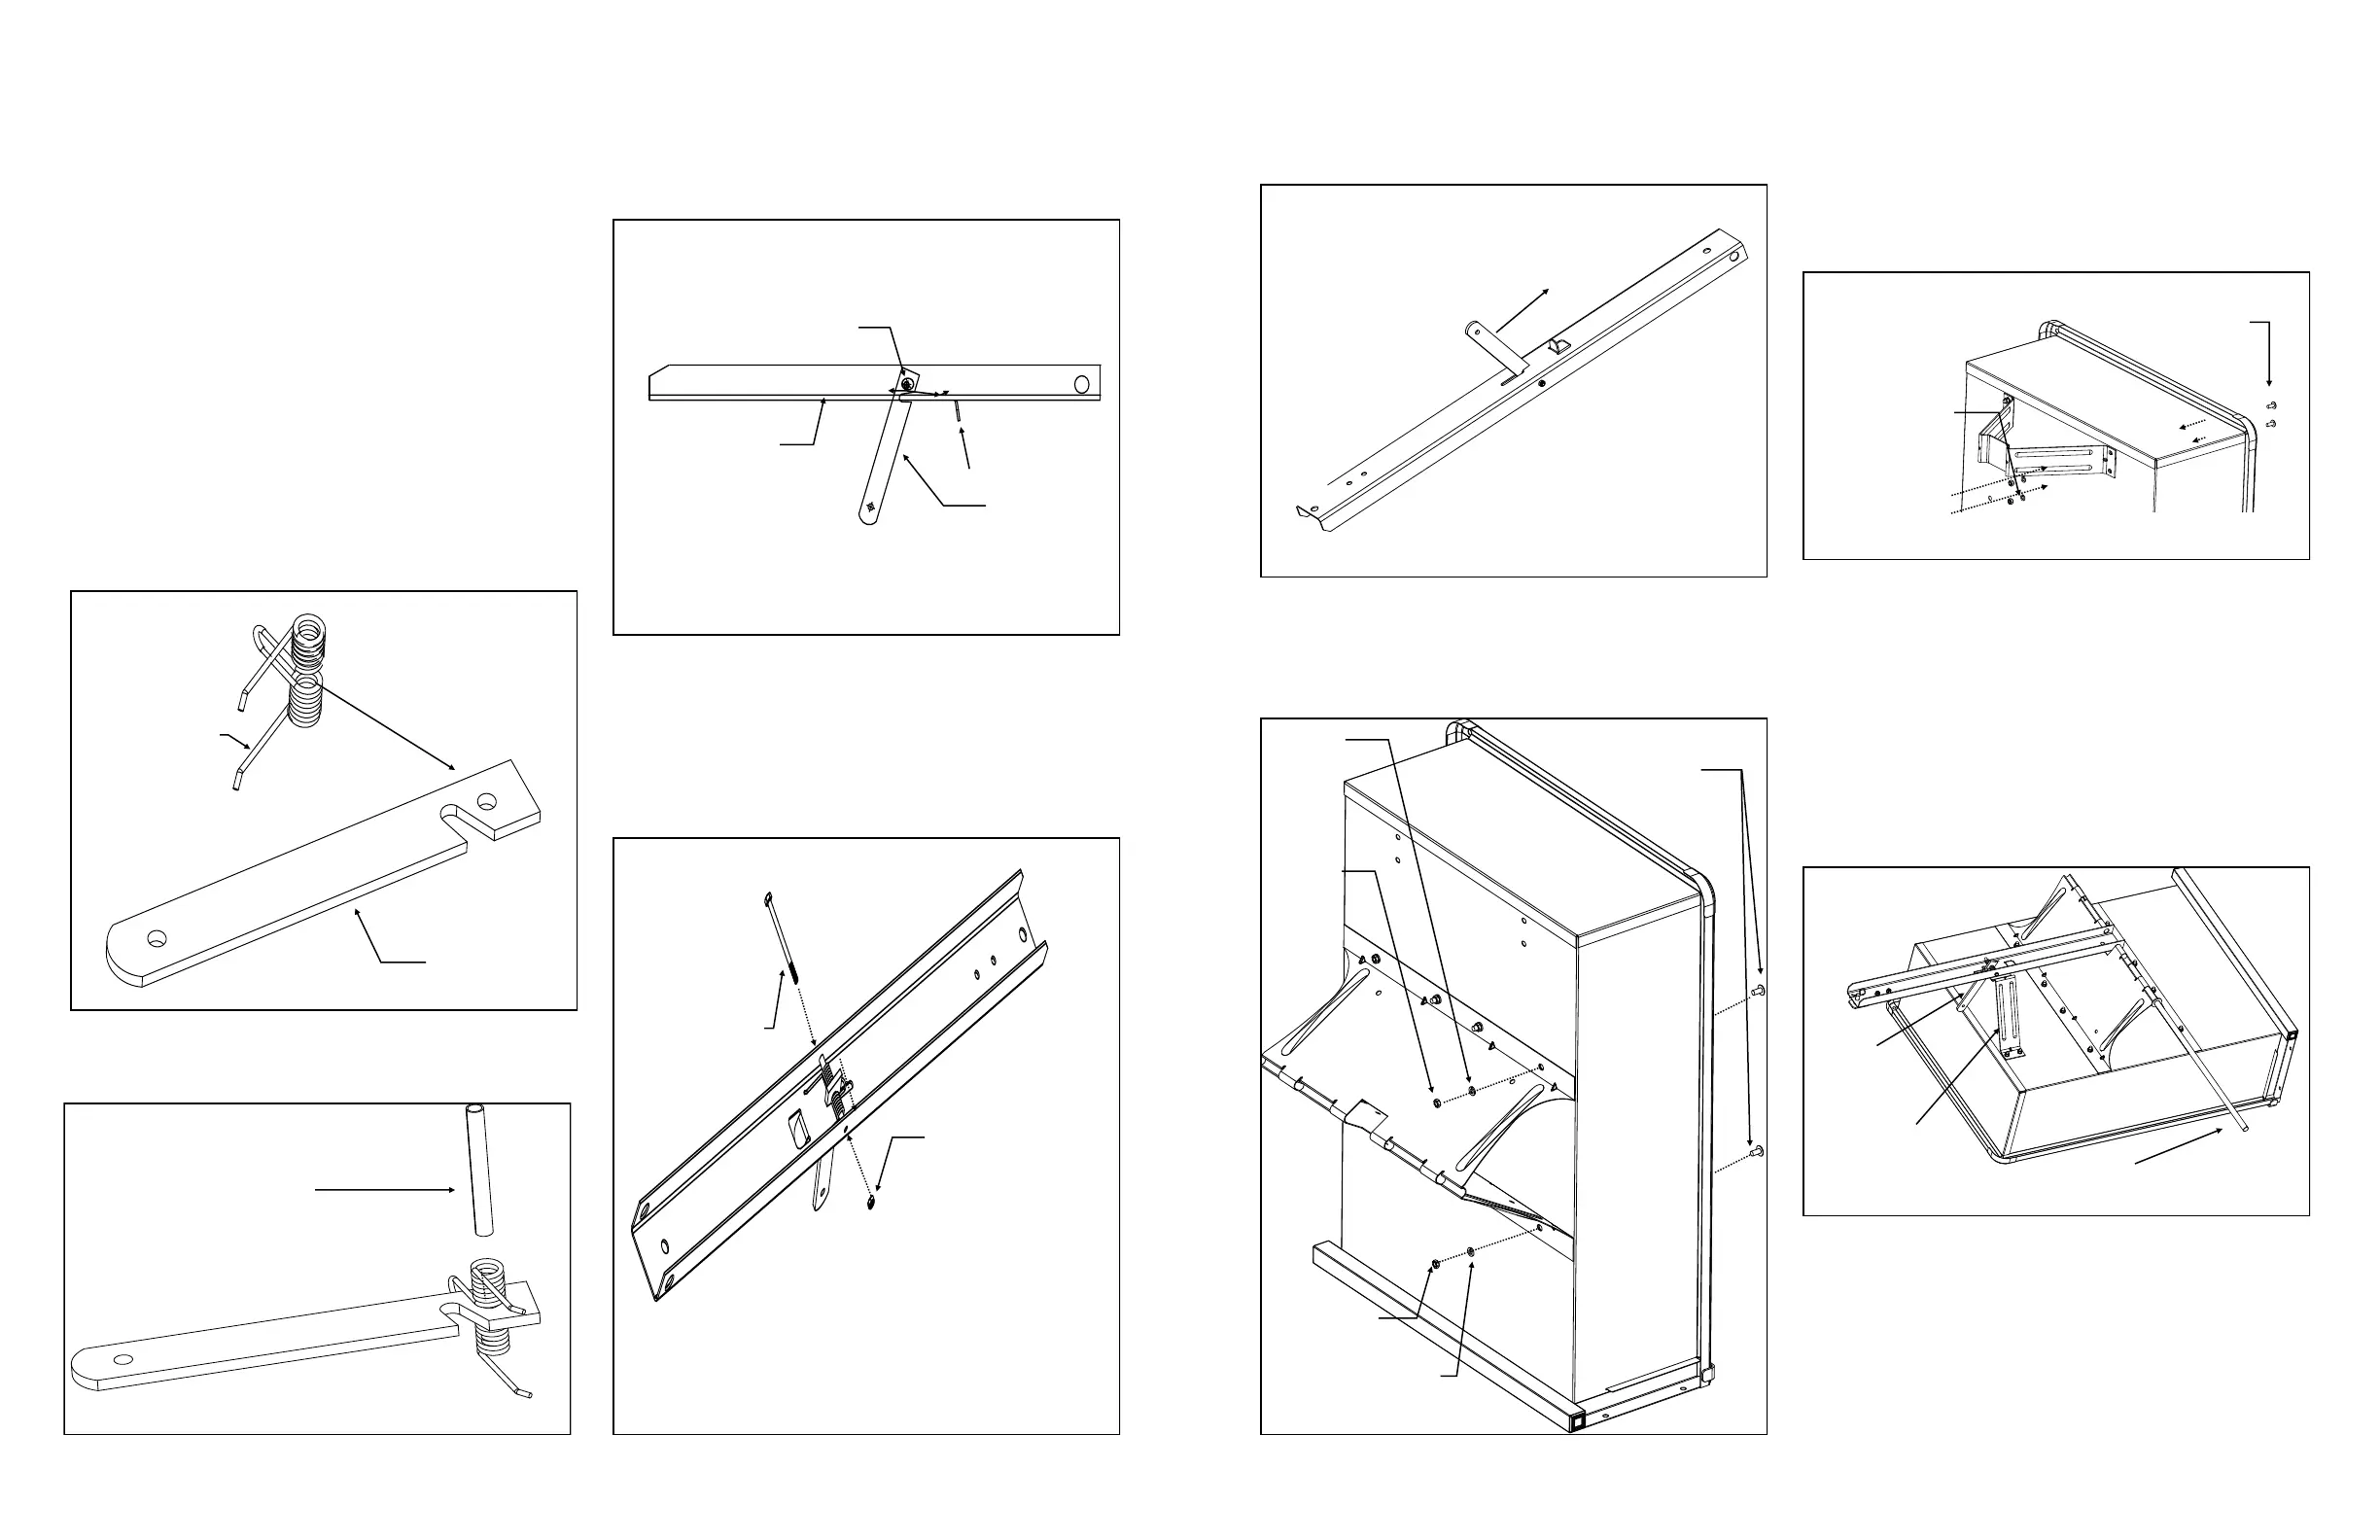
1. Slide Spring over the Latch Handle as shown in
Figure 1.
2. Slide the 1/4” x 2.75” Spacer through the Spring
and Latch as shown in Figure 2.
1/4” x 2.75”
Spacer
Figure 2
Figure 1
Latch
Spring
3. Slide the Latch, Spring and Spacer through the
Tow Bar. This will cause the Spring to open. See
Figure 3.
4. Slide 1/4” x 3—1/2” Hex Head Bolt through
Spacer and secure with a 1/4” Nylon Lock Nut.
See Figure 4.
Figure 3
Spring
Top of Tow Bar
Latch
Pedestal Tab
1/4” x 3 1/2”
Hex Head
Bolt
1/4” Nylon
Lock Nut
Figure 4
5
5. If assembled correctly the Latch should be forced
toward the back of the Tow Bar by the spring. See
Figure 5.
6. Attach Undercarriage Axle Support to the bottom
of the Body. Use 3/8” x 3/4” Truss Head Bolts, 3/8”
Lock Washers, and secure with 3/8” Hex Head Nuts.
See Figure 6.
7. Attach Pedestal to bottom front of Body. Use
5/16” x 3/4” Truss Head Bolts from inside. On the
bottom side, use 5/16” Lock Washers and secure
with 5/16” Hex Head Nuts. See Figure 7.
8. Move Body to flat position with Undercarriage
and Pedestal face up. Slide Axle halfway through
Undercarriage. Place Tow Bar into center slot on
Undercarriage, locking latch to Pedestal then slide
the Axle though the holes in the Tow Bar then all
the way through the Undercarriage. See Figure 8.
Figure 5
Force of Spring
Figure 7
5/16” x 3/4”
Truss Head
Bolt
Figure 6
3/8” Lock
Washer
3/8” Hex
Head Nut
3/8” Truss
Head Bolt
Figure 8
Latch
Pedestal
Axle
3/8”
Lock
Washer
3/8”
Hex
Head
Nut
5/16” Lock
Washer
5/16” Hex
Head Nut
 Loading...