Step 1
Attach the Leg Stands (M) to the Chassis Assembly (B) rear tube using four 1/4” x 1-3/8” Hex Head Bolts and
securing with four 1/4” Nylon Lock Nuts.
Step 2
Attach the Height Adjustment Tube (K) to the chassis Bumper Assembly using a 5/16” x 1-3/4” Hex Head Bolt
and a 5/16” Nylon Lock Nut. Connect one end of the Spring to one side of the bracket then stretch around the
Height Adjustment Tube and connect the other end of the spring to the opposite side of the bracket.
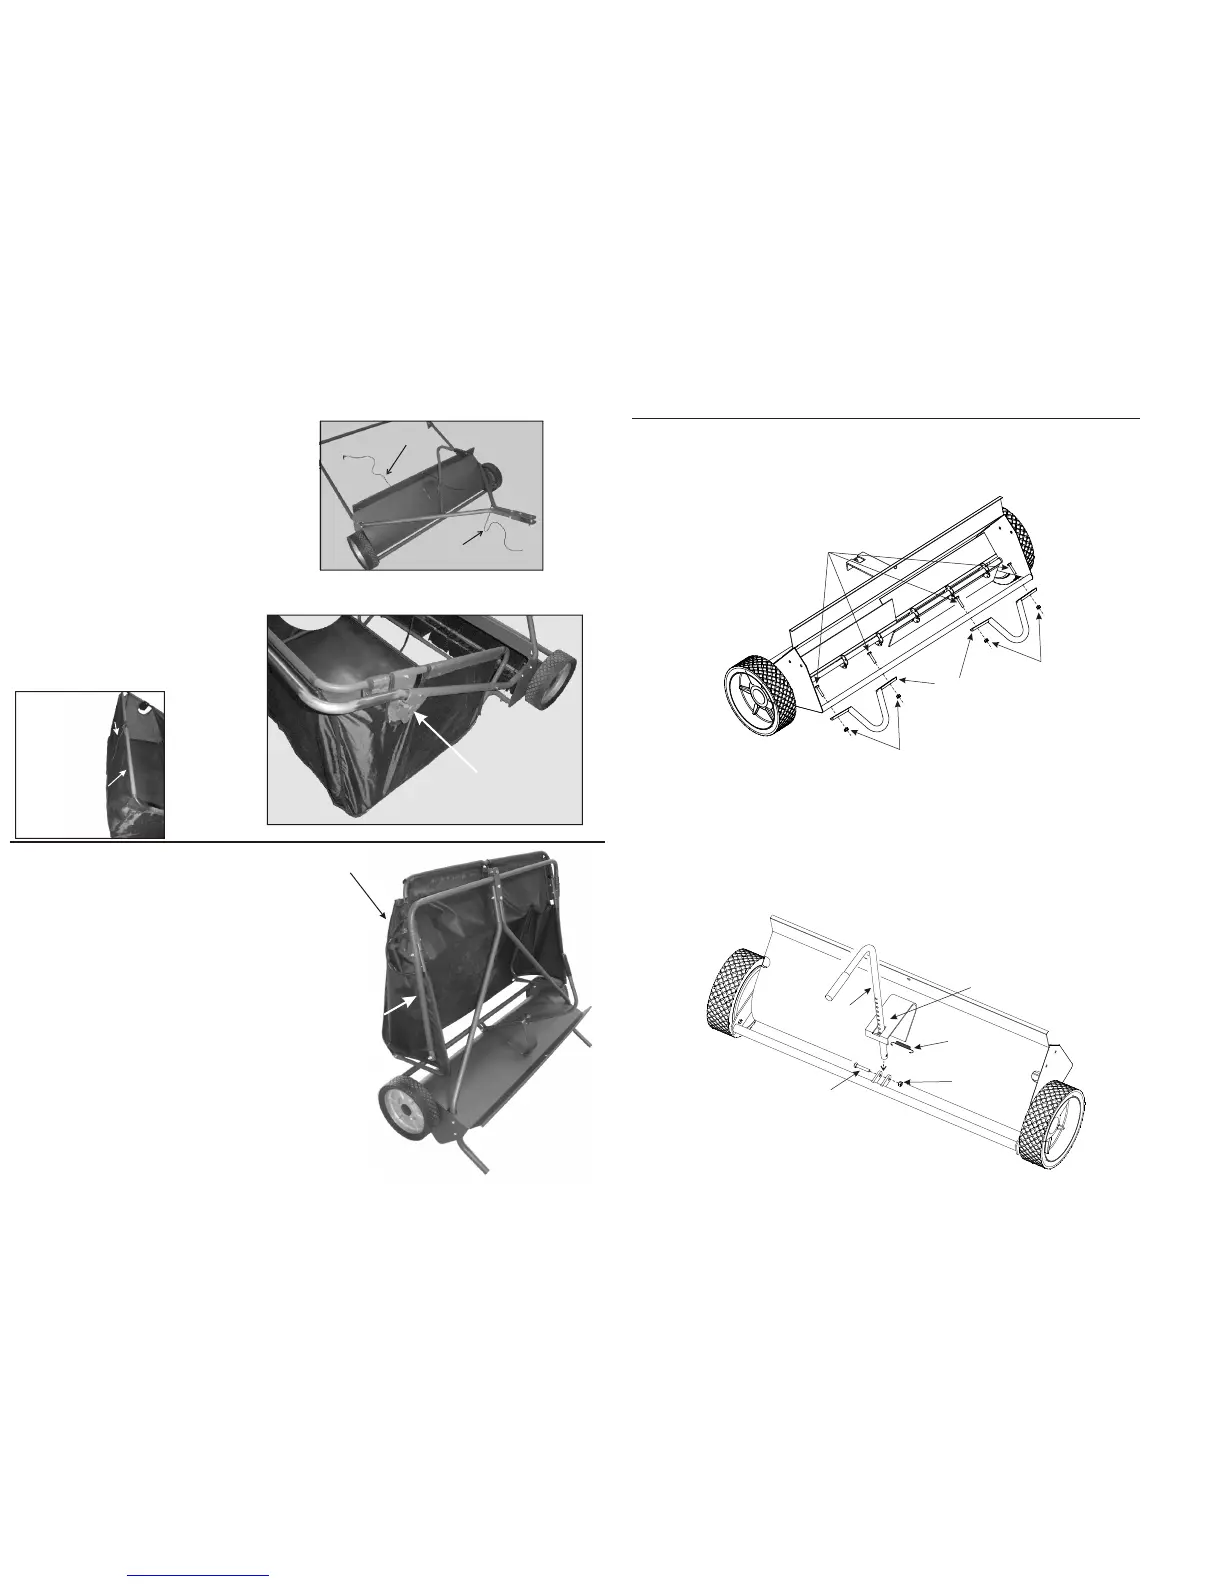
Step 7
Insert the Hamper Dump Rope through
center hole on the Sweeper Chassis Assembly.
Next, lay the Hamper Dump Rope behind the
sweeper. Fig. 4
Install the Hamper Assembly onto the frame
assembly. The Hamper Pivot Bracket Assemblies
fit inside the slots on both Pivot Brackets on the
frame of the sweeper. Fig. 5
The Hamper Dump Rope needs to go under
and up the back side of the Hamper Assembly
for proper dumping operation. Tie the Hamper
Dump Rope end to the center of the Top Hamper
Cross Brace. Fig. 6
Hamper Dump
Rope
Hamper Dump
Rope
Top Hamper
Cross Tube
STORAGE:
For long term storage, you can remove the
Tube Frame Assembly (both RH and LH Side
Frame and Top Frame Tube) and the Fiberglass
Hamper Support Rods on the Hamper Assembly
to reduce total storage area.
NOTE: ALL REFERENCES TO “RIGHT” (RH), AND “LEFT” (LH) DIRECTIONS ARE IN REFERENCE TO POSITION BEHIND SWEEPER.
Fig. 4
Fig. 6
Hamper Dump
Rope
1/4” x 1-3/8” Hex
Head Bolts
1/4” Nylon
Lock Nuts
Leg Stands
Height Adjustment
Tube
Spring
5/16” x 1-3/4”
Hex Head Bolt
5/16” Nylon
Lock Nut
Bracket
1/4” Nylon
Lock Nuts
Tube Frame Assembly
Hamper Assembly with
Fiberglass Hamper Support
Rods removed
Hamper Pivot
Bracket on Frame
Fig. 5
 Loading...