Begin Assembly of the PVS
To attach the PVS to the console, you need to reroute several cables.
IMPORTANT
Assemble the equipment accor
ding to the guidelines in this manual to ensure that
you do not void the Precor Limited Warranty. Any damage caused during
installation is not covered by the Precor Limited Warranty.
Installation Requirements
You will need the following tools to compete this assembly:
• Phillips screwdriver
• 3/16-inch socket head screwdriver
• Set of metric hex wrenches
• Set of SAE hex wrenches
• Hex-drive torque wrench with #2 Phillips screwdriver bit
Hardware Kit
The following fasteners and components are included in the hardware kit. If your
hardware kit is missing parts, contact Precor Customer Support.
Hardware Hardware name Quantity
Phillips-head screws M5 x 10 mm
(black)
8
5/16 x 3½-inch socket head screw
(use with 800 line tr
eadmills only)
1
5/16 x ¾-inch socket head screw
(use with all equipment except the
800 line treadmills)
1
8 x 1/4-inch Phillips head tooth
lock scr
ew
1
Hardware Hardware name Quantity
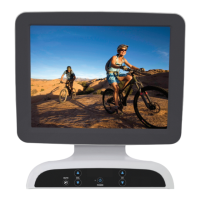
PVS monitor 1
Audio/Mobile device charger chin 1
Audio cable 1
PVS mounting bracket 1
PVS bracket cover 1
Console access cap and cover 1 of each
Long back plate (for 800 line
tr
eadmills only) and short back
plate for all other equipment
1 of each
3
 Loading...