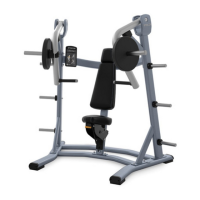
Attaching the Weight Bar
The weight bar is packaged with the Smith Machine and must be attached
before use.
To attach the weight bar:
1. Latch safety stops in position 7 (see figure below).
2. Align the two brackets on the weight bar assembly with the linear
bearing housings on the base frames.
3. Make sure the stop screw is on the right hand side of the equipment
and below the bar.
WARNING The stop screw and tab must be in the position shown
below to ensure the machine functions properly.
4. Secure each bracket in place using two M12 × 30 mm socket head cap
screws and two M12 split washers. Alternate turning cap screws two
turns each until brackets are flush.
Component Quantity
Storage horn bumper 6
Weight bar assembly
includes stop screw and
retainer pin
1
Weight storage horn 6
The Smith Machine arrives partially assembled. Follow the instructions below to
complete the assembly. If you need to disassemble the equipment to move it, please
refer to the disassembly section of this guide before completing the assembly steps.
WARNING At least two people are required to assemble the equipment.
DO NOT attempt assembly by yourself.
Assembly Requirements
When assembling the equipment, we recommend you:
• Assemble the equipment close to where you plan to use it.
• Locate the equipment at least 40 inches (1 meter) away from walls or
furniture on either side of the equipment, and 40 inches (1 meter) away from
objects behind the equipment.
• Assemble the equipment on a solid, flat surface, so that it remains level and
stable.
Important Before you wrench tighten a fastener, check that its head is flush with the
surface of the product. If not, cross-threading may have occurred. Do not attempt to
rework the assembly as more damage to the equipment will occur. Instead, contact
Customer Support at www.precor.com.
• Do not move the equipment without assistance.
Component Quantity
Socket head cap screw
(M12 × 30 mm)
6
Socket head cap screw
(M6 × 60 mm)
2
Split washer (M12) 6
End cap 1
Discovery™ Series Plate Loaded Line Smith Machine
Assembly Guide
Hardware Kit
• 19 mm open-end wrench
• 18 mm open-end wrench
• Torque wrench
• Rubber mallet
• 10 mm hex bit
• 6 mm hex bit
• 5 mm hex bit
Weight Bar
Weight
Storage
Horns
Base Frames
Adjustable
Foot
Right Side
Left Side
Adjustable
Safety
Stop
Adjustable
Safety
Stop
Linear Bearing
Housing
Upper Frame
5. Tighten the fasteners to 806 inch-pounds (91 newton-meters)
of torque.
6. Insert a retainer pin in the end of each weight bar.
Attaching the Weight Storage Horns
Repeat this procedure to attach all of the weight storage horns to the
equipment.
To attach a weight storage horn:
1. Insert the weight horn into the hole in the equipment frame until it stops.
If needed, use a rubber mallet to tap it gently into place.
2. Secure the weight horn using a M12 x 30 mm socket head cap screw
and M12 split washer. Torque to 806 in-lb (91 N-m).
3. Push the storage horn bumper into the weight horn with its wide side
facing outward. If needed, use a weight plate to push the bumper against
the equipment frame.
Weight storage horn attachment
Retainer pin installation
Required Tools
Position 7 and correct stop screw and tab locations
Tab location
and detail
Stop screw
location
Position 7
Bracket installation
 Loading...