26
5 Studio One Artist Quick Start
5.3 Creating a New Song
Studio Series 1810c and 1824c
Owner’s Manual
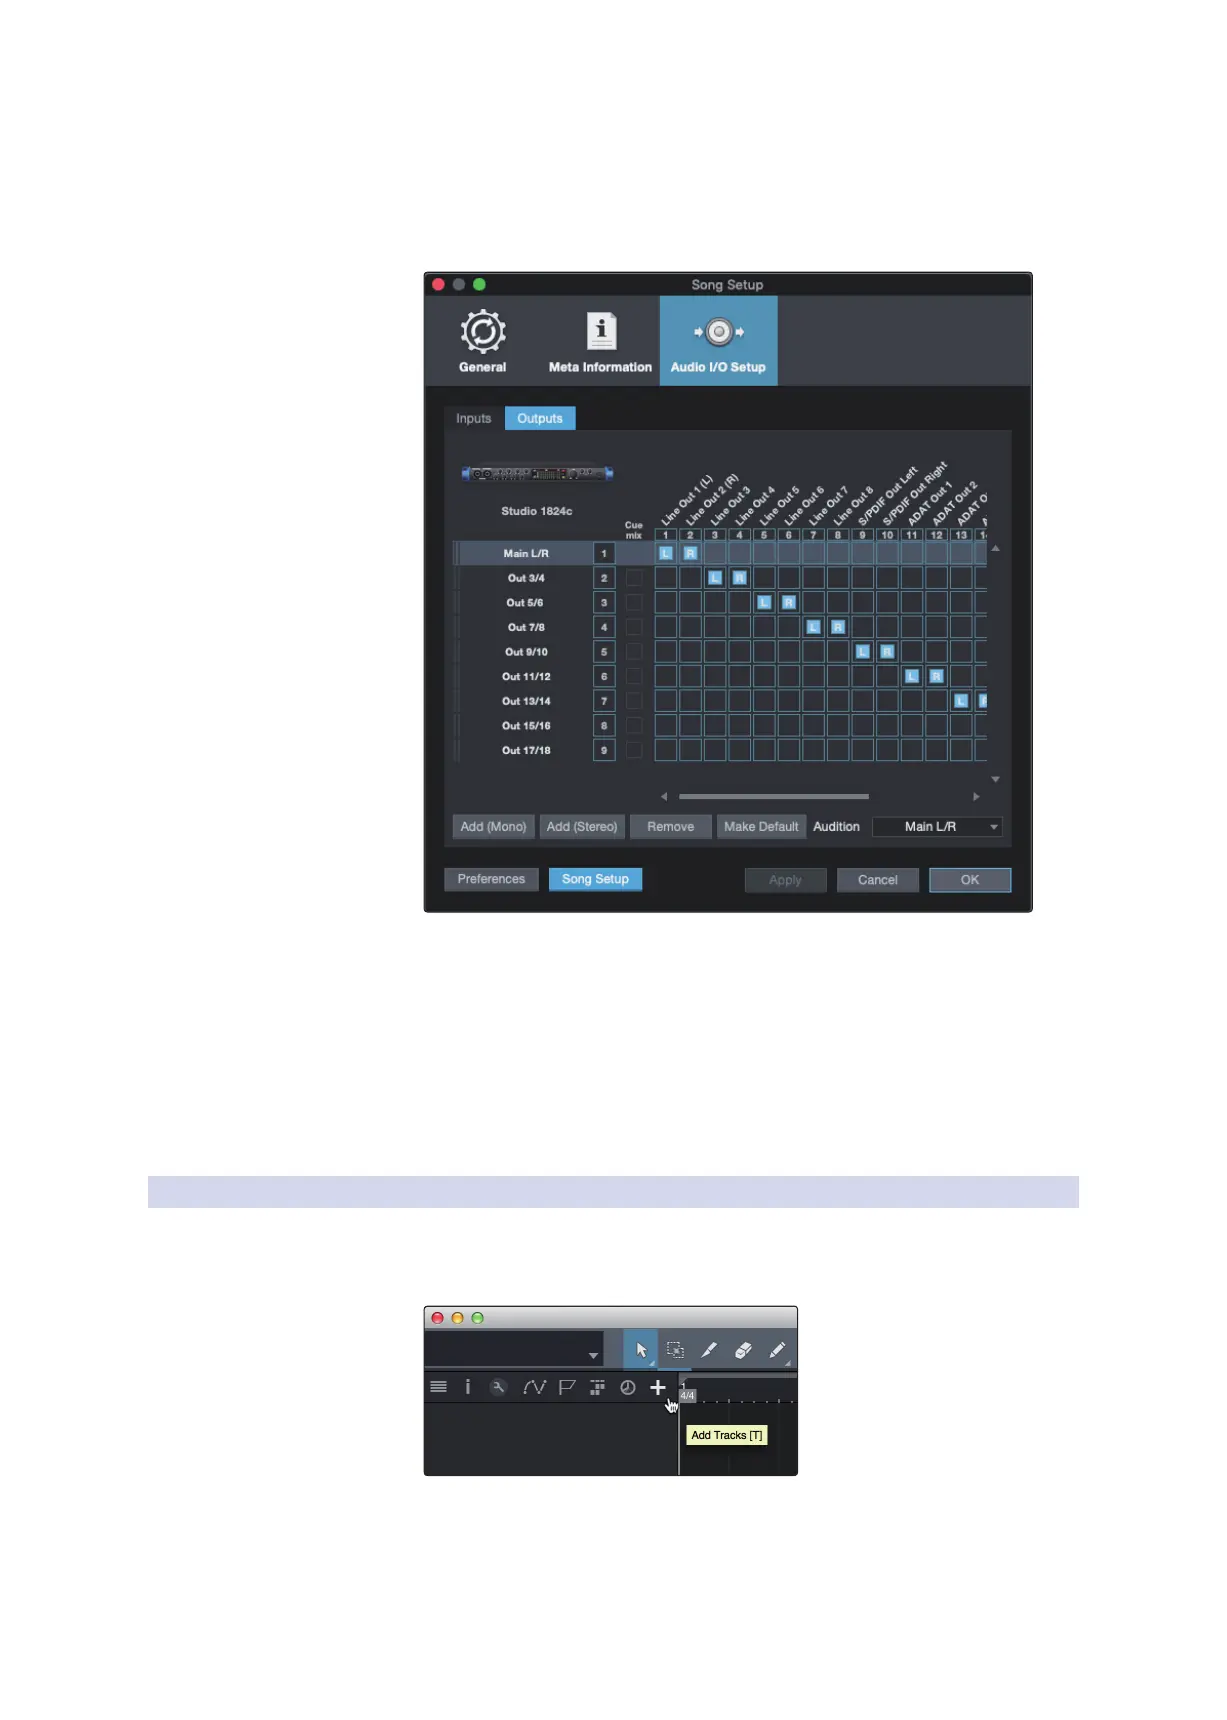
4. Click on the Outputs tabs to enable any or all of the outputs on your PreSonus
audio interface. In the lower right corner, you will see the Audition select menu.
This allows you to choose the output from which you will audition audio files
prior to importing them into Studio One Artist. In general, you will want this to
be the main output bus.
Power User Tip: If you would like this I/O configuration to be the same every time you
open Studio One, click the Make Default button.
Setting Up Z-Mix
PreSonus Studio-series interfaces provide zero-latency monitoring through
Studio One. To enable zero-latency monitoring, you must enable the outputs
for the mixes to be Cue Mix outputs. From the Outputs tab, click on the Cue Mix
box next to any output you’d like to use to send a zero-latency monitor mix.
For more information on Z-Mix, see Section 5.4.
5.3.2 Creating Audio & MIDI Tracks
1. In the upper left corner of the Arrange window, you will notice several buttons.
The button furthest to the right is the Add Tracks button. Click on this button to
open the Add Tracks window.
 Loading...