5
14. At the end of the processing time, turn the burner off and remove the canner from the burner. Let the pressure drop of its own
accord. Do not attempt to speed the cooling of the canner; this can cause jar breakage, liquid loss, and other problems.
Pressure is completely reduced when the automatic air vent has dropped and no steam escapes when the pressure regulator is
lifted from the vent pipe.
15. When the pressure has been completely reduced, remove the pressure regulator from the vent pipe and let the canner cool for
10 minutes. Do not remove the regulator until the pressure is completely reduced and the automatic air vent has
dropped. Always remove the regulator before opening the cover.
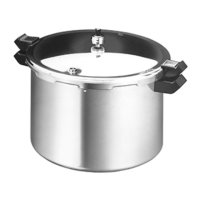
16. To remove the cover, turn it counterclockwise until it hits the stop tab. The cover handles will be beyond the body handles.
CAUTION! If the cover seems to stick or is hard to turn, do not force it open. Sticking may indicate that there is still pressure
inside the canner. If in doubt about the state of pressure in the canner, let it stand until cool before removing the cover.
17. When opening the cover, lift it toward you to keep any steam away from you.
18. Using a jar lifter, remove the jars by lifting them straight up and out of the canner. Be careful not to tilt them, which may cause
liquid to siphon from them. Place the jars upright on a board or a towel, away from drafts. Allow them to cool naturally for 12 to
24 hours before testing the seal. See the “After Processing” information on page 3.
NOTICE: If processing consecutive batches, be sure to check the water level in the canner after each batch. Add water as needed
to maintain 3 quarts of water in the canner at all times. If the canner boils dry and is left on a heated burner, or is heated while
empty, it may overheat, resulting in discoloration and/or warping of the canner bottom.
19. When canning is complete, allow the canner to cool completely before cleaning it.
Canner Storage
Store the canner in a dry place at temperatures above freezing. Invert the cover on the canner body. If you store the canner with the
cover locked on, unpleasant odors may form and/or the sealing ring may deform. The canner must be completely dry before storing.
Care and Maintenance
Canner Body
• The outside surface of the colored canners may be kept bright and shiny by washing with a mild soap and warm water. Avoid
allowing food residue to burn onto the finish. If food residue should happen to burn on, soak the canner in warm water until
the food residue is loosened. Scrub lightly with a nylon-mesh cleaning pad. Do not use steel wool scouring pads or abrasive
kitchen cleansers.
• It is normal for the inside of the canner to discolor. This discoloration is not harmful. It is a result of the various minerals in the
water and foods interacting with the aluminum. To remove this discoloration, use a solution of 1 tablespoon cream of tartar for
every 1 quart of water. Pour enough solution into the canner to cover the discoloration, making sure the canner is not filled more
than ⅔ full.
Close the cover securely, place the pressure regulator on the vent pipe, and heat the canner until the pressure regulator begins to
rock. Remove the canner from the heat and allow it to stand for 2 to 3 hours. Remove the regulator, open the canner, and empty
the contents. Scrub thoroughly with a steel wool soap pad; wash, rinse, and thoroughly dry.
• Pitting is caused by the interaction of the aluminum with other metals in the presence of moisture. To minimize pitting, wash,
rinse, and dry the canner body thoroughly after every use. At least once a year, scour the inside of the canner body with an
abrasive cleanser, such as Cameo* Aluminum & Stainless Steel Cleaner. Always store the canner in a dry area.
• Do not leave an empty canner on a heated burner or allow the canner to boil dry. This can cause damage to the canner bottom and/
or the stovetop.
• Do not strike the rim of the canner body with any metal utensil. This will cause nicks, resulting in damage to the rim which may
allow steam to escape from the canner.
• Do not pour water into a dry, overheated canner; this may crack the metal.
• If the body or cover handles of the canner become loose, tighten them with a screwdriver.
Sealing Ring and Automatic Air Vent
• Each time the canner is washed, remove the sealing ring and wash it in warm, soapy water. Rinse, dry, and replace it in the cover.
• The sealing ring and the automatic air vent should be replaced at least every three years, or sooner if the sealing ring becomes
hard, deformed, cracked, worn, or pitted, or if the canner becomes difficult to open or close. Failure to replace the sealing ring and
automatic air vent could result in bodily injury or property damage. Use only genuine Presto
®
replacement parts.
* Cameo is a registered trademark of Armaly Sponge Company. Presto is not associated with this company.