4
How to Use your Presto
®
Pressure Canner
Important: Do not attempt to use your canner before reading these step-by-step instructions for pressure canning. Prepare food
according to the processing procedures in the current and tested recipe. Follow the recipe and instructions carefully.
1. Be sure your canner is thoroughly cleaned and working properly. Before each canning season, check the sealing ring and the
automatic air vent. Replace these parts when they become hard, deformed, cracked, worn, pitted, or unusually soft. Use only
genuine Presto
®
replacement parts.
2. Check the Mason jars for nicks, cracks, and sharp edges. Check the screw bands for dents or rust. Use only jars, lids, and screw
bands in perfect condition so an airtight seal may be obtained. Wash and rinse the jars, lids, and screw bands. Pour hot water into
the jars and set them aside until needed. Follow the manufacturer’s directions for preparing the lids.
3. For recipe information, see your booklet titled Recipes and Helpful Hints for Presto
®
Pressure Canners. Select fresh, firm
food. Sort the food according to size and clean thoroughly. Prepare the food according to the specific recipe; always use current,
research-tested procedures, recipes, and timetables.
Fill the hot jars promptly with food and liquid to the recommended level. Allow ½-inch headspace for fruits. Most vegetables
and meats require 1-inch headspace due to expansion during processing. Work out the air bubbles with a clean, nonmetallic
spatula. Wipe the sealing edge clean with a damp cloth. Center the flat lid on the jar rim. Adjust the screw band according to the
manufacturer’s directions.
4. Position the canner on a level gas or electric coil burner and range only. These canners are not designed to work on electric
glass-top or induction burners and ranges. If you use the canner on a tilted burner or range, it may interfere with the operation of
the pressure regulator. For electric ranges, use the element that most closely matches the diameter of the canner bottom, which is
the portion that comes in contact with the element.
CAUTION! Do not use the canner on an outdoor LP gas burner or a gas range over 12,000 BTUs. If you use an element that is
too large or one over 12,000 BTUs, the canner may soften and the bottom may warp. It may also result in property damage and/
or personal injury.
5. Place 3 quarts of hot water and the canning rack in the canner; for hot packed foods, the water can be heated to 180°F, or not
quite boiling. To prevent water stains on the jars, add 2 tablespoons of white vinegar to the water in the canner. Note: 3 quarts of
water are needed regardless of how many jars are being canned.
6. Place the filled jars on the canning rack immediately after each jar is filled. Always use the canning rack as the jars may break if
set directly on the bottom of the canner.
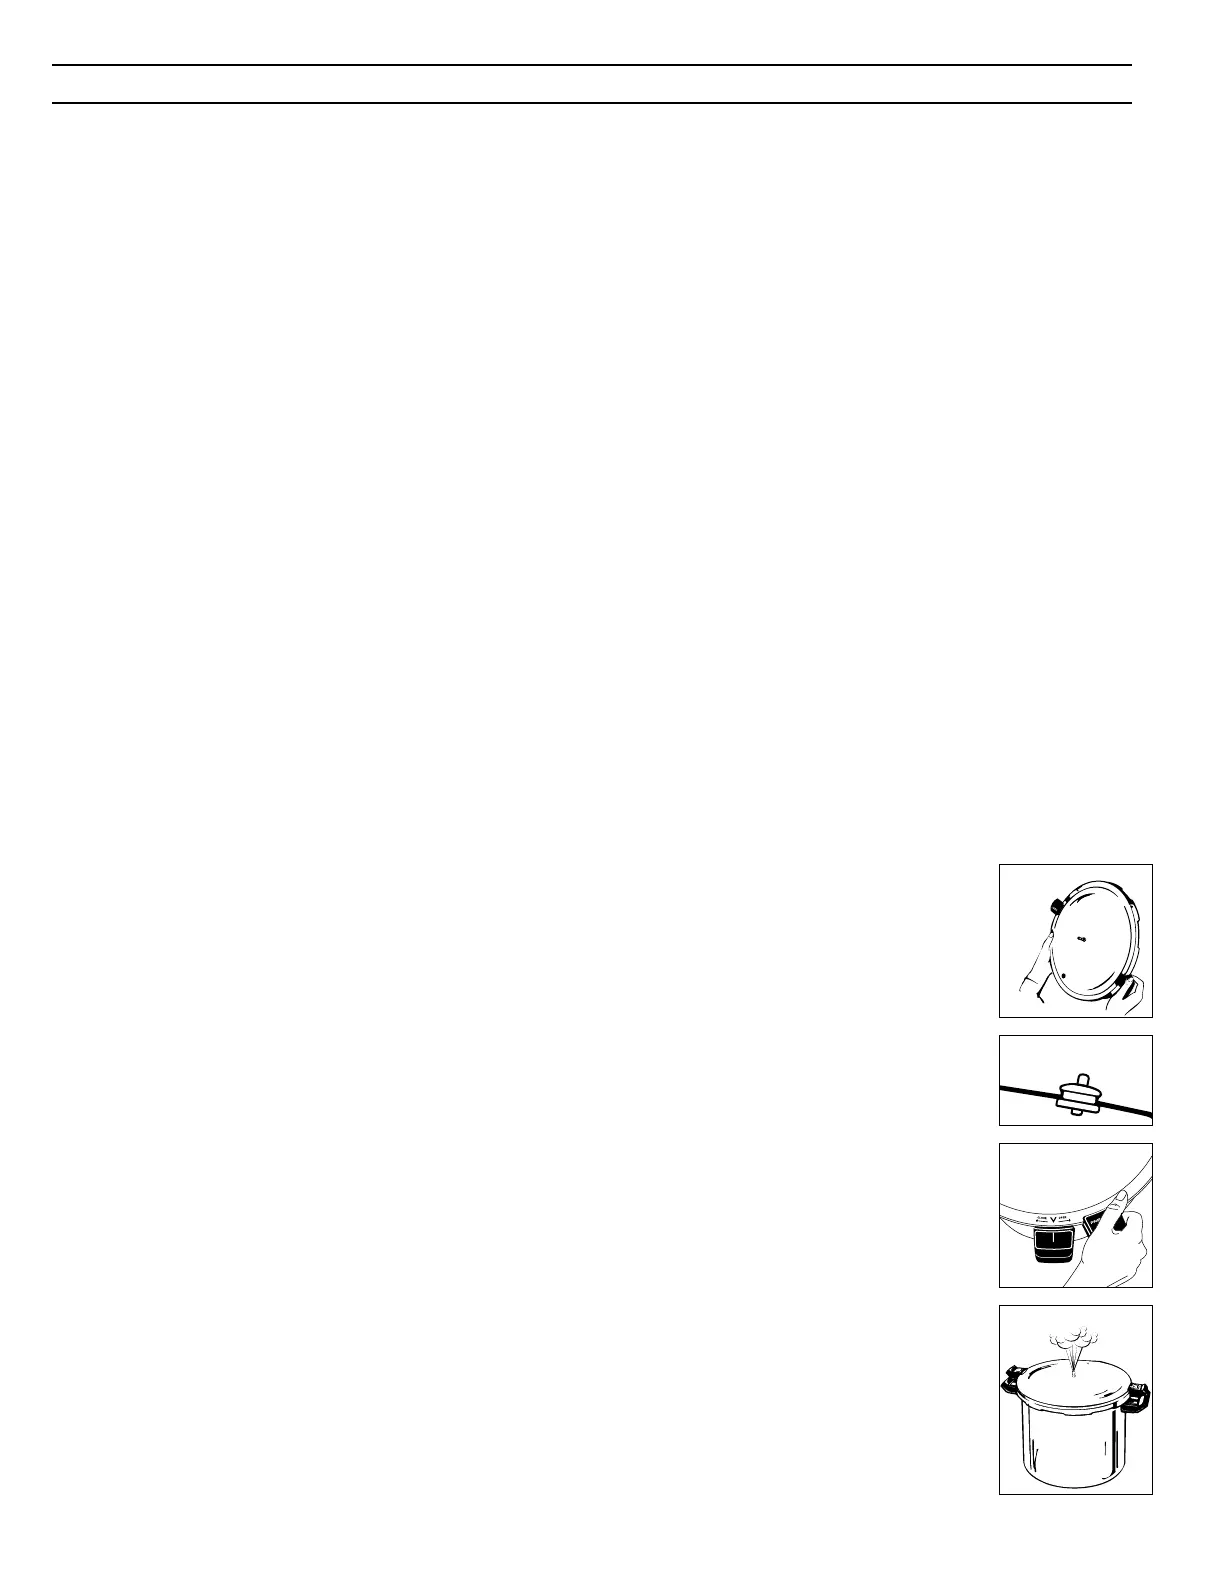
7. Hold the cover up to the light and look through the vent pipe (Fig. B) to be certain it is clear before placing
the cover on the canner. If it is clear, proceed to the next step. If it is blocked, clean the vent pipe with a
small brush or pipe cleaner.
8. Check to be sure the automatic air vent is seated properly in the cover (Fig. C).
9. Place the cover on the canner, aligning the V mark on the cover (Fig. D) with the mark on the body handle.
Press down on the cover handles to compress the sealing ring and then turn the cover in the direction
indicated (clockwise) to close until the cover handles are above the body handles. Do not rotate the cover
beyond this point.
If the cover is difficult to open or close, use a pastry brush or paper towel to apply a light coating of
vegetable oil to the underside of the body lugs of the canner. Do not lubricate the sealing ring.
10. Using a high setting on your stove, heat the canner until a steady flow of steam can be seen, heard, or felt
coming from the vent pipe (Fig. E). Let the steam flow from the vent pipe for 10 minutes to vent all the air
from the canner. Reduce the heat on your stove, if necessary, to maintain a steady, moderate flow of steam.
11. Assemble the pressure regulator (see page 2) to register the desired canning pressure. See the specific canning
recipe to determine the processing pressure.
12. Place the pressure regulator on the vent pipe. If the heat was reduced for venting, adjust it to a high setting
and heat the canner. As the pressure develops in the canner, the automatic air vent will lift and seal the canner.
The automatic air vent is a visual indicator of the state of pressure in the canner. When it is in the up position,
there is pressure. When it is in the down position, there is no pressure (see page 2).
13. The processing time begins when the pressure regulator begins to rock gently. Adjust the heat to maintain a
slow, steady rocking motion. To watch a video of a regulator maintaining this slow, steady rocking motion,
visit www.GoPresto.com/ppc/rocking.
If the pressure regulator stops rocking, it will be necessary to bring the pressure back to the correct setting and
begin the processing countdown from the beginning for the full amount of time.
Fig. D
Fig. B
Fig. C
Fig. E