76
Slow Cook Mode
To slow cook foods:
1. Press the slow cook button once for the LO setting and twice for the HI setting. The
light on the slow cook button will flash. After approximately 3 seconds, the default 2
hour cook time (2:00) will flash in the display window. The default time is the same
for both settings.
2. To adjust the time, press the slow cook button again to the desired cooking time. The
time will increase in 30-minute increments.
3. Press the start button to begin cooking. The setting selected (LO or HI) will appear in
the display. During cooking, the display will alternate between the selected setting and
the remaining cooking time. The maximum programmed time for slow cooking is 12
hours and the minimum time is 2 hours.
NOTE: The time will flash in the display window while you are programming the unit.
Once you press start, the time and light on the slow cook button will stop flashing. If you
forget to press the start button, you will hear 2 beeps. The unit will then go into standby
mode and you will need to reprogram it following the steps above.
Warm Mode
When the set time has expired, the unit will beep 3 times and automatically go into the warm
mode, except when using cold smoke. The light on the warm mode button will illuminate
to let you know it is in this mode. The timer will begin to count down. The unit will remain
on for 8 hours (8:00) and then shut off automatically.
The warm function can be manually selected to keep food warm after cooking. Press the
warm button on the digital touchpad. The default time, 30 minutes (:30), will flash in the
display window. To increase the time, press the warm button again to the desired cooking
time. The time will change in 30-minute increments. Press the start button to activate the
warm setting. The warm setting is NOT to be used for cooking. The maximum time is 12
hours when the warm function is manually selected.
Start/Stop
Press the start/stop button to activate the unit once it has been programmed or to stop the
unit at any time.
How to Use for Smoking
Check the rubber pads on the bottom of the
smoker base before each use to be sure they
are free of oil or other debris. If needed, wipe
with a warm, soapy cloth and dry thoroughly.
1. Position the smoker base on a clean,
dry, level, and stable surface in the
center of the countertop, away from
combustible materials. Always make
sure the appliance and cord are out of
reach of children.
2. Remove the slow cooking pot from the smoker base. It is not needed for smoking.
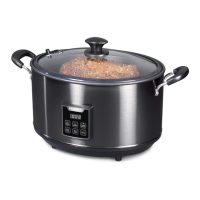
3. Position the charring cup around the heating element so the holes are towards the top
(Fig. D).
4. Place wood chips loosely around the heating element. Be sure to also place wood chips
in the center of the element. For foods with smoking times up to 2 hours, fill the charring
cup half full. If smoking time is more than 2 hours, fill the cup to the top.
5. Cover the charring cup with the charring cup lid.
NOTE: If the lid does not rest on the charring cup, the cup is overfilled. Remove excess
wood chips. Never smoke with an overfilled cup.
6. Position the base rack (rack with handles) so the legs are resting on the counter and
the handles are extended out (Fig. A, page 4). Grasp the handles and lift the rack into
the smoker base. Release the handles and move them so they rest against the smoker
base sidewalls.
7. Load the base rack with food. See the Helpful Hints on page 8 for guidance on positioning
food and other tips.
8. If additional racks are needed, position another rack on top. Be sure to rest the leg in-
dents of the added rack onto the bars of the rack below (Fig. A, page 4). Load the rack
with food. Repeat this process if a third rack is needed.
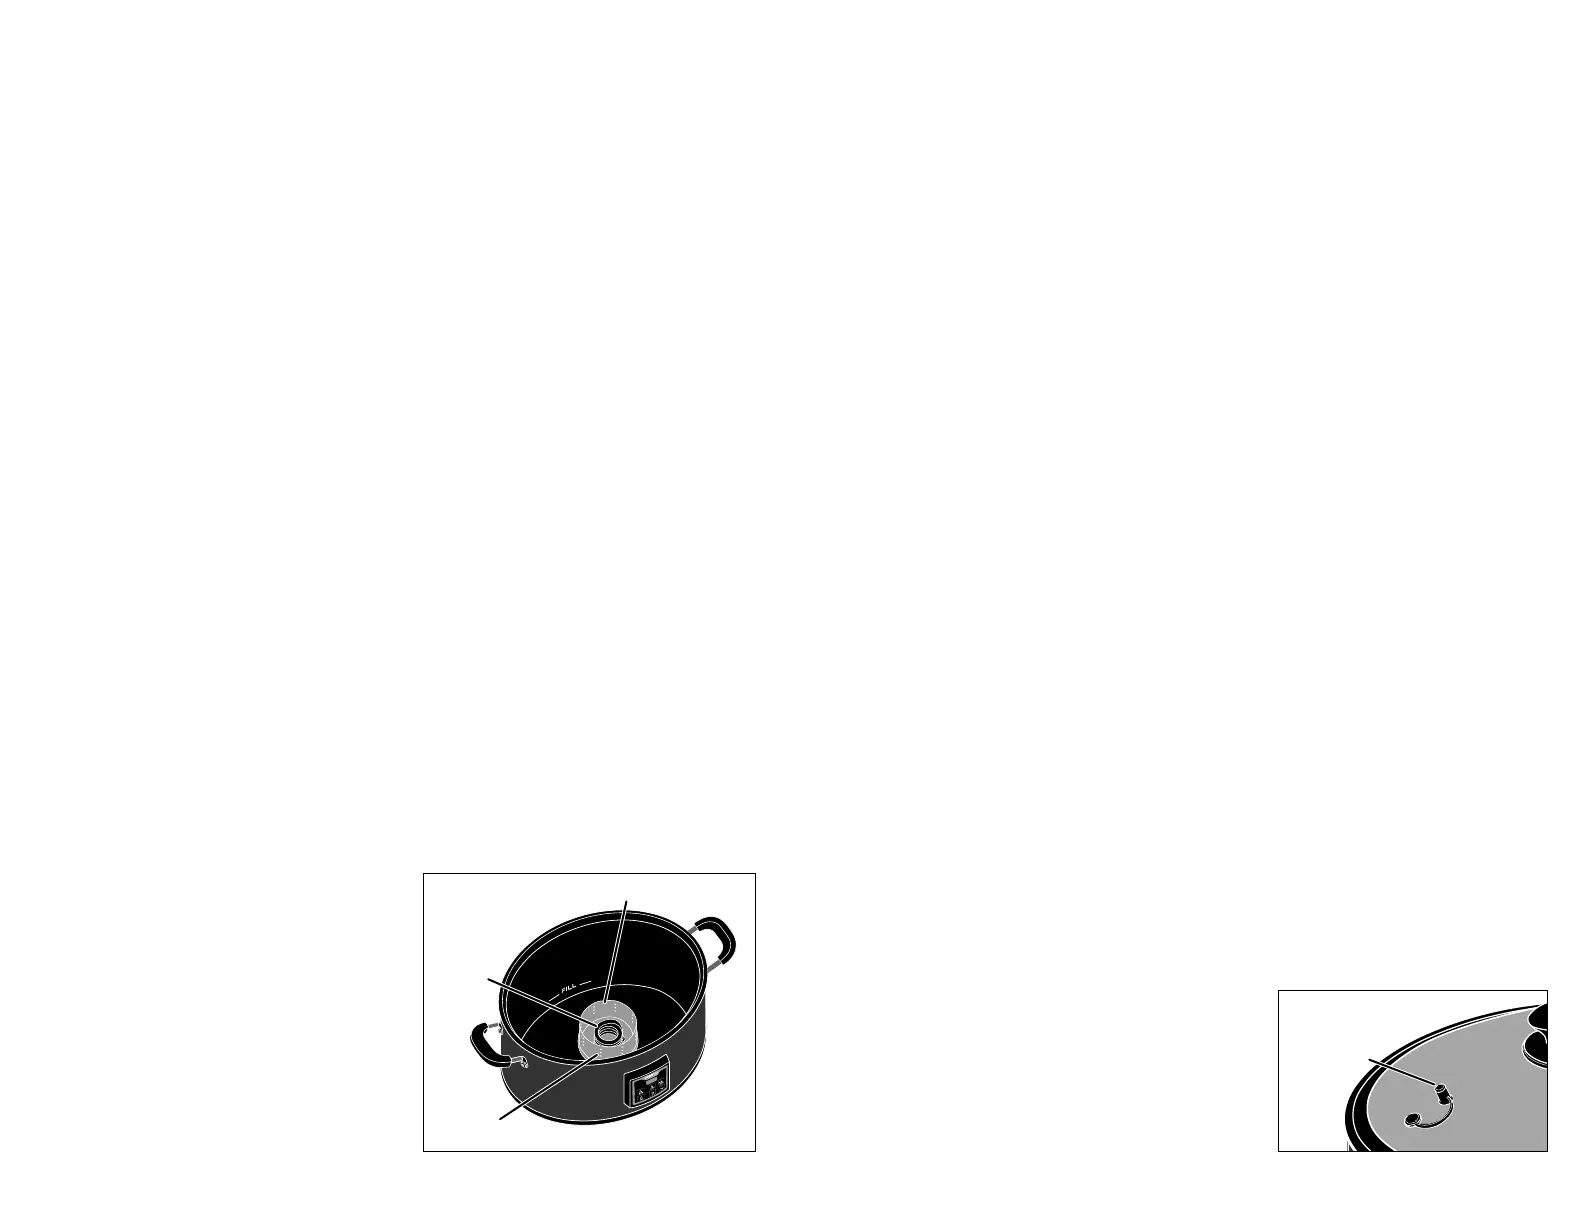
9. Place the cover onto the smoker base, ensuring the gasket is seated against the base rim.
Also ensure both ends of the vent plug have been pushed into place in the cover (Fig. E).
10. Plug cord into a 120VAC electrical wall outlet only.
11. Press the desired smoke mode button. Press the button again to set the smoking time.
Refer to the time charts and recipes on pages 9 through 14 as a guide for recommended
times. Then press the start button to begin the smoking process.
NOTE: It will take a few minutes for the wood chips to heat up. The unit will not begin
counting down until the warmup occurs.
During cooking, the light on the smoke mode button in use will flash intermittently.
This indicates the unit is cycling on and off to maintain the temperature.
The cover and gasket are designed to provide a closed environment to optimize smoke
infusion into the food. To maximize smoke flavor, do not open the cover during smoking.
While smoking, you will probably notice a light smoky odor and some condensation
on the cover. Both are normal.
12. When smoking time expires, the unit will beep 3 times and automatically go into the
warm mode when using hot smoke or combo smoke. It will remain in this mode for 8
hours or until the stop button is pressed. When cold smoke time expires, unit will go
into standby mode.
13. Remove the smoker cover.
NOTE: With long smoke times, a vacuum seal
may form between the smoker base and cover.
If the cover is difficult to remove, pull the taller
end of the vent plug (Fig. E) from the cover to
break the seal.
Fig. D
Charring
cup holes
Heating
element
Charring cup
Taller end of
vent plug
Fig. E
 Loading...