2
Important Cord Information
This appliance has a polarized plug (one blade is wider than the other). To reduce the risk of electric shock, this plug is intended to fit
into a polarized outlet only one way. If the plug does not fit fully into the outlet, reverse the plug. If it still does not fit, contact a qualified
electrician. Do not attempt to modify the plug in any way.
A short power supply cord (or cord set) is provided to reduce the risk resulting from becoming entangled in or tripping over a longer
cord. Extension cords may be used if care is properly exercised in their use.
If an extension cord is used, the marked electrical rating of the extension cord should be at least as great as the electrical rating of the
appliance. The extension cord should be arranged so that it will not drape over the countertop or tabletop where it can be pulled on by
children or tripped over unintentionally.
Connect the power supply cord to a 120VAC electrical outlet only.
How To Use
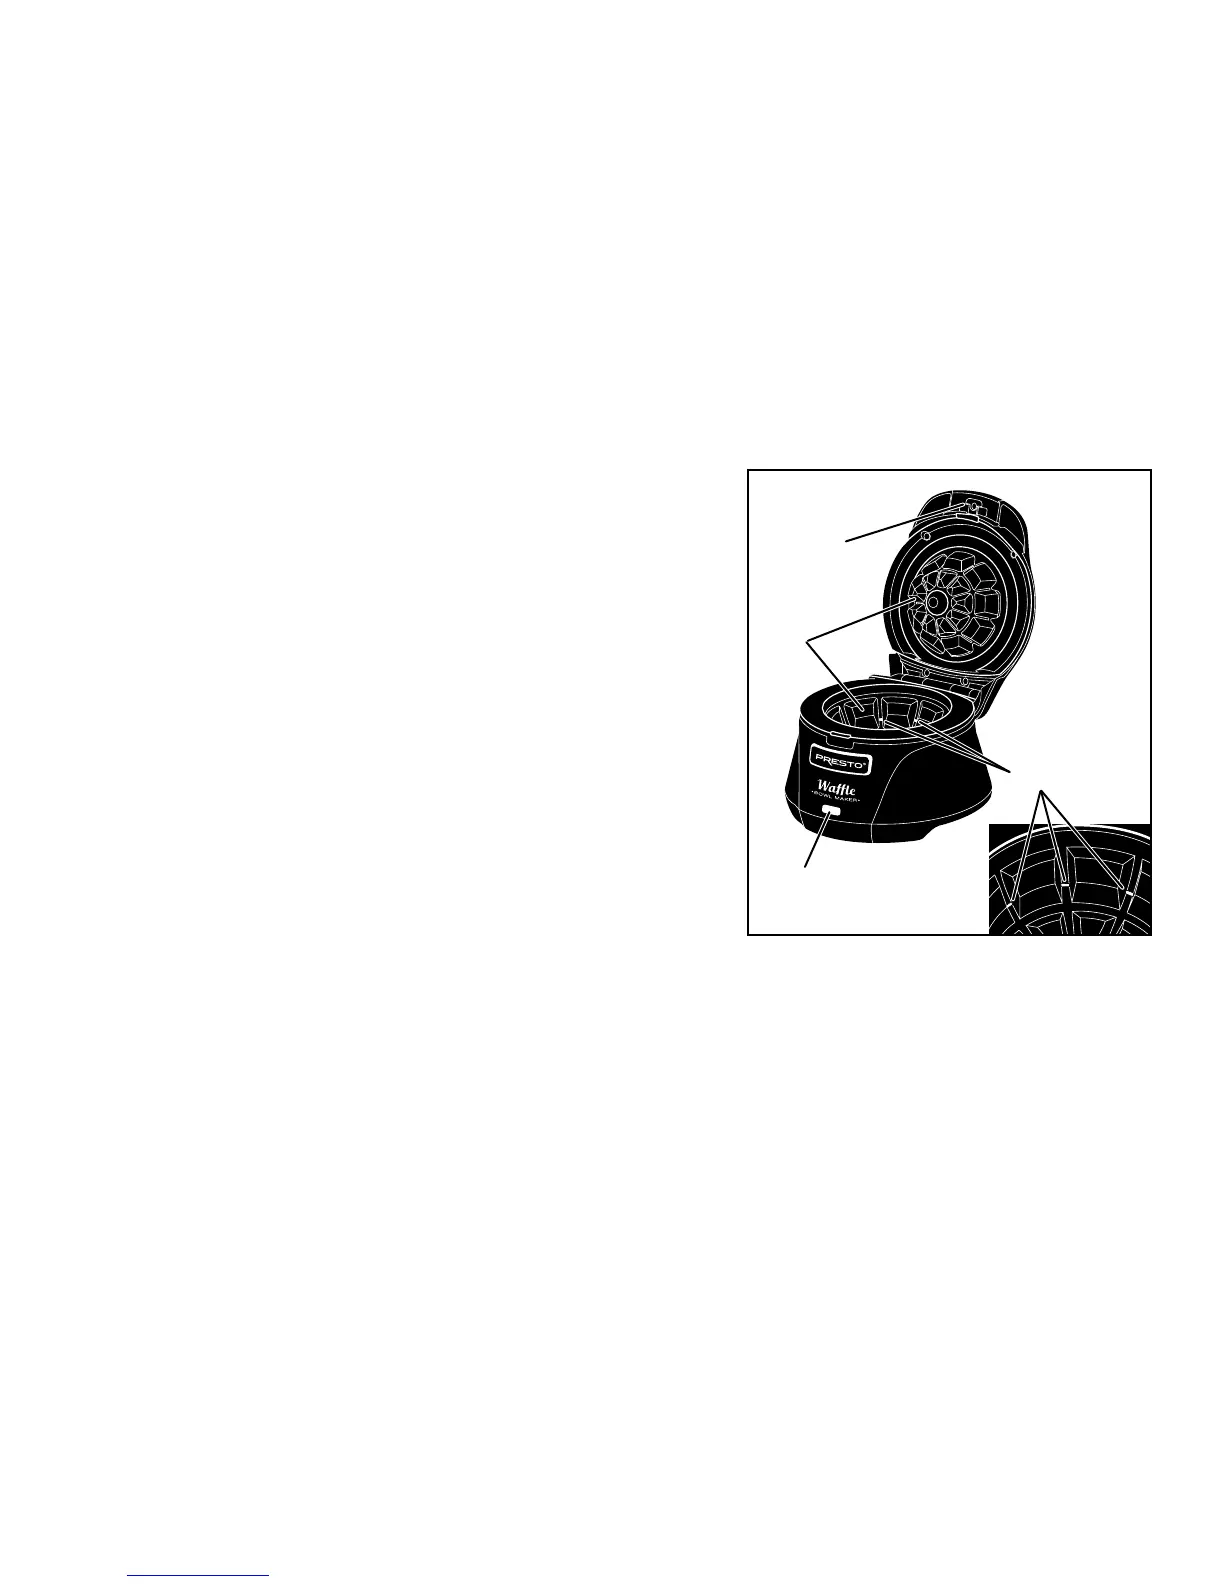
Become familiar with the Presto
Belgian Waffle Bowl Maker (Fig. A). Squeeze the cover latch and open the waffle bowl maker. Wipe
the waffle grids with a damp cloth before initial use.
1. Plug the waffle bowl maker into a 120VAC electrical outlet and preheat with
the cover in the closed position.
NOTE: When using the waffle bowl maker the first time, a slight odor or
smoking may occur as manufacturing residue burns off. This is normal during
initial use.
2. While the unit is preheating, prepare waffle batter from a commercial mix, one
of the recipes on pages 4 and 5, or your own recipe.
NOTE: The red signal light will be illuminated while the unit is preheating.
When the unit is ready for use, the light will go out. The preheat time will be
approximately 3 to 3½ minutes.
3. Before the first use, after the unit has preheated, use a brush or paper towel and
apply a light coating of cooking oil to the grids (no-stick cooking spray is not
recommended). You may find it helpful to repeat the process for the next 2 or
3 waffle bowls. Thereafter, apply oil only if you find it difficult to remove a
waffle bowl.
4. Pour waffle batter into the bottom grid. For most batters, pour to the fill lines
(Fig. A). However, for thin batters, pour to under the fill lines. If you prefer
using a measuring cup, pour in approximately ½ cup.
NOTE: Different batters expand at different rates. If your first waffle bowl is too tall (batter flows into the overflow area), reduce
the batter to slightly below the fill lines for the next waffle bowl; or if you would like a taller waffle bowl, fill slightly above the fill
lines for subsequent batches.
NOTICE: Do not strike the rim of the waffle bowl maker with any cooking utensil as this may scratch the nonstick surface.
5. Squeeze the cover latch, lower the cover until closed, and release the latch. During cooking the signal light will cycle on and off.
CAUTION! As with any waffle maker, steam escapes during cooking. Keep hands and face away from steam to prevent steam burns.
Take extra care when opening the waffle bowl maker as hot steam may escape near the latch and could cause burns.
6. Set a timer to the desired time. See the recipes on pages 4 and 5 for recommended cooking times. Most waffle bowls will cook in
3½ to 4½ minutes. Waffle bowl is done when the unit stops emitting steam.
7. Check the waffle bowl at 3½ minutes to see if it is golden brown. If additional browning is desired, cook an additional 30 seconds
to 1 minute. When cooking is complete, use a fork to carefully spear the interior of the waffle bowl and lift it from the grids, making
sure you don’t scratch the nonstick surface.
8. Repeat steps 4 through 7 for additional waffle bowls.
9. Fill waffle bowls with desired ingredients.
10. Unplug waffle bowl maker when cooking is completed.
Fig. A
Waffle
grids
Signal light
Cover latch
Fill lines
 Loading...