3
NOTICE: This appliance is not intended to melt wax,
gels, plastics, or other materials for making candles or
for other hobbyist activities or in any commercial or
business application. Using this appliance for purposes
differentfromthosespeciedintheinstructionmanual
may cause damage to the appliance and will void the
warranty.
How to Use
NOTICE: Avoid using no stick cooking sprays as they
may cause the cooking surface to become tacky. In
addition, use heat-resistant nylon, silicone, wooden, or
rubber utensils to turn, stir, or remove food when not
using the steam/fry basket. Do not use metal utensils as
they may scratch the nonstick surface.
1. Place appliance on a dry, level, heat-resistant surface
away from the wall and the edge. Do not let the
cord hang or drape over the edge of the counter or table within reach of children.
Remove the cover from the appliance.
NOTICE: To prevent possible heat damage to your countertop, place a heat-
resistant counter protector, such as aluminum foil, under the appliance; take care
not to place the foil under the legs.
2. Insert the heat control probe into the appliance so the two electrical pins on the
appliance are fully inserted into the heat control. Then attach the magnetic cord
to the heat control by aligning the magnetic plug end with the two electrical pins
located on the back of the heat control (Fig. E).
Due to the fact that the magnetic plug end is polarized, it is intended to be
attached to the heat control only one way. The printed patent information on
the plug end should be facing up. The daisy and cautionary language should be
facing the counter. When properly aligned and positioned correctly, the plug end
will magnetically attach itself to the heat control.
IMPORTANT: The magnetic cord was designed to detach easily from the heat
control. As a result, if it is bumped or touched during use, it could detach and
cause the appliance to stop heating. Avoid contact with magnetic cord during
operation. If contact occurs, verify that the magnetic cord is still properly connected to the heat control.
3. Using the index below, determine the type of cooking method desired and turn to the referenced page.
4. Plug the appliance into a 120VAC electrical outlet only. Preheat appliance as indicated by the cooking method and follow the
cooking instructions. During cooking, the indicator light will turn on and off indicating temperature is being maintained.
NOTE: Occasionally you may hear a pop or clicking sound while the appliance is preheating. This is normal and a sign of fast
heatup.Youmayalsonoticethissoundastheunitcoolsdown.Whenusingtheapplianceforthersttime,aslightodororlight
smoking may occur as manufacturing residue evaporates. This is normal.
5. When cooking is complete, turn heat control to OFF. Remove plug from wall outlet and then remove magnetic plug end from the
heat control. Allow to cool completely before removing the heat control from appliance and before cleaning.
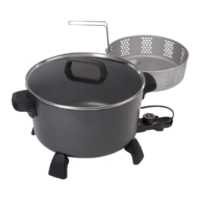
Cooking Methods
Your Kitchen Kettle
®
deep fryer/multi-cooker/steamer is truly versatile as you can prepare soups and stews, steam vegetables and
seafood,andevendeepfryinit.Becausethisappliancedoessomanythings,thisbookrstprovidesageneraloverviewofhowto
use,clean,andcareforitandthenspecicsectionsonthevariouscookingmethodsavailabletoyou.Detailedinstructionsandrecipes
can be found on the pages indicated below:
Cooking Method Page Cooking Method Pages Cooking Method Pages
Boil (pasta and rice) 7 Deep Fry 7–9 Steam(vegetablesandsh) 6–7
Braise (meat and poultry) 6 Simmer (soups and stews) 4–6
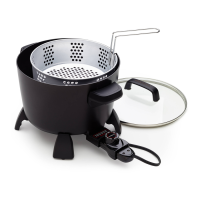
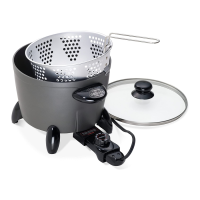
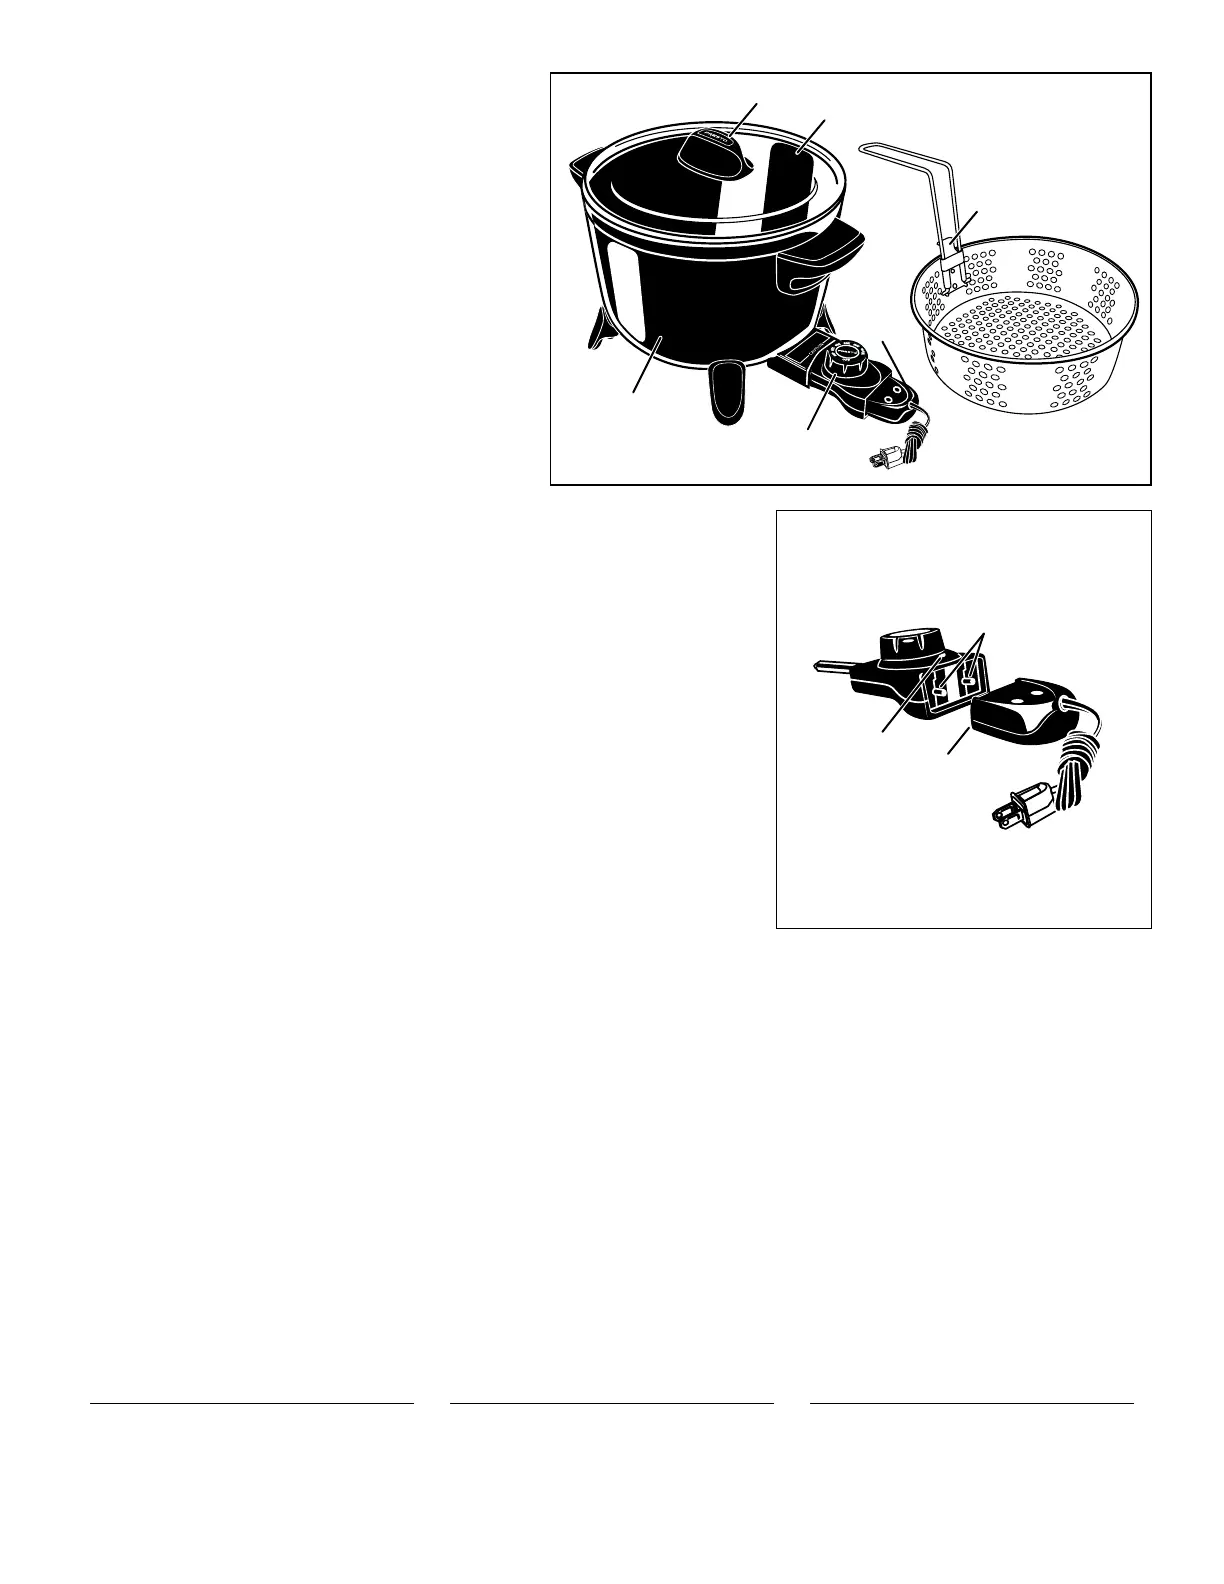
Fig. E
Probe
Indicator light
Heat selector
Magnetic cord
Heat control
Magnetic
plug end
Electrical
pins
To assure the continued accuracy of the Control Master
®
heat control, avoid rough handling during use and storage.
Store it in a clean, dry location away from metal objects.
Always check the magnetic plug end of the cord before use
to assure metal items have not become attached.
Control Master
®
heat control
Control Master
®
heat control
Basket handle
Steam/fry basket
Tempered glass cover
Nonstick surface
inside and out
Magnetic
cord
Cover knob
Fig. D
Steaming/draining hook
 Loading...