3
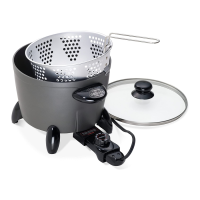
3. Next, place one of the pegs in one of the upper peg holes. Then squeeze the
handle bars together and fit the opposite peg in the other peg hole (Fig. F).
4. While continuing to squeeze the handle bars together and keeping the pegs in the
holes, rotate the handle towards the basket rim, allowing the handle bars to snap
into the tabs on the basket bracket (Fig. F). The handle is now in the locked posi-
tion for deep frying and blanching.
Handle/Basket Assembly for Steaming
To attach the handle to the basket for steaming, follow these steps:
1. Refer to the basket handle position in Fig. B, page 2. Hold the basket in one
hand and the basket handle in your other hand. You will be placing the pegs,
which are at the ends of the two basket handle bars, into the two lower holes
(identified as STEAM) in the basket bracket (Fig. G).
2. While holding the pegs near the lower (STEAM) peg holes, squeeze the handle
bars together and position the pegs in the lower holes on the bracket (Fig. H).
3. While continuing to squeeze the handle bars together and keeping the pegs in the
holes, rotate the handle towards the basket rim, allowing the handle bars to snap
into the tabs on the basket bracket. The handle is now in the locked position for
steaming.
How To Use
Before initial use, and after each subsequent use, wash appliance in dishwasher or
in hot, soapy water, rinse, and dry. Do not immerse heat control or magnetic cord
assembly in water or let them come in contact with any liquid.
1. Place multi-cooker on a dry, level, heat resistant surface. The cover should not be
on the multi-cooker.
CAUTION: To avoid personal injury, position multi-cooker well back from edge of counter or table.
Do not let cord hang or drape over edge of counter or table within reach of children.
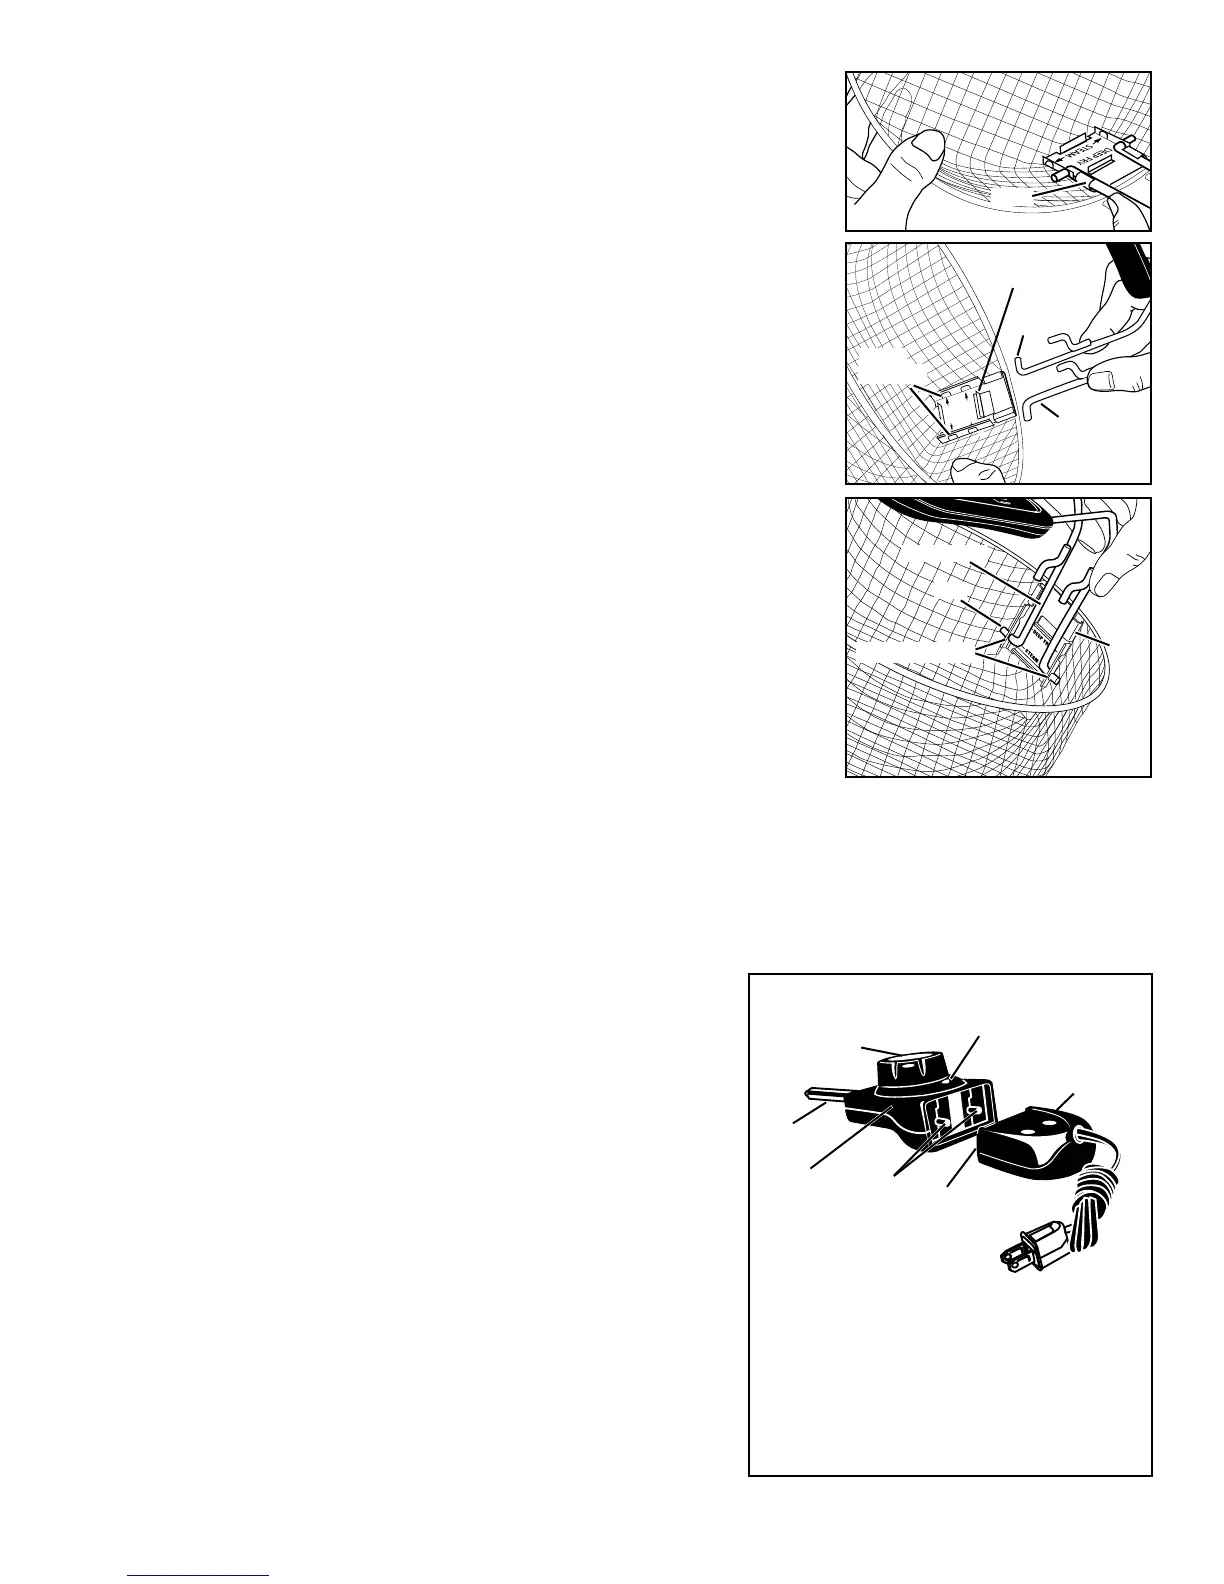
2. Insert the probe end of the heat control into the multi-cooker so the two electrical pins on the appliance are fully
inserted into the heat control. Then attach the magnetic cord assembly to the heat control by aligning the magnetic
coupler end with the two electrical pins located on the back of the heat control (Fig. I). Due to the fact that the mag-
netic coupler end is polarized, it can only be attached to the heat control one way. When properly aligned, the plug
will magnetically attach itself to the heat control. Attach the cord so
that the printed patent information on the magnetic plug is facing up.
The daisy and cautionary language will be facing towards the counter.
If positioned upside down, it will not attach.
Important: The magnetic cord was designed to detach easily from
the multi-cooker. As a result, if it is bumped or touched during
use it could possibly detach causing the unit to stop heating. Avoid
contact with cord during operation. If contact occurs, verify that
the cord is still properly connected.
3. Plug the multi-cooker into a 120v AC electrical polarized outlet only.
4. Using the index on page 4, determine the type of cooking method
you will be following. Turn to the referenced page and assemble any
necessary parts.
5. Preheat multi-cooker as indicated in the cooking method and follow
the cooking instructions. During cooking, the pilot light will go on
and off indicating temperature is being maintained.
Note: When using the multi-cooker for the first time, a slight odor or
light smoking may occur as manufacturing residue evaporates. This is
normal during initial use.
Fig. F
Tabs
Fig. G
Pegs
Basket
handle bars
Basket bracket
Steam
peg holes
Handle bars
Pegs
Steam peg holes
Fig. H
Tabs
Probe
Pilot light
Heat selector
Magnetic cord
assembly
Heat
control
Magnetic
coupler end
Electrical
pins
Control Master
heat control
Fig. I
To assure the continued accuracy of the
Control Master
heat control, avoid rough
handling during use and storage. Store
the cord assembly in a clean, dry location
away from metal objects. Always check the
magnetic coupler end before use to assure
metal items have not become attached.
 Loading...