Page 7
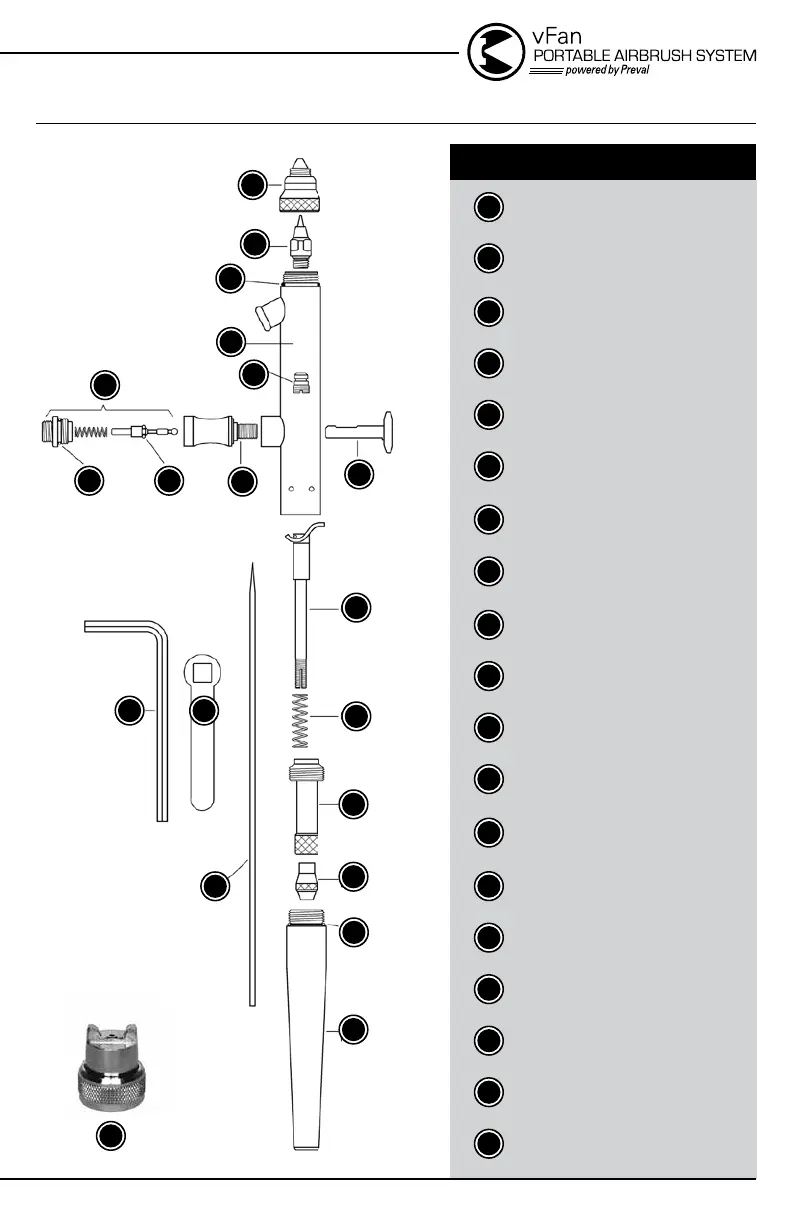
NO. PART
Fan Aircap
sku 0956
Standard Aircap
sku 0957
Fluid Tip
sku 0958
“O” Ring
sku 0903
Shell Assembly
sku 0
Packing Assembly PTFE
sku 0906
Trigger
sku 0915
Rocker Assembly
sku 0908
Needle Spring
sku 0902
Spring Housing
sku 0907
Needle Locknut
sku 0909
Handle
sku 0945
Valve Casing
sku 0910
Air Valve Assembly
“O” Ring
sku 0914
“O” Ring
sku 0911
.66 mm Needle
sku 0959
Wrench
sku 0912
Allen Wrench
sku 0913
DIAGRAM OF THE vFAN AIRBRUSH (ILLUSTRATION A)
1
2
2
3
3
4
4
4
5
5
6
6
7
7
8
8
9
9
10
10
11
11
12
12
13
13
14
14
15
15
16
16
17
17
18
18
19
19
1
AIRBRUSH OPERATION:
1. Press down on the trigger to control air and pull back on the trigger to control
quantity of paint flow. See video at: tinyurl.com/vfan-howtopaint
2. The airbrush comes with a fan aircap. Test spray on a piece of scrap. Hold
the airbrush 6" away from the surface to achieve a 3" fan pattern.
See video at: tinyurl.com/vfan-fanaircap
3. Switching aircap is as easy as screwing the fan aircap off and replacing it with
the standard aircap. Make sure there is a snug fit and there are no air leaks.
See video at: tinyurl.com/vfan-precisionaircap
4. Speed of movement controls density of color and fading effects at beginning
and end of strokes.
5. For fine detail, hold the airbrush very close to the surface, push down for air
and pull back very slowly on the trigger to release a small amount of paint.
See video at: tinyurl.com/vfan-hairlinespray
6. For background work and broad effects, hold the airbrush away from the work
surface and pull back on trigger to release required amount of color.
7. For stippling, remove the aircap, push down on the trigger and pump the
trigger forward and back. Adjust the air pressure to between 15 and 65 PSI
for desired stipple effect.
8. For cleaning and replacing parts see full disassembly at:
tinyurl.com/vfan-disassemble
9. For more information visit www.preval.com and visit the FAQ section.