Quick Hook Up Guide and
Patient Check List
Attach the electrodes
© 2017 Preventice Solutions or its affiliates. All rights reserved.
Preventice Services, LLC and Preventice Technologies, Inc. are wholly owned subsidiaries of Preventice Solutions, Inc.
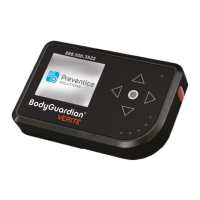
Activating the monitor
2
Caution: U.S. Federal law restricts this device to sale by or on the order of a physician.
1. Attach the black wire aligned with the left side of your neck, two nger
widths below the left collarbone.
2. Attach the red wire below and to the left of the black wire, under the
breast and to the outer ribcage (bone part of the ribs).
3. Attach the white wire aligned with the right side of your neck, two nger
widths below the right collarbone.
4. Lastly, attach the green wire below and to the right of the white wire,
under the breast and to the outer ribcage (bone part of the ribs).
All leads should be put on BEFORE the plastic PULL Tab is removed from the
monitor. The order of lead placement is important and should be done in the
correct order every time the leads are attached.
1 2 3 4
1
Once all four leads are properly connected, sit down and remove the PULL
Tab from the monitor. Remain still for the rst 60 seconds.
You will hear a ring tone to conrm the monitor is powered on correctly.
The monitor will automatically proceed to the “Monitoring” screen.
LEFT RIGHT