3 - Operating Instructions
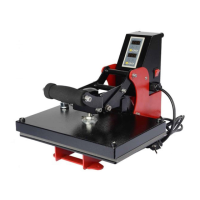
3.1 Introduction to the control panel
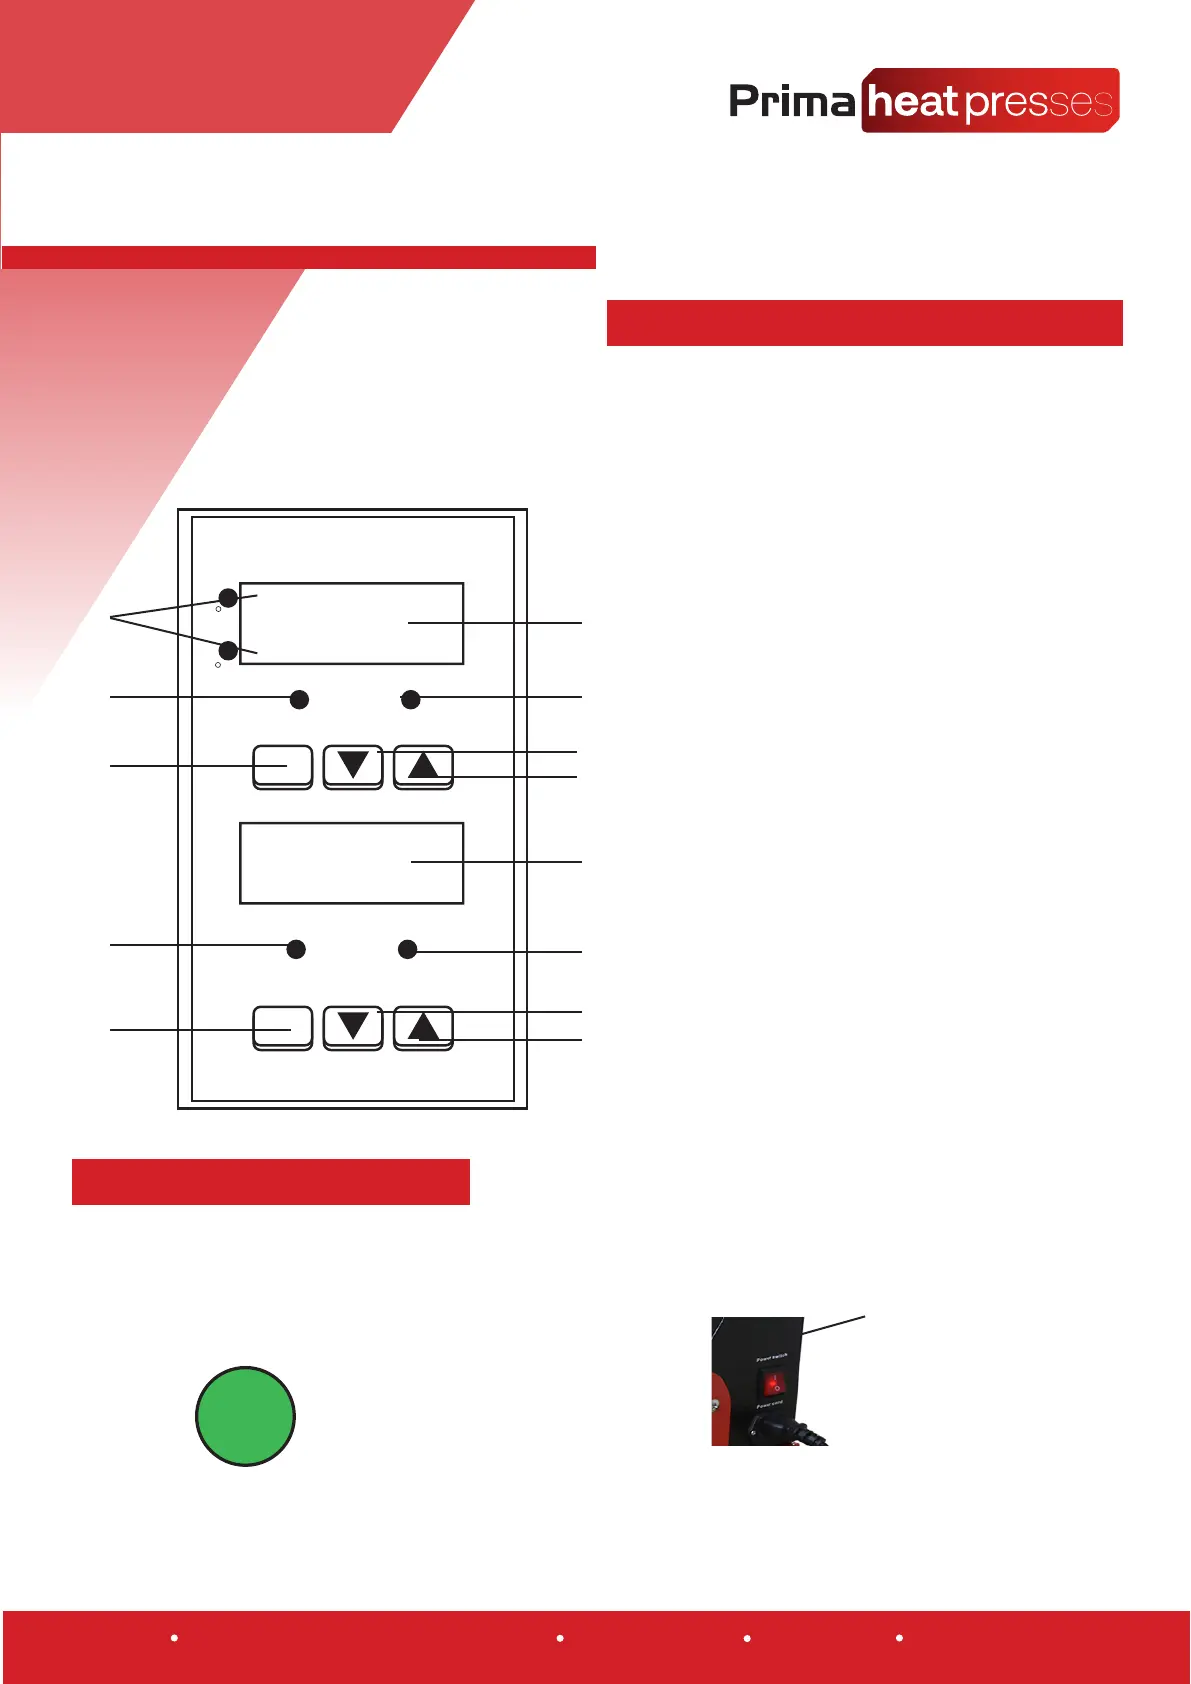
3.2 Power ON the heat press
1. Temperature Option Selection
2. SETIEM LED (illuminated when the
temperature is being set)
3. Temperature SET Button
4. Temperature Display
5. OUT LED (illuminated when the
heat element is on)
6. Temperature DOWN Button
7. Temperature OUT Button
8. AT/ALM LED (illuminated when the
press is in operaon and the mer is counng)
9.Time DOWN Button
10. Time UP Button
11SETTIM LED (illuminated when the
me is being set)
12. Time SET Button
Power Button
Below is a diagram of the control panel of your heat press, from here you will control all the
functions of your press.
1
4
5
6
7
7
8
9
10
11
12
2
3
SET
SET
Temperature
Time
C
F
S
SETTEM
SETITM
NTIF - 2000
AT/ALM
OUT
8888
8888
When the press is powered on the power switch on the
side of the machine will be illuminated and the control
panel will power on.
The heang element will begin to heat up immediately.
INFORMATION!
1. Connect your heat press to mains power using the power cable provided.
2. The press can now be turned on using the main power
button located on the side of the press.
Warehouse 3, Browns of Carlisle, Carlisle, Cumbria, CA5 6LF www.primaheatpresses.com +44 (0) 01228 712128 VAT No. GB944407715
 Loading...