ASSEMBLY DIAGRAM 6 USE A PARTNER TO HELP WITH THIS STEP
REMEMBER: Only hand tighten all nuts and bolts until whole machine is assembled
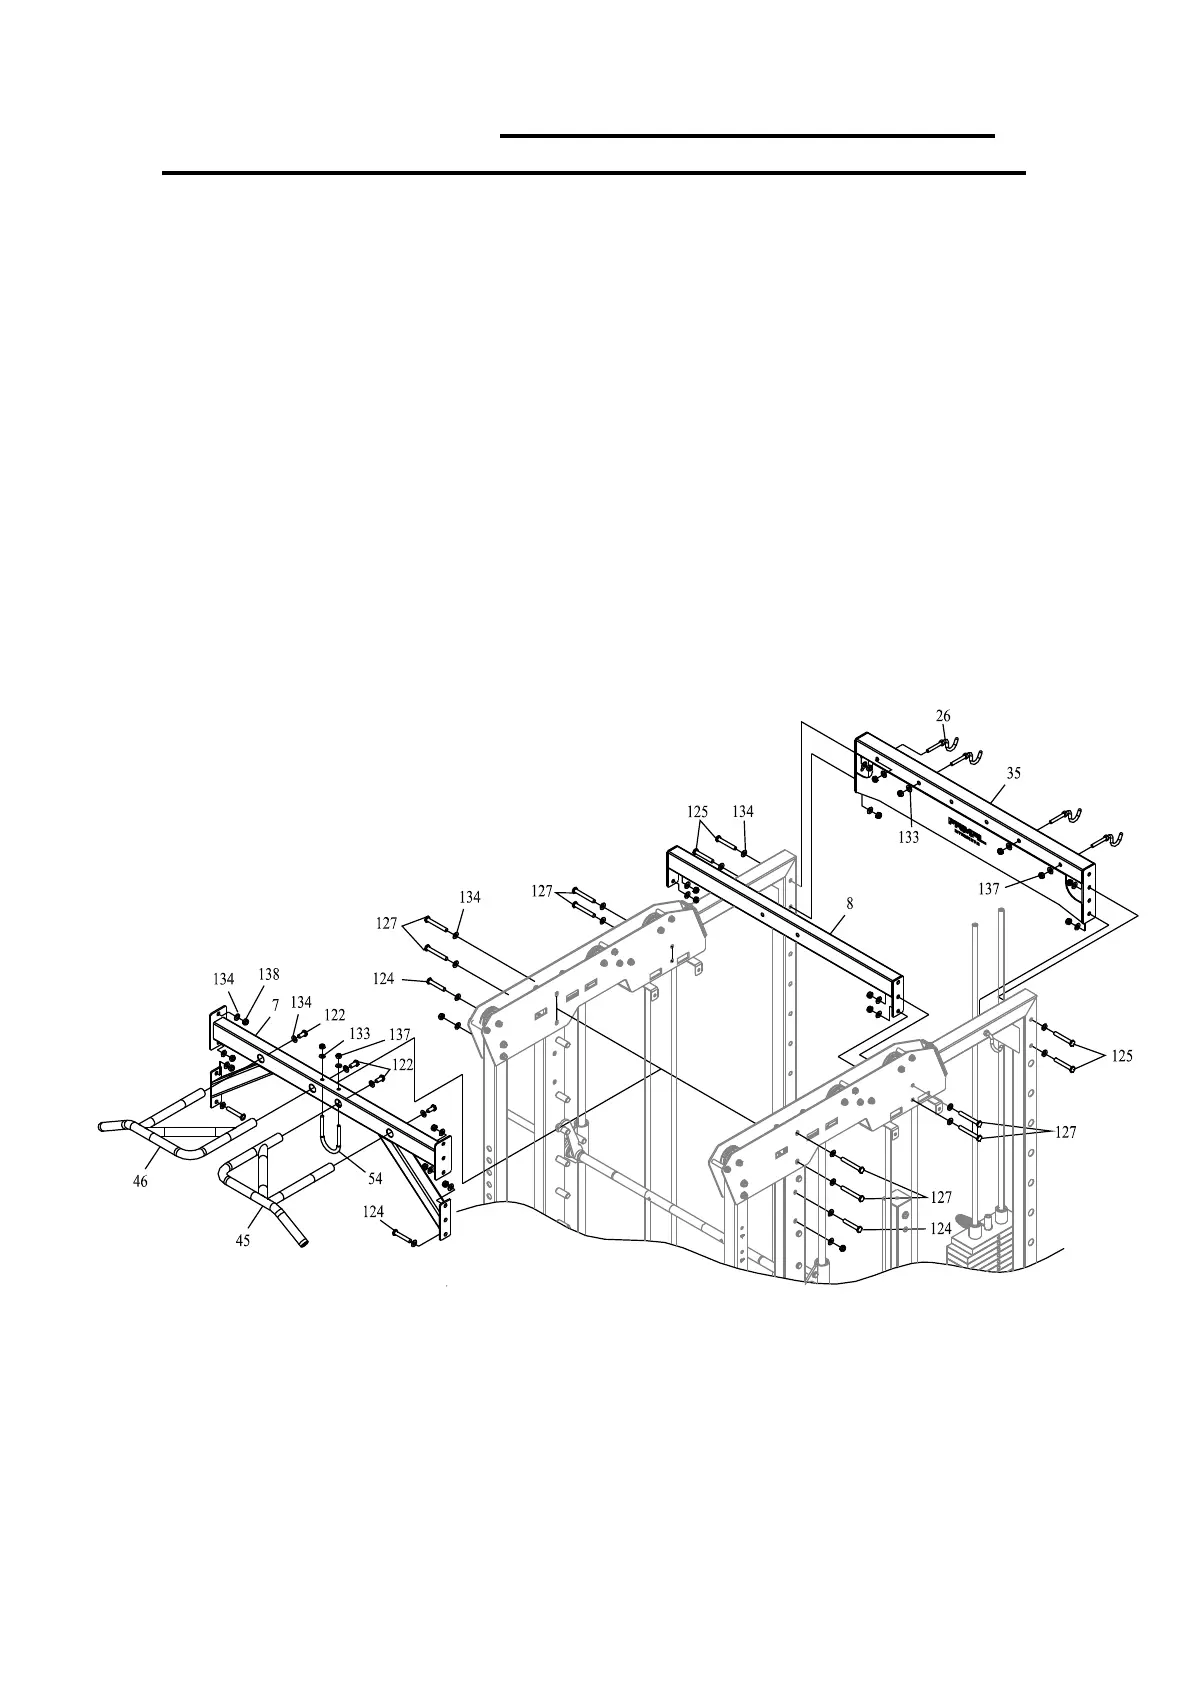
1. Attach REAR TOP CONNECTION (35) to REAR UPRIGHT (23) with BOLT M12*80 (125),
WASHER12(134)andLOCKNUTM12(138).
2. AttachMIDDLECROSSFRAME(8)toTOPFRAME(6)withBOLTM12*90(127),WASHER12
(134)andLOCKNUTM12(138).
3. Attach RIGHT&LEFT HANDLE (45&46) to TOP
CROSS FRAME (7) with BOLT M12*25 (122)
andWASHER12(134).
4. Attach UHOOK(54) to TOP CROSSFRAME (7) withWASHER 10(133)andLOCK NUTM10
(137).
5. Attach TOP CROSS FRAME (7) to TOP FRAME (6) and REAR SLIDE FRAME (5) with BOLT
M12*90(127),BOLT
M12*70(124),WASHER12(134)andLOCKNUTM12(138).
6. AttachHOOK(26)toREARTOPCONNECTION(35)withLOCKNUTM10(137)andWASHER
10(133).
 Loading...