Menu: SET (Setup)
SET 4
4
4
4
4
2
3
2
3
SET 4
4
Calibration
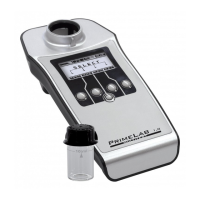
Because of the innovative PrimeLab technology, especially in conjunction
with the JENCOLOR MultiColour sensor, it is no longer necessary to return
the photometer for calibration. The precision of the sensor is so good that
the strength of the light source (LED) is measured and the system is
calibrated on basis of the calculated value. Calibration should be carried
out on a regular basis (e.g. at least 2 weekly) to ensure accurate test
results at all times.
In start menu press button 4 to access the SETUP menu.
In setup list scroll up with button 2 and down with button 3 until
“Calibration” appears in white on black.
Press button 4.
Select calibration procedures to be carried out by scrolling with keys 2 and
3 by the following list:
PrimeLab
Turbidity adapter
PTSA adapter
Fluorescein adapter
The calibration procedures ending on "adapter" are only needed for
parameter-IDs 111 (PTSA) / 112 (Turbidity -NTU-) and 113 (Fluorescein).
For all other parameter-IDs, first calcibration option "PrimeLab" is
applicable.
Press button 4 to confirm your selection.
If you select “PrimeLab“:
The procedure described below is also shown on the display (3 steps)
and can be read in its entirety by scrolling up and down with button 2
and button 3.
Calibration is initiated by pressing button 4 and should only be
started after the steps described on the display / in the following
description have been taken!
If there is a cuvette inside the device, please remove it.
Place the “Light protection sleeve for 16 mm cuvette” in the (empty / with
no cuvette inserted) sample chamber (align with ^ symbol!).
Press button 4 to start the calibration procedure.
The calibration procedure takes no longer than 10 seconds and is
confirmed with the message “Calibration successful”.
Press button 4 again to save the calibration value in the system and return
to the sub-menu “SETUP”.
Continued...
Light shield
for 16mm
Cuvette
 Loading...