This document is the user manual for the Primera PR608MSX Built-In Electric Oven. It provides detailed instructions for operation, installation, maintenance, and safety.
Function Description
The Primera PR608MSX oven offers a variety of cooking functions, each designed for specific culinary needs:
- Oven Lamp: Illuminates the oven interior, allowing users to monitor cooking progress without opening the door.
- Defrost: Utilizes air circulation at room temperature to quickly thaw frozen food without heat. This is suitable for ready-made dishes and cream-filled products.
- Bottom Heat: A concealed element at the bottom provides concentrated heat to the base of food, ideal for slow-cooked dishes like casseroles, stews, pastries, and pizzas requiring a crispy base. The temperature range is 60-120°C, with a default of 60°C.
- Convectional Cooking: Both heating elements work to provide convectional cooking. The oven needs to be pre-heated, and it's ideal for single items such as large cakes. Best results are achieved by placing food in the center. The temperature range is 50-250°C, with a default of 220°C.
- Conventional with Fan: Combines the fan with both heating elements for more even heat penetration, saving 30-40% energy. Dishes are lightly browned on the outside and remain moist inside. This function is suitable for grilling or roasting large pieces of meat at higher temperatures. The temperature range is 50-250°C, with a default of 220°C.
- Double Grilling with Motor Fan: The inside radiant element and top element work with the motor fan. The temperature range is 180-240°C, with a default of 210°C.
- Double Grilling: The inside radiant element and top element work with the fan. The temperature range is 180-240°C, with a default of 210°C.
- Fan Forced: An element around the convection fan provides additional heat, improving air circulation and creating even heat for cooking. The temperature range is 50-240°C, with a default of 180°C.
- Radiant Grilling: The infrared elements are working. The temperature range is 180-240°C, with a default of 210°C.
Usage Features
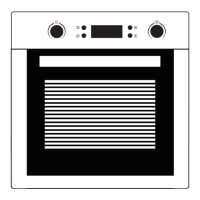
The oven features a user-friendly interface with two rotary knobs (K1 and K2) and several buttons for setting functions, time, and temperature.
- Clock Setting: After connecting to power, the display shows "0:00". Users can set the 24-hour clock by pressing the time button, rotating K2 for hours (0-23) and minutes (0-59), and then pressing the time button again to confirm. The clock must be set for the oven to function.
- Function Setting: To select a cooking function, rotate K1. The corresponding indicator will illuminate. Rotate K2 to adjust the temperature. Press the start button to confirm and begin cooking. If temperature adjustment is skipped, the default temperature will be used. Cooking time can also be adjusted using K1 during cooking, followed by pressing the start button.
- Lamp Setting: Select the relevant function with K1, then press the start button. The lamp icon will illuminate.
- Inquiring Function: During cooking, users can check the current time by pressing the time button. If the clock was set, pressing the remind button will display the current time.
- Child Lock Function: To activate, press the remind and stop buttons simultaneously for 3 seconds. A long beep will sound, and the child lock icon will illuminate. To deactivate, repeat the process.
- Reminder Function: The oven has a 9-hour reminder. In standby mode with the clock set, users can set a reminder to start cooking. Press the reminder setting button, rotate K2 for hour and minute, then press the confirm button. The oven buzzer will sound 10 times at the set time, and the reminder symbol will disappear.
- Start/Pause/Cancel Function: Press the start button to begin cooking or resume a paused program. Press the stop button once to pause and twice to cancel cooking.
- Energy-Saving Function: In waiting or reminding states, pressing the confirm button for 3 seconds will turn off the LED display and activate energy-saving mode. The display also turns off after 10 minutes of inactivity in waiting state. Any key press or encoder rotation will exit energy-saving mode.
Important Technical Specifications
- Power Supply: The appliance must be installed by an authorized technician and connected to the electrical supply by an accessible switch or plug that ensures all-pole disconnection.
- Heat Resistance: Kitchen unit panels next to the oven must be made of heat-resistant material, and glues for veneered wood units must withstand at least 120°C.
- Ventilation: Adequate ventilation is crucial. The back of the kitchen unit should be removed, and the hob must have a rear gap of at least 45 mm.
- Oven Lamp: A special bulb with high temperature resistance (240V~25W).
Maintenance Features
Regular cleaning and maintenance are essential for the oven's appearance and reliability.
- General Cleaning: Disconnect power before any maintenance. Ensure all controls are in the OFF position. Wait until the oven is slightly warm for easier cleaning. Clean surfaces with a damp cloth, soft brush, or fine sponge, then wipe dry. For heavy soiling, use hot water with a non-abrasive cleaning product.
- Glass Cleaning: Do not use harsh abrasive cleaners or sharp metal scrapers on the oven door glass, as this can scratch and damage the surface.
- Stainless Steel Parts: Avoid leaving acidic substances (lemon juice, vinegar) on stainless steel parts.
- High-Pressure Cleaners: Do not use high-pressure cleaners for cleaning the unit.
- Baking Pans: May be washed in mild detergent.
- Removable Parts:
- Slider Brackets: Shelf support rails on the sides of the oven can be removed for cleaning oven walls.
- Oven Door: The oven door is removable. To remove, open the door fully, stir the toggle cover of the hinges, then close the door until it touches the toggle cover. Hold the sides of the door, raise it 2-3mm vertically, and turn it to remove from the hinge sockets.
- Inner Glass: The inner glass is also removable for cleaning. Pull the inner glass downward while pressing on the outer glass to release the clip spring.
- Middle Glass: The oven may have one or two layers of middle glass. These can be removed by following specific steps involving pulling and pressing to release them from the door bracket and rubber bumper. After cleaning, reassemble the middle glass layers and ensure bumpers are correctly positioned.
- Bulb Replacement: Disconnect power. Unscrew the covering glass, replace the bulb with a new one of the same type, and screw the covering glass back in place.
Safety Hints
- Always wear appropriate footwear when using the oven.
- Do not touch the oven with wet or damp hands or feet.
- Avoid opening the oven door frequently during cooking.
- The appliance must be installed by an authorized technician. The producer is not responsible for damage caused by defective placement or unauthorized installation.
- Do not place anything on the oven door or drawer when open, as this may unbalance the appliance or break the door.
- Allow hot parts of the appliance to cool down before touching them directly.
- Unplug the appliance if it will not be used for a long time.
- If the supply cord is damaged, it must be replaced by the manufacturer, its service agent, or similarly qualified persons.
- Remove all accessories and excess spillage before cleaning.
- A steam cleaner is not to be used.
- The appliance and its accessible parts become hot during use. Keep young children away and avoid touching heating elements.
- Cleaning and user maintenance should not be performed by children without supervision.
- Do not allow children near the oven when it is operating, especially when the grill is on.
- Ensure the appliance is switched off before replacing the oven lamp to avoid electric shock.
- The means for disconnection must be incorporated in the fixed wiring.
- Children should be supervised to ensure they do not play with the appliance.
- This appliance is not intended for use by persons with reduced physical, sensory, or mental capabilities, or lack of experience and knowledge, unless supervised or instructed by a responsible person.
Declaration of Compliance
Upon unpacking, inspect the oven for damage. If in doubt, contact a professionally qualified person. Keep packing materials (plastic bags, polystyrene, nails) out of reach of children. The appliance is marked according to European directive 2002/96/EC on Waste Electrical and Electronic Equipment (WEEE), indicating it should not be treated as household waste. It must be handed over to an applicable collection point for recycling.