THERMOSIPHONIC SOLAR WATER HEATERS / TECHNICAL DOCUMENTATION / JANUARY 2021 PAGE
18
VI) INSTALLATION OF SYSTEM ON INCLINED ROOF [All systems]
CAUTION: Check the capacity of the roof structure to bear the solar heater load in operation with the
constructor of the building or contact the local authorities.
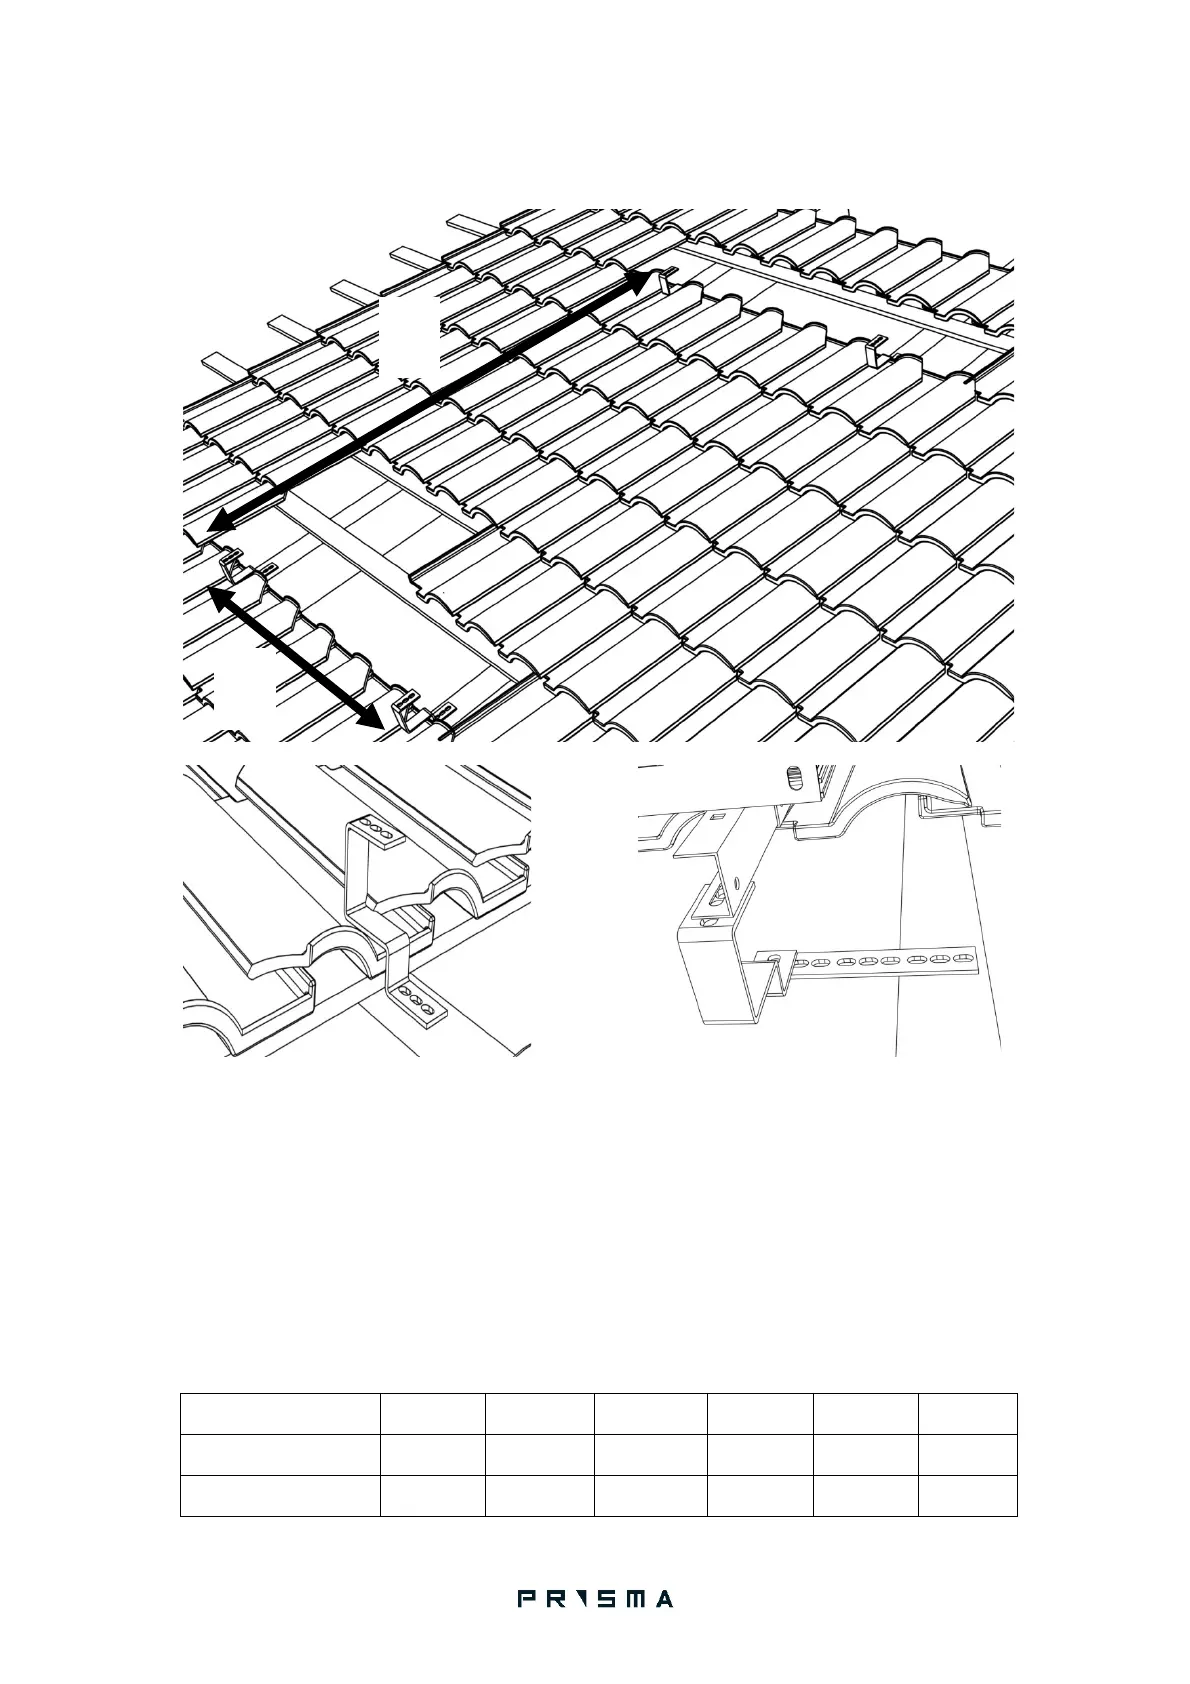
STEP 1
Uncover the roof tiles at the lowest and the highest part of the area where the thermosiphonic system
will be installed. Install the 4 AGG brackets (or the AT – triangular type or the AR – special screw, if
needed) on the vertical, load bearing beams with appropriate screws, as shown on the drawing above.
Make sure that the distances A and B between any of the top holes on each bracket are set according
to Table 2. You may take advantage of the fact that there are 3 holes on the top of each bracket to
accommodate for different tile sizes. In case the AGG brackets do not coincide with the roof beams,
use the additional 20 cm extension piece for AGG brackets [right drawing].
TABLE 2
DIMENSION 160/2 160/2.5 200/2.5 200/4 300/4 300/5
A
2000 2400 2400 2000 2000 2400
B
1600 1994 1994 1600 1600 1994
 Loading...