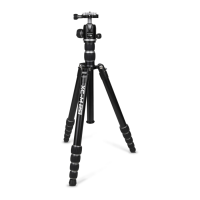
MD Plate
MD Plate front view
MD Plate back view
MD Clamp
(sold separately)
Yoke Port
(1/4” - 20 thread)
Figure 7
QR Plate
(top view)
QR Plate
(bottom view)
Mounting Bolt
(1/4” - 20 thread)
Mounting Bolt
(4mm hex)
Bail
Safety Bolts
(2.5mm)
Strap Slot
TIPS FOR BEST OPERATION
1) LEAVE ROOM FOR YOUR OWN LEGS
Unless specic terrain dictates otherwise you should set up your tripod with one leg angled away from you and
the other two legs directed to your left and right. This gives you room to stand and work with your camera with
less chance of tripping on the tripod.
2) EXTEND THE THICKEST LEG SECTIONS FIRST
When you are using the XC-M tripod without all 5 leg sections fully extended be sure to use the largest legs
rst and avoid using the thinner leg sections unless necessary. In other words, work your way down from the
top of each leg. Using the largest leg sections provides the greatest amount of stability because their larger
diameter leg locks have more surface area to provide the maximum amount of grip and, therefore, stability.
Extending the top sections rst also keeps the rest of the unused sections at the bottom of each leg, closest to
the ground. This forces more of the tripod’s weight into a lower position which lowers its center of gravity.
3) EXTEND THE COLUMN LAST
Always use the extendable legs to achieve your desired working height rst. Do not extend the column
unless the legs are already fully extended and you need additional height. This creates the most stability and
steadiness to your tripod setup.
4) KEEP THE YOKE LEVEL
Notice the Bullseye Level built into the Yoke of your XC-M tripod. This is a valuable tool. Before leveling the ball
head and camera you should rst do your best to make the Yoke of the tripod level during its initial setup. Use
the XC-M’s independent leg angle adjustments as well as the independently extendable legs to achieve this. It
will ensure maximum stability before you mount your camera to the ball head.
Warning: If the yoke of the tripod is not set up level you risk having the tripod (and your camera) falling over.
5) USE THE WEIGHT HOOK
XC-M tripods are designed to be as lightweight and compact as possible for easy travel and transport. But less
weight can reduce stability. Get into the habit of adding weight to your tripod using its built-in, retractable
Weight Hook. This can add stability for steadier photographs and reduce the chance of accidentally knocking
over your tripod and camera.
6) DON’T FOLD THE LEGS TRANSVERSE-STYLE WHEN IN THE FIELD
Lighting conditions can change rapidly when photographing outdoors. Being able to set up your tripod quick-
ly can ensure you get a great shot before conditions change. To help achieve this we recommend you avoid
folding your XC-M into its compact, transverse position when you are working in the el. The compact position
is great for storage and transport but when you are working consider simply folding the legs in as you would
with a typical non-transverse style tripod. This will let you unfold and set up the XC-M much faster.
7) TURN OFF CAMERA AND LENS STABILIZATION
Many cameras and lenses have built in stabilizing features. Stabilization is great for hand-held photography.
However, some of these stabilizing systems can fail when your camera is absolutely still because the stabilizer is
“looking” for motion to counteract. This means it can actually work against you and create a blurry photograph.
We recommend you refer to information from your camera and lens manufacturer(s) to learn about your
particular stabilizing system and nd out if it should be turned OFF when using a tripod.
 Loading...