Figure 5
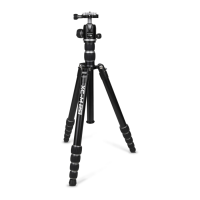
XC-M shown in it Monopod State
Each of the 3 XC-M legs can be
detached
OPERATING THE BALL HEAD
Your XC-M tripod kits includes a precision, machined, aluminum Ball Head. It is a double-action design,
meaning there is a separate control for ball tension and another for panning. Each of these are explained
below. This Ball Head also uses two safety bolts to prevent accidental dropping of your camera. This feature
is explained in more detail in the next section titled “Attaching Your Camera”.
All of the knobs on this ball head are covered in a soft, grippy material. These covers protect your ngers
from direct contact with metal (particularly helpful in extremely cold weather). Their pattern and grip give
you a secure hold on each control for a positive, direct feel when using each knob.
1) PANNING
The XC-M Ball Head has an independent base panning control along with a Laser-Engraved Scale around the
panning base for precise rotational movements. Loosen the Panning Knob and you can rotate the entire
head around its bases 360 degrees.
2) USING TENSION AND THE MEMORY LOCK
The large knob on the XC-M ball head is the Tension Knob. Inside of the Tension Knob is a Memory Lock,
which is a 3-point dial on the face of the Tension Knob. Before using the Tension Knob, turn the Memory Lock
counterclockwise until it stops. This is the Memory Lock’s reset position. Now you can use the Tension Knob to
loosen and tighten the ball joint within the head. Turn it counterclockwise to reduce the tension or clockwise
to increase the tension. You can use the Ball Joint to move the camera around, including into a vertical posi-
tion by placing the Neck of the Ball Joint into the U-shaped slot.
The Memory Lock is a special feature that allows you to set the minimum tension for the Ball Joint. This is
handy when using a heavier camera and/or long lens which create a lot of leverage against the head. When
this happens, you may not want to completely loosen the Tension Knob for fear of the camera and lens “drop-
ping” on the head too quickly and risking damage. Using the Memory Lock is easy. Start by ensuring the lock
is at its reset position by turning it counterclockwise until it stops. Tighten the Tension Knob by turning it
clockwise. Mount your camera and lens and while holding the camera slowly loosen the Tension Knob by
turning it counterclockwise. When you feel the tension on the ball joint is low enough to allow proper camera
movements at the Ball Joint but still tight enough to prevent the camera from moving too rapidly or dropping
on the ball head, turn the Memory Lock clockwise until it stops. You do not need to apply a lot of pressure to
the Memory Lock. Be sure you do not overtighten it or it will not function properly. Just turn it until it stops.
With the Memory Lock set you can now move the Tension Knob between this minimum tension stop and full
tension quickly and easily without risk of making the ball head too loose for the weight of your camera rig.
Tip: Practice using the Memory Lock function rst without a camera. Once you have mastered its use try it with a
camera, after reading the section “Attaching your Camera” in this guide.
3) USING THE LEVELS
Your XC-MH Ball head has 3 levels. There are two Line Levels on the side, near the top and there is a Bullseye
Level built into the QR Release Knob (see gure 6). The Line Levels are helpful when the camera is in either a
horizontal or vertical position. The Bullseye Level is useful when the camera is in a vertical position and this
level is facing up. Use these levels as compositional aids.
 Loading...