EasyManua.ls Logo

Pro-Peak 2500VPG2 - User Manual

Default Icon
2 pages
Print Icon
To Next Page IconTo Next Page
Loading...
PRO-PEAK 2500VPG2 AC/DC Delta Peak Charger Item No. O-IP2500VPG2
Dear Customer
Thank you for purchasing this Pro-Peak 2500 VPG2 AC/DC charger, we are sure you will be pleased with its performance. In order to ensure you obtain
the maximum from its operation, please read the following instruction manual carefully. Should there be any aspects of it you do not understand, please
contact your point of purchase or Ripmax customer services for advice
EXTREMELY IMPORTANT - READ BEFORE USING CHARGER - SAFETY PRECAUTIONS
• ThisPro-PeakchargerisNOT suitable for children under 14 years of age.
• ONLY charge rechargeable type Ni-Cad & Ni-MH battery packs. Never charge other
battery types. When quick charging, ONLY charge suitable ‘Quick Charge’ Ni-Cad or
Ni-MH battery packs. DO NOT charge other types of pack.
• DO NOT mix old and new cells or cells of different makes.
• ThechargingofbatteriescreatesHEAT. Both the Pro-Peak charger and the battery pack
will become WARM during charging, this is normal. DO NOT place the charger or battery
pack on any surface that can be affected by heat. Always charge on a heat resistant
surface.
• Alwaysensurethechargerandbatterypackhaveadequateventilationaroundthem.
DO NOT charge in an enclosed space.
• DO NOT cover charger ventilation openings.
• Ifthebatterypackbecomesextremelyhot-untouchable-discontinuechargingimmediately.
The battery pack may be defective. Consult your dealer or Ripmax Customer Service.
• The battery to be charged should be at room temperature before charging. DO NOT
charge a HOT battery pack.
• Allowchargertocooldownfor10minutesafter2consecutivequickcharges.
• ALWAYS follow charging instructions.
• ALWAYS remove battery pack from device (car, boat etc.) before charging.
• NEVER charge batteries inside their device or with the device switched on.
• NEVER charge 2 battery packs in parallel.
• NEVER allow the charger in close proximity to water. If charger becomes wet, leave
overnight in a warm environment to dry. Connection if wet, is life threatening.
• NEVER dismantle charger. Service or repair should only be carried out by authorised
personnel. Contact your dealer or Ripmax for service/repair information.
• Battery and chargershould be monitored whilst charging takes place. DO NOT leave
unobserved (possible risk of fire).
CONNECTIONS OUTPUT CONNECTIONS
The Ripmax Pro-Peak 2500 VP G2 charger has two types of Power Input. Mains AC 220-
240V (50/60Hz) or 12V DC via an alternative power source, such as a battery or 12V output
power supply. These two power inputs allow charging at home or at the place of operation.
Under no circumstances should the two Power Inputs be connected at the same time.
The charger is designed for individual Power Input operation.
MAINS AC 220-240AV CONNECTIONS
• Connectthemainsleadtoawallsocket.
• Turn‘ON’themainswallsocketandthe‘RED’LEDwillflashevery2secondstoindicate
power to the charger, and the charger is ready for use. Turn ‘OFF’.
• Ifthe‘RED’LEDdoesnotflash,thisindicatesthatnopowerisreachingthecharger.Check
the fuse in the mains lead plug. Spare fuses can be purchased from most electrical shops.
Only use a fuse with the correct rating, 250V 3A, otherwise damage may occur to the
charger. This will not be covered under warranty.
DC 12V INPUT CONNECTION
• UsingthetwoCrocodileClipsontheendofthefixedleadexitingattherearofthecharger,
connect the ‘RED’ clip to the Positive (+) connection of the power source (i.e. battery etc.)
and the ‘Black’ clip to the Negative (-) connection.
• Onceconnectedthe‘RED’LEDwillflashevery2secondstoindicatethechargerisready
for use. Under no circumstances reverse the crocodile connections or attempt to connect
the DC crocodile clips to a 220~240v AC 60Hz power source. This will result in serious
damage to the charger, not covered under warranty, and possible electrocution.
• TheProPeak2500VPG2usesstandard4mmgoldbananatypeconnectors.
• Pleaseensureyouconnecttheplugstothechargerusingthecorrectpolarityasshownin
the following diagram.
• Redconnector=Postive(+)
• Blackconnector=Negative(-)
Crocodile Connectors
DC 12V Input
Mains Input
AC 240V 50/60-Hz
Negative (-) Black
Positive (+) Red
Charging
Green LED
(Complete/Finish)
Red LED
(Power / Fast Charge)
Negative (-) Black
Positive (+) Red
Variable Control Knob (Current)
Start
Question and Answer IconNeed help?

Do you have a question about the Pro-Peak 2500VPG2 and is the answer not in the manual?

Summary

Safety Precautions

Battery Compatibility and Handling

Covers battery types (NiCad/NiMH), mixing cells, and handling hot batteries or high temperatures.

Ventilation and Environmental Safety

Ensures proper heat dissipation, avoiding enclosed spaces, and keeping away from water.

General Charging Safety

Includes following instructions, charging outside devices, avoiding parallel charging, and monitoring.

Charger Maintenance and Safety

Advises against dismantling the charger and emphasizes professional service.

Connections

AC Mains Input

Details connecting the charger to a 220-240V AC mains power source.

Output Connections

Explains the use of standard 4mm gold banana connectors for charging.

DC 12 V Input

Describes connecting the charger to a 12V DC power source using crocodile clips.

Operation

Fast Charging Process

Outlines the steps for fast charging, including LED indicators and charge completion.

Stopping Charging

Instructions on how to manually stop the charging process.

Transmitter Charging

Guidance for charging transmitter (Tx) batteries using AC power only.

Alarm and Error Messages

Output Disconnection

Indicates an error if output connections become disconnected during charging.

Low Input Voltage

Describes the error state when the DC input voltage drops too low.

Battery Short Circuit

Detects and responds to a short circuit in the battery being charged.

Reverse Polarity Protection

Reversed Input Polarity

Warns about incorrect DC input polarity and the resulting failure to power on.

Reversed Output Polarity

Explains that reversed output polarity will blow the charger's fuse.

Technical Information

Timer Function

Details the automatic shutdown timer for potentially problematic charging scenarios.

Technical Data Specifications

Provides input/output voltage, current ratings, and supported battery types.

Overview

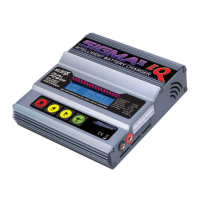
The Pro-Peak 2500VPG2 AC/DC Delta Peak Charger is a versatile charging device designed for rechargeable Ni-Cad and Ni-MH battery packs. It offers both AC and DC power input options, making it suitable for use at home or in the field.

Function Description

The charger's primary function is to provide fast and trickle charging for 4-8 cell (4.8-9.6V) Ni-Cad/Ni-MH battery packs. It features a delta peak detection circuit for automatic shut-off when the battery is fully charged, preventing overcharging. The device also includes a variable control knob for adjusting the charge current, allowing users to select between 1A, 2A, 3A, 4A, and 5A.

For AC operation, the charger connects to a standard wall socket. For DC operation, it uses crocodile clips to connect to a 12V DC power source, such as a battery. The charger is equipped with LED indicators to show its status: a red LED for power/fast charge, and a green LED for complete/finish. A flashing red LED indicates power connected and ready for use, while a continuous green LED signifies trickle charging. During fast charging, both red and green LEDs glow continuously.

The charger also supports trickle charging for transmitter (Tx) batteries when using AC input power. This function is continuous and indicated by a continuously glowing green LED. It is explicitly stated that quick charging of Tx batteries while they are still in the transmitter is not permitted.

Safety features include automatic shutdown after 1 hour during quick charging if the battery is unsuitable or damaged, and continuous beeping alarms for output disconnection, low input voltage, and battery short circuit.

Important Technical Specifications

Input:

  • AC: 220-240V (50/60Hz)
  • DC: 12V

Output:

  • Fast Charge (230V AC 50Hz Input): DC 4.8-9.6V, 3.5A
  • Fast Charge (DC 12V Input): DC 4.8-8.4V, 3.5A
  • Trickle Charge (230V AC 50Hz Input): DC 4.8-9.6V, 130mA
  • Trickle Charge (DC 12V Input): DC 4.8-8.4V, 130mA

Charge Current: 1A, 2A, 3A, 4A, 5A (selectable via variable control knob) Battery Type: Rechargeable Fast Charge Nickel Cadmium (Ni-Cad) or Nickel Metal Hydride (Ni-MH) Cell Count: 4-8 cells (4.8-9.6V) Output Connectors: Standard 4mm gold banana type connectors Fuse: 7.5A (located on the front of the charger, for output polarity protection)

Protection Features:

  • Reverse polarity DC Input
  • Reverse polarity Output (Fused)
  • Thermal Cut-out
  • Security Timer (1-hour automatic shut-off for quick charge)
  • Alarms (for output disconnection, low input voltage, battery short circuit)

Usage Features

General Operation:

  • Power On: Connect to AC mains or DC 12V source. The red LED will flash every 2 seconds, indicating the charger is ready.
  • Battery Connection: Connect the battery to the output charge lead. The flashing red LED will go out, and the continuous green LED will turn on, indicating trickle charging.
  • Fast Charging: Press the START button. A "BLEEP" will be heard, and both the red (fast charge) and green (trickle charge) LEDs will glow continuously. Fast charging commences at the maximum selected rate and adjusts as the charge continues.
  • Automatic Shut-off: The charger automatically shuts off at the end of the charge cycle using delta peak detection.
  • End of Charge Indication: At the end of fast charge, the charger will beep 4 times, repeated 16 times. The red LED will turn off, and the green LED will continue to glow, indicating a return to trickle charging. Pressing the START button again stops the beeping.
  • Stop Charging: Disconnect the battery at any time to stop charging.

AC 220-240V Connections:

  • Connect the mains lead to a wall socket.
  • Ensure the mains wall socket is turned 'ON'.
  • A flashing red LED indicates power to the charger. If the red LED does not flash, check the fuse in the mains lead plug (use a 250V 3A fuse).

DC 12V Input Connection:

  • Connect the red crocodile clip to the positive (+) connection of the power source (e.g., battery) and the black clip to the negative (-) connection.
  • A flashing red LED indicates the charger is ready.
  • Crucially, never reverse the crocodile connections or attempt to connect DC crocodile clips to an AC power source, as this will cause serious damage and potential electrocution.

Safety Precautions:

  • Not suitable for children under 14 years of age.
  • Only charge rechargeable Ni-Cad & Ni-MH battery packs.
  • Do not mix old and new cells or cells of different makes.
  • Batteries and charger will become warm during charging; place on a heat-resistant surface.
  • Ensure adequate ventilation; do not charge in an enclosed space or cover ventilation openings.
  • If a battery pack becomes extremely hot (untouchable), discontinue charging immediately.
  • Charge batteries at room temperature; do not charge hot battery packs.
  • Allow the charger to cool for 10 minutes after 2 consecutive quick charges.
  • Always remove battery packs from devices (car, boat, etc.) before charging.
  • Never charge batteries inside their device or with the device switched on.
  • Never charge 2 battery packs in parallel.
  • Keep the charger away from water. If wet, allow to dry completely before use (connection if wet is life threatening).
  • Monitor battery and charger during charging (possible risk of fire).
  • Under no circumstances should both AC and DC power inputs be connected simultaneously.

Transmitter (Tx) Charging (AC Only):

  • Connect the Tx charge cable to the charger output socket and then to the transmitter's charge socket.
  • The green trickle LED will light continuously, indicating trickle charging.
  • Do not press the START button for Tx charging, as trickle charging is a continuous function.
  • Suggested Tx pack trickle charge times: 500mAh - 5.5hrs, 600mAh - 6.5hrs, 700mAh - 7.5hrs.

Maintenance Features

Alarm/Error Messages:

  • Output Disconnection: If output connections become disconnected, charging stops, and the charger beeps continuously. Press START to stop beeping, reconnect the output lead, and restart the charge cycle.
  • Low Input Voltage: If DC input voltage drops during quick charging, the trickle LED blinks. If the input voltage drops to the output voltage level, the charger perceives an "Error" and beeps continuously.
  • Battery Short Circuit: If the battery voltage is detected as 0 volts 10 seconds after quick charging commences, the charger discontinues quick charging and starts beeping.

Reverse Polarity Connection:

  • Reversed Input Polarity (DC): If DC input polarity is connected incorrectly, the red power LED will not light. Reconnect correctly.
  • Reversed Output Polarity: If the battery is connected with reversed polarity or the charge leads are incorrect, the 7.5A fuse on the front of the charger will blow. Disconnect the battery, replace the fuse, and reconnect the battery with the correct polarity.

Warranty:

  • Pro-Peak chargers are warranted for 90 days from the original date of purchase, verified by a sales receipt.
  • Warranty is void if casing seals are broken (indicating unauthorized opening).
  • For warranty claims, contact your point of purchase or Ripmax Ltd. Chargers sent for warranty repair that operate correctly will incur a service fee.
  • The warranty does not cover: suitability for specific operation, incorrect installation, component wear from use, reverse or incorrect voltage application, misuse, damage due to opening of the unit, replacing of cut or damaged wires and connectors, connection to items not mentioned in instructions, mechanical damage, immersion in water, or any other damage caused by misuse.
  • Warranty liability is limited to repair or replacement of the unit. The supplier's liability is limited to the cost of the unit, as they have no control over product use. By using the product, the user accepts all resulting liability.

Pro-Peak 2500VPG2 Specifications

General IconGeneral
BrandPro-Peak
Model2500VPG2
CategoryBattery Charger
LanguageEnglish

Related product manuals