19
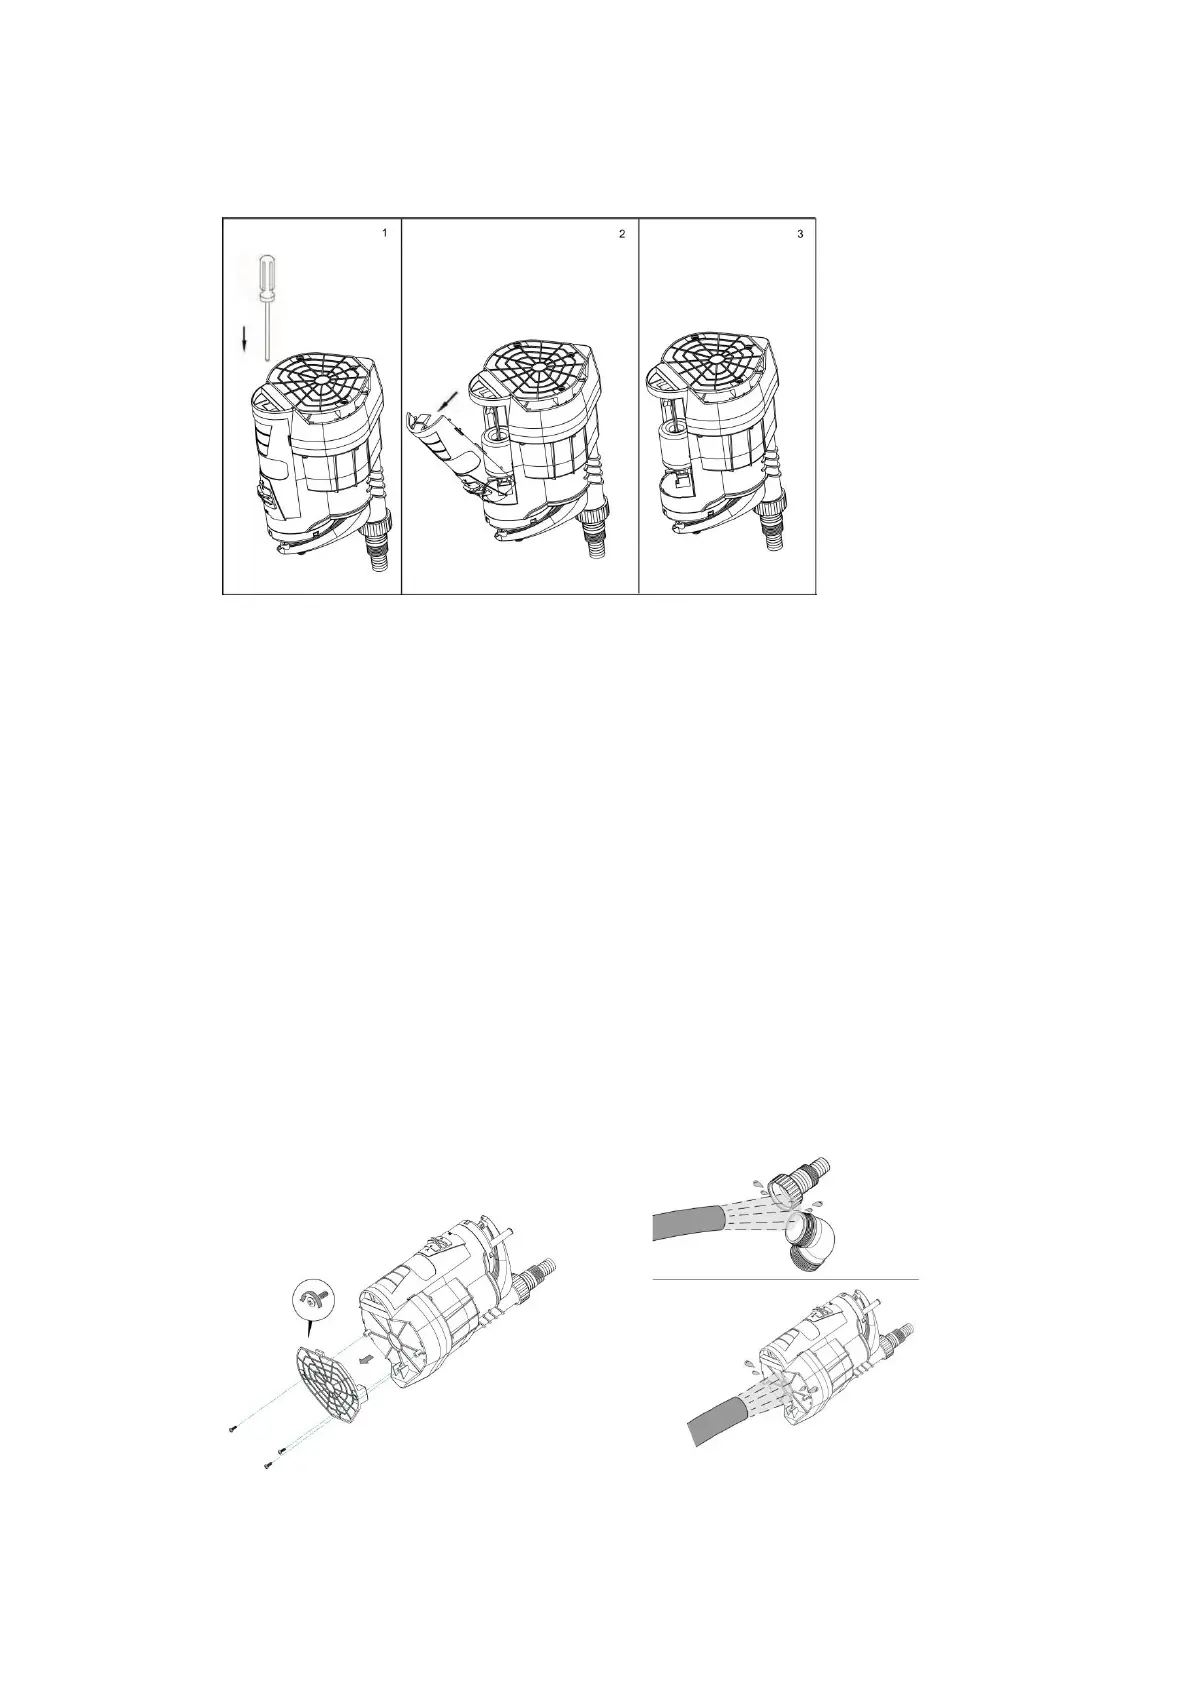
remove(see diagram). Take the pin and float out and clean the float and the magnet.
Prevent damage or incorrect assembly and do not remove the float from the pin!(fig.12)
(fig.12)
• If you regularly use the pump at different locations, you must rinse with clean water
(inside and out) after each use.
• Keep the base of the well (or the tile on which the pump is positioned) free from mud
and residue.
• Ensure that the pump does not freeze. Before winter sets in,run the pump dry and
store it in a frost-free location.
Cleaning
• Clean the device with a soft, damp and lint-free cloth. Protect electrical components
from moisture. Do not use any aggressive cleaning agents such as cleaning sprays, solvents,
alcohol-based or abrasive cleaners to dampen the cloth.
• Disassemble the cover panel at the bottom of the pump in order to access the air
intake opening.(see fig.13)
• Rinse the reducer (7) as well as the other connections using clear water.(see fig.14)
• Clean the bottom of the pump as well as the impeller by means of a jet of water.
• Reattach the cover panel to the device.(see fig.15)
(fig.13) (fig.14)