4
ver. 1.1
3. Before first use
a) Open the box and check if the elements
listed in 1. are present.
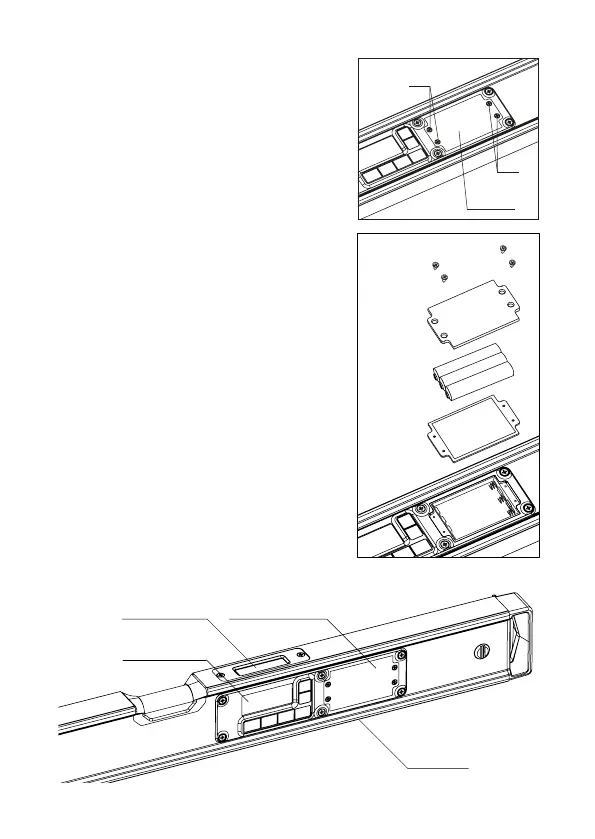
b) Open the cover using a small screwdriver
(screws a, b, c, d).
c) Place 3xAAA 1.5V batteries in the module.
a, b
c, d
battery
cover
d) WARNING!
The seal under the battery cover
provides an appropriate degree of water
protection. In case the seal was taken
out, it has to be placed back together
with the battery cover.
Make sure the rubber seal of the
battery compartment is not misshaped.
e) Screw on the battery cover using the
screws until you encounter resistance.
Appropriate screwing is essential for
maintaining IP65 protection rating.
f) Turn on the device using the “POWER” (4) button.
g) Place the device on the levelled surface. Make sure it is in the
horizontal position. You can use the built-in spirit level of the device
or another spirit level. Check the indications displayed on the screen.
h) Similarly as in point g) place the device in the vertical position.
Check the indications displayed on the screen.
i) If the screen shows “0.00° ±0.1°” for horizontal position
and “90.00° ±0.1°” for vertical position, the device is calibrated
and ready to work. If the indication differs from „0.00°”,
move to point 5 and calibrate the digital level.
j) If the indications on the display screen for horizontal or vertical
position are other than the values mentioned above, move on
to point 5 (“Calibration”) and calibrate the device.
k) Check the device again (according to points g, h, i).
screws
battery
cover
3xAAA
1.5V
seal
electronic
module
MAIN DISPLAY (3)
UPPER
DISPLAY (1)
BATTERY COVER (2)
MEASURING
SURFACE
 Loading...