5
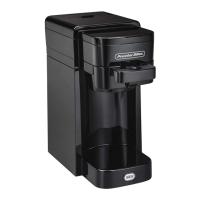
How to Brew a Single-Serve Pod
w WARNING
Burn Hazard.
To avoid contact with hot coffee or water:
• Do not ll water above MAX ll line (40 ounces [1183 mL]).
• Fully insert a 10 to 12 ounce cup (284 to 341 mL) under funnel.
w CAUTION
Cut Hazard.
Removable single-serve pod holder has a sharp blade. Use caution
when handling.
NOTES:
• This Coffee Maker brews 10 ounces (284 mL) coffee for each cup.
• It can take up to 2 minutes before brewed coffee starts dispensing into
your cup. Total brew time average is 3 minutes. For best results, allow
Coffee Maker to cool for at least 2 minutes between brewing cycles.
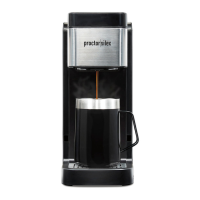
1. Plug in Coffee Maker and ensure
Removable Funnel is in place.
2. Press Lid Release Button and ll
Water Reservoir to MAX Fill Line
with 40 ounces (1183 mL) cold
water.
3. Place a Pod into Single-Serve
Pod Holder. Close Lid.
4. Fully insert a 10 to 12 ounce (284
to 341 mL) cup or mug on Drip
Tray. To adjust Drip Tray: Slide
into openings for position you
want and push down to lock into
place.
5. Press BREW Button. The Button
will light up to show Coffee
Maker is on.
6. Coffee Maker will shut off
automatically and Light will
go off when brew cycle is
completed.
7. When done brewing, unplug
Coffee Maker.
NOTES:
• Allow 2 minutes to cool in between brews.
• Removable Funnel and Removable Single-Serve Pod Holder should be
rinsed after every use.
• Add only water to Water Reservoir. No need to rell if the Water
Reservoir still has water in it.
 Loading...