13. Check that the appliance is OFF ( O) before plugging cord into wall outlet. To disconnect, turn the control to OFF
(O); then remove plug from wall outlet.
To unplug, grasp the plug and pull from the outlet. Never pull from the power cord.
14. Check hopper (cup) for presence of foreign objects before using
15. Do not attempt to defeat any interlock mechanism.
16. Do not remove cover until blade has completely stopped rotating.
17. Do not use appliance for other than intended purpose.
18. CAUTION! In order to avoid a hazard due to inadvertent resetting of the thermal cut-out, this appliance must not
be supplied through an external switching device, such as a timer, or connected to a circuit that is regularly
switched on and off by the utility.
SAVE THESE INSTRUCTIONS
Other Consumer Safety Information
This appliance is intended for household use only.
WARNING Electrical Shock Hazard: This appliance is provided with a polarized plug (one wide blade) to
reduce the risk of electric shock. The plug fits only one way into a polarized outlet. Do not defeat the safety purpose
of the plug by modifying the plug in any way or using by an adapter. If the plug does not fit, reverse the plug. If it still
does not fit, have an electrician replace the outlet.
The length of the cord used on this appliance was selected to reduce the
hazards of becoming tangled in or tripping over a longer cord. If a longer cord is necessary, an approved extension
cord may be used. The electrical rating of the extension cord must be equal to or greater than the rating of the
appliance. Care must be taken to arrange the extension cord so that it will not drape over the countertop or tabletop
where it can be pulled on by children or accidentally tripped over.
To avoid an electrical circuit overload, do not use another high-wattage appliance on the same circuit with this
appliance.
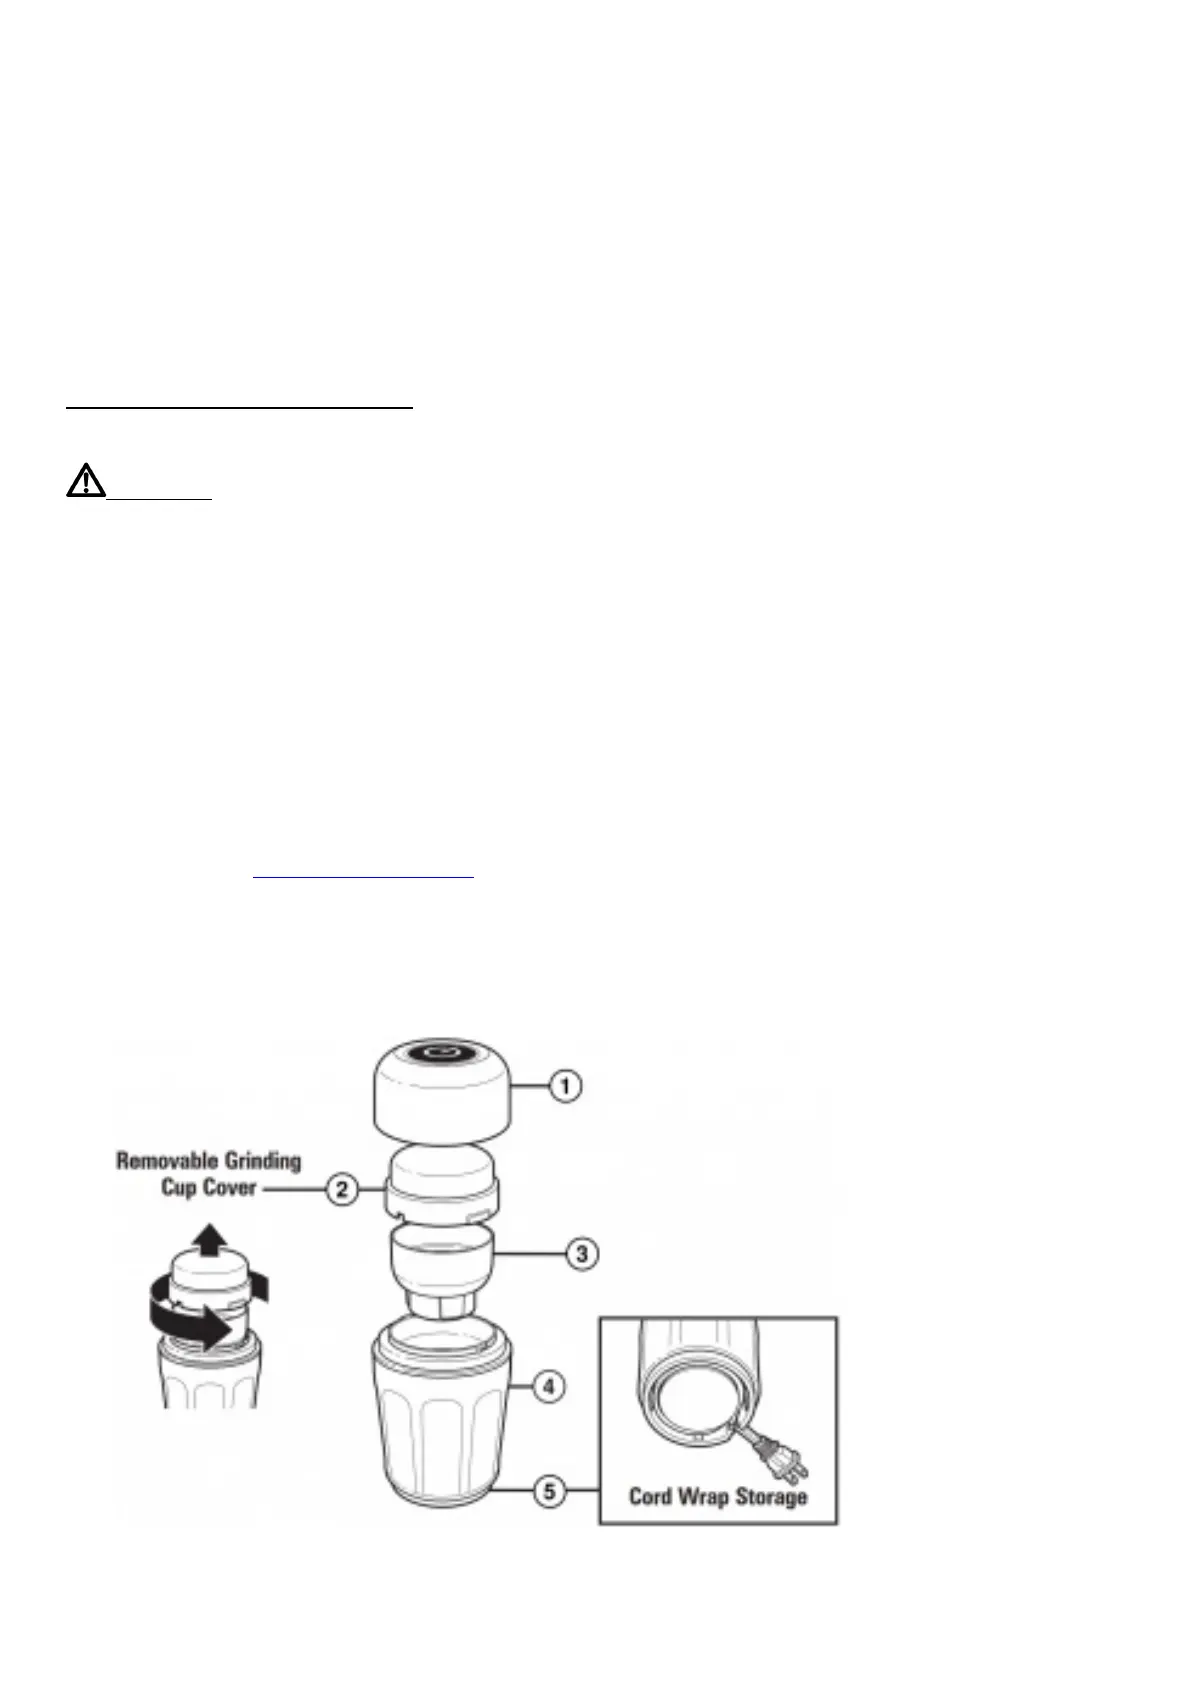
Parts and Features
To order parts, visit: proctorsilex.com/parts
1. Sound Shield
2. Removable Grinding Cup Cover
3. Removable Grinding Cup with Markings for Coffee Beans
4. Base
5. Cord Wrap Storage
How to Use



 To Next Page