34
Filter Insert
CAUTION:
• Never wash the lter in the washing machine.
• Do not use a hairdryer for drying.
• Only use the appliance after the lters have been
installed correctly.
Proceed as follows to remove, clean and reinstall the lter
insert:
1. Empty the dust collector as described previously.
2. Remove the dust collector lid. Turn it anticlockwise in the
direction of
.
NOTE:
The markings “
” and “ ” are imprinted on the right
side of the dust container.
3. Remove the ne dust lter. Remove the foam insert from
the ne dust lter.
4. Remove the coarse dirt lter from the dust collector. To
do this, reach into the recesses of the lter and remove
it by pulling it upwards.
5. Use a brush to clean the lters. In case of heavy stain-
ing, clean the lters under running water.
6. Let the lters air-dry completely before retting them!
7. Wipe the dust collector with a damp cloth and then wipe
it dry.
NOTE:
If moisture gets into the rubber seal of the base plate,
carefully remove the seal and dry it as well as the
base plate. Replace the seal.
8. Put the coarse dirt lter back into the collector. Make
sure that the guides are seated in the openings.
NOTE:
The recesses are made in such a way that the
guides t in one position only. This prevents incorrect
assembly.
9. Insert the foam insert into the ne dust lter. The smooth
side must be visible.
Place the ne dust lter onto the coarse dirt lter.
10. Put the lid back on the dust collector. The guides must
t into the openings. Press it gently and turn it clockwise
until it clicks into position.
NOTE:
The recesses are made in such a way that the
guides t in one position only. This prevents incorrect
assembly.
Check the correct t of the cover. The attened side of
the handle must t over the hose connector.
11. Fit the dust collector in the appliance.
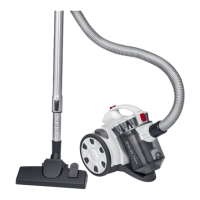
Outlet Filter
The appliance is also equipped with an outlet lter.
It is located on the back of the unit next to the parking aid.
1. Push down the lever (10) and remove the ventilation
grille.
2. Remove the lter insert and clean it. You can brush out
the lter.
3. Reinsert the lter. The guide eyes have to point up-
wards.
4. Put the ventilation grille back on the appliance. Observe
the guide lugs. The ventilation grid must engage audibly.
Cleaning
WARNING:
• Pull the mains plug out of the socket before cleaning or main-
taining the appliance.
• Under no circumstances should you immerse the appliance in
water for cleaning purposes. Otherwise this might result in an
electric shock or re.
CAUTION:
• Do not use a wire brush or any abrasive items.
• Do not use any acidic or abrasive detergents.
Clean the housing with a soft, dry cloth without additives.
Storage
• Let the appliance cool down completely.
• Wind the cable completely.
• Please insert the hook of the oor nozzle into the parking
assistant on the rear of the appliance.
 Loading...