Distributed Exclusively by Ferguson and Wolseley Canada
© 2017 Ferguson Enterprises, Inc. 0217 406162
Filter
Adjustable rod
Mould 2001
float cup
Fill valve
body
Triangle
gasket
Rubber
seal
Plastic seal
Hexagonal
seal
G
I
J
A
B
C
D
E
F
H
K
L
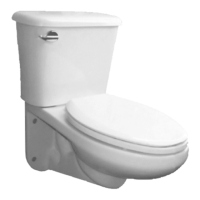
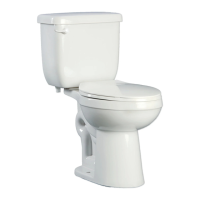
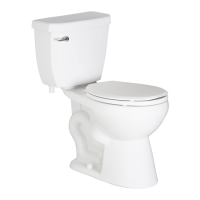
Installation Instructions
HET Toilet Bowl and Tank
with Dual Flush
Remove Old Toilet
1. Shut off water supply line to toilet. Flush toilet
and remove all water from the bowl and tank.
Use a sponge to absorb the water.
2. Disconnect the water supply from the tank.
3. Remove tank from bowl, use screwdriver and
adjustable wrench or socket wrench. Loosen
toilet bowl flange nuts under caps.
4. Remove old bowl by carefully lifting it off the
floor. Clean flange and plug drain with a rag to
prevent sewer gas from escaping.
Install New Toilet
1. If new installation, install a toilet flange into
waste line per flange instructions. Make sure
you have the correct rough in toilet.
2. Remove the rag from the drain. Install the
flange bolts into the flange.
3. Turn the bowl upside down and place it on the
flattened carton box to prevent damage.
4. Install a wax ring evenly around the bowl flange,
(horn).
5. Gently lower the bowl onto the flange making
sure the flange bolts protrude through the toilet
bolt openings.
6. Apply pressure evenly and rock the bowl from
side-to-side and front-to-back until it is firmly on
the floor.
7. Install the washers, nuts, and caps on the flange
bolts snug. Be careful not to over tighten because
the china may break.
8. Install the tank-to-bowl-gasket, tank bolts with
washer if it is not already installed, and place
tank on bowl.
9. Snug and level the tank nuts using a socket
wrench and holding the truss head screw firmly
inside the tank with a screwdriver.
CAUTION: DO NOT overtighten nuts more than
required for a snug fit. DO NOT spin bolts inside
tank with a screwdriver.
10. Connect the water supply to the ballcock. Only
hand tighten the supply line. DO NOT USE
CHANNEL LOCKS.
11. Turn on water, flush, and check for leaks. Adjust
ballcock to proper water line height as noted on
the flush valve tube.
Adjustments
Water level adjustment:
Rotating adjustable rod
will adjust the height of
float cup and change
water level.
A
Flange Bolts
Flange
Wax Ring
Sealant
Nut
Washer
Bolt
Rubber
Gasket
Filter
Adjustable rod
Mould 2001
float cup
Fill valve
body
Triangle
gasket
Rubber
seal
Plastic seal
Hexagonal
seal
DIFFICULTIES REASON SOLUTION
Water level
is too high
or too low
Fill valve
adjusted
incorrectly
Adjust water
level
Fill valve
can’t fill
Shut-off valve
not fully open
Open
shut-off valve
Filter clogged Remove and
clean filter
Float cup is
stuck by tank
wall
Free fill valve
from tank wall
Leaking Hexagonal nut is
loose
Tighten
hexagonal nut
Tools Needed
G
I
J
A
B
C
D
E
F
H
K
L
A. Screwdriver
B. Wrench
C. Tape Measure
D. Level
E. Drill
F. Flange
G. Wax Seal
H. Marker
I. Plugs
J. Screws
K. Flexible Supply Line
L. Gasket Adapter