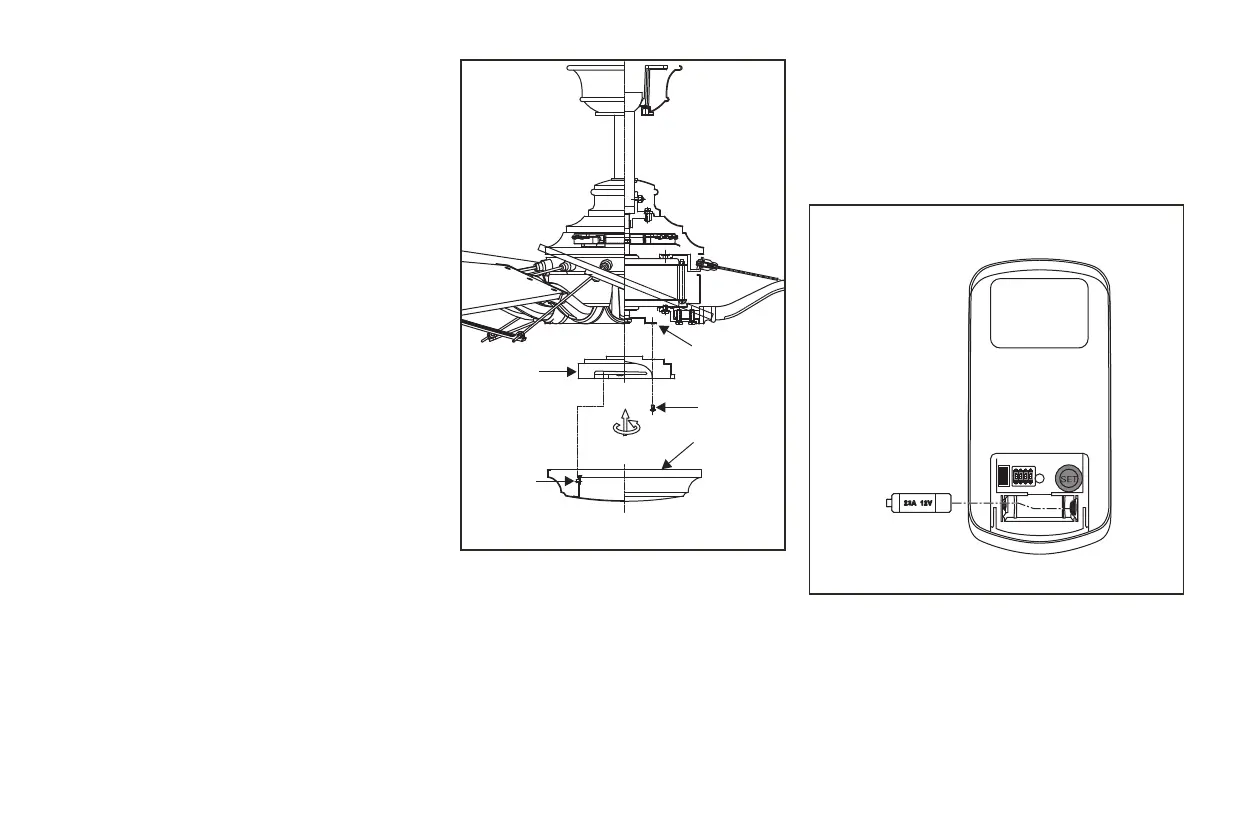
9.
Installing the
Decorative Cover
CAUTION: Before starting installation,
disconnect the power by turning off the circuit
breaker or removing the fuse at fuse box. Turning
power off using the fan switch is not sufficient to
prevent electric shock.
Step 1. Remove the 1 of 3 screws from the posts
of the mounting ring and keep it for future use.
Loosen the other 2 screws. (Do not remove)
Step 2. Place the key holes in the mounting plate
over the two screws previously loosened from the
mounting ring. Turn the mounting plate until the
decorative cover locks in place at the narrow
section of the key holes. (Fig. 14)
Step 3. Securely tighten the two mounting screws
previously loosened and the one previously
removed.
Step 4. Position the notches in the outer rim of
the mounting plate so they line up with the tabs
on the decorative cover. Carefully lift the
decorative cover up inside the mounting plate and
secure it to the fan by turning the decorative cover
clockwise until snug. DO NOT OVERTIGHTEN.
Figure 14
Installing the battery
Install a 12V MN21/A23 battery (included) into the
remote control. To prevent damage to the remote
control, remove the battery if not used for long
periods. (Fig. 15)
Figure 15
Screws
Mounting
ring
Mounting
plate
Tab
Decorative
cover
ON ECE
1234