24 progress
Installation instructions
5
5
0
M
IN
6
00
560 - 570
8
0
÷
1
0
0
To ensure trouble-free operation of the
built-in appliance, the kitchen units or re-
cess that the appliance is built into must
have suitable dimensions.
In accordance with the regulations in
force, all parts which ensure protection
against accidental contact with live parts
and parts with basic insulation must be se-
cured in such a way that they cannot be re-
moved without tools.
These also include the fixing of any end
panels at the beginning or end of a line of
built-in units.
In any case, the accidental contact pro-
tection must be ensured by the building in of
the appliance.
The appliance can be positioned with its
back or side wall against higher kitchen
units, appliances or walls. However, only
other appliances or units of the same height
as the appliance can be placed against the
other side wall.
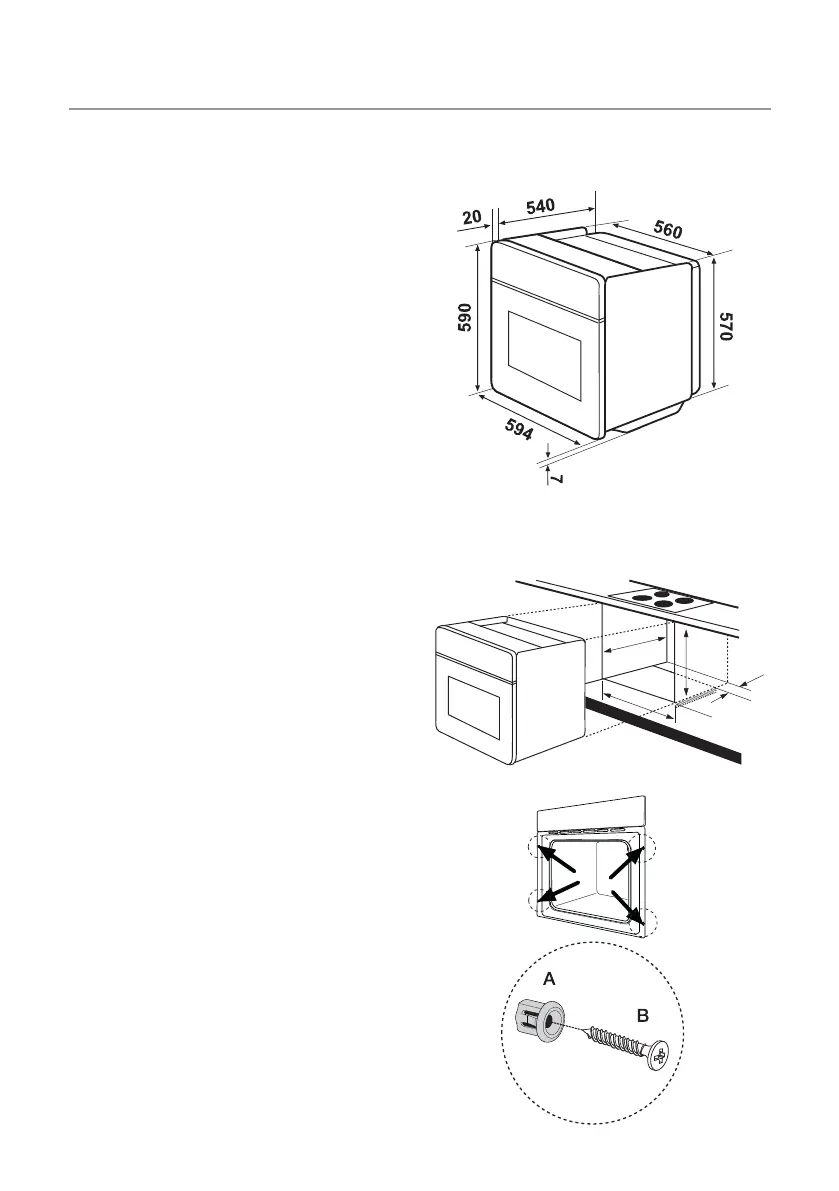
Oven dimensions (see illustration)
Instructions for building in
To ensure trouble-free operation of the
built-in appliance, the kitchen units or re-
cess that the appliance is built into must
have suitable dimensions.
Securing in the unit
1. Open the oven door.
2. Secure the oven in the unit using the four
spacers (see illustration - A). These fit
exactly in the holes in the frame. Then
screw in the four woodscrews (supplied)
tightly (see illustration - B).