66
VEHICLE JUMPSTARTING INSTRUCTIONS
NOTE: Instructions for negatively earthed vehicles only
1. Charge your jumpstarter for 24 hours prior to first use and as soon as possible after
each use.
2. Before making any connections, check the jumpstarter battery status by pressing the red
BATTERY STATUS button:
Green LED: Ready to use.
Yellow LED: Medium charge. Ready to use but must be recharged immediately
after jumpstarting.
Red LED: Low charge. Do not jumpstart. Recharge jumpstarter immediately.
3. Turn your vehicle’s ignition to OFF before connecting the jumpstarter’s clamps to
your vehicle.
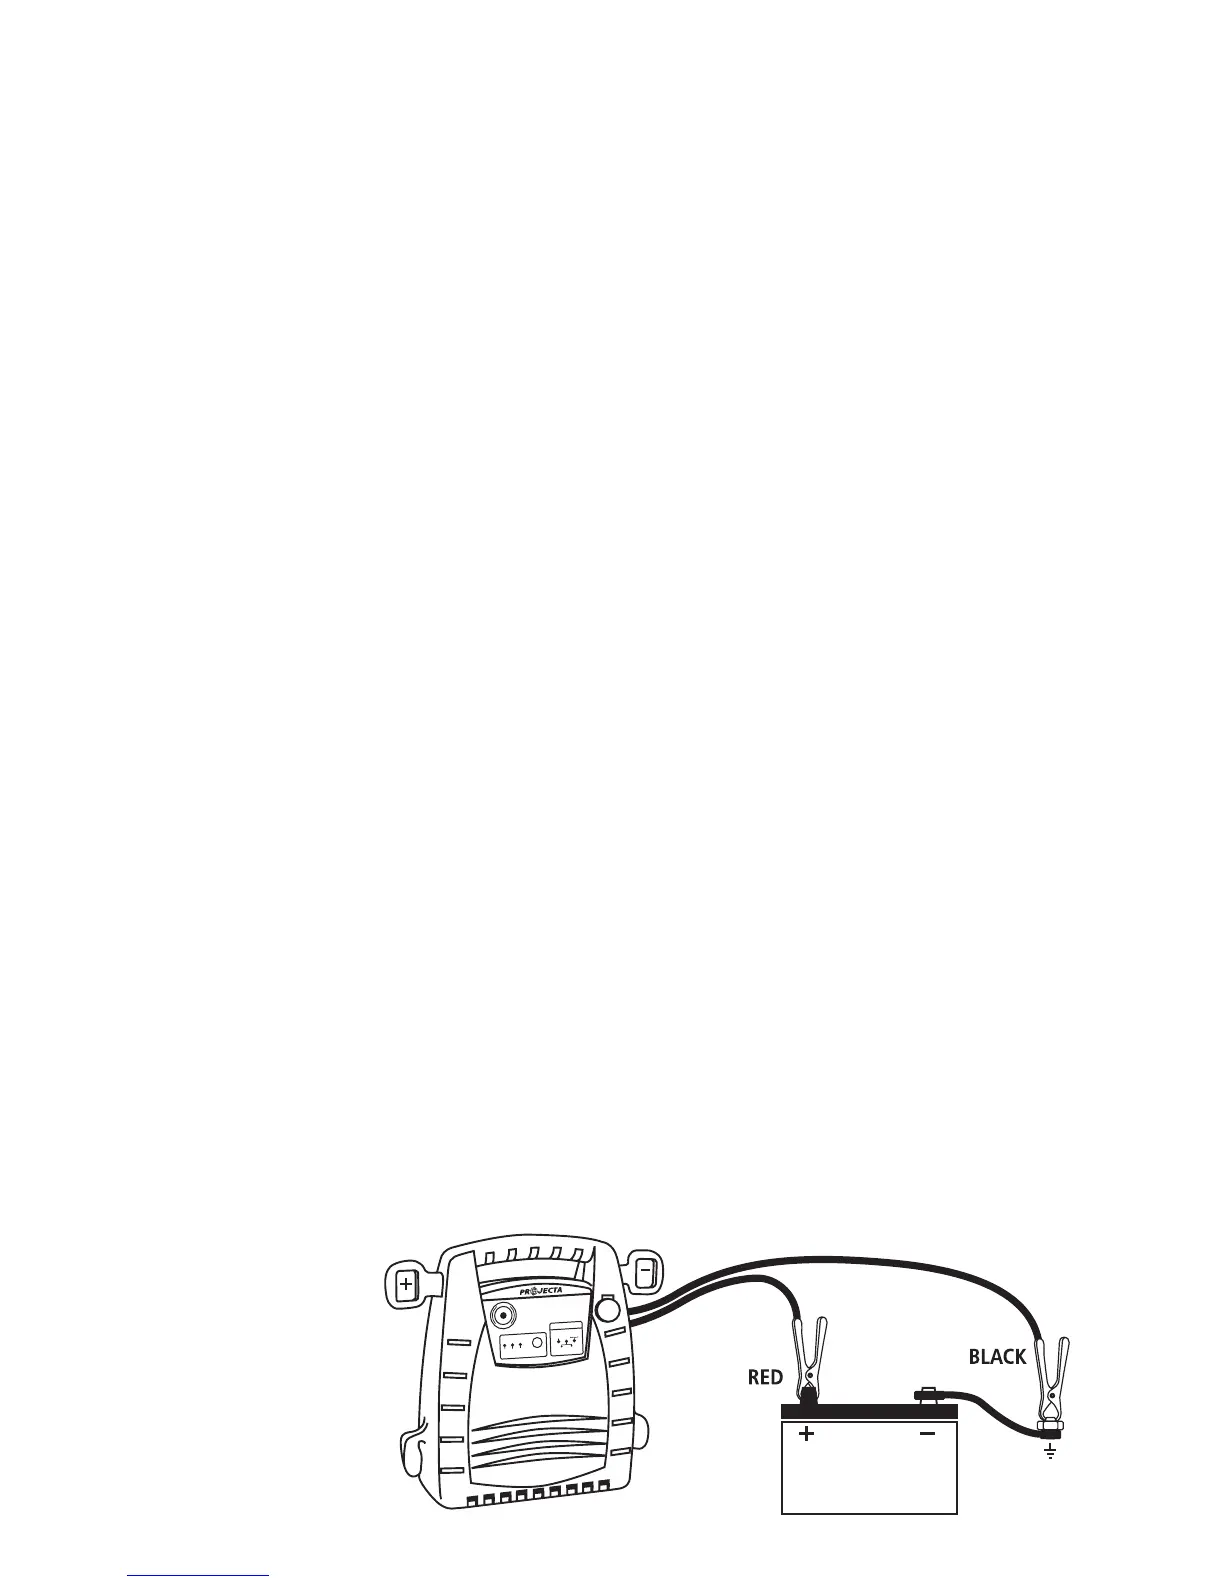
4. Connect the Red Positive (+) clamp to the positive (+) terminal of the battery in the vehicle
and the Black Negative (-) clamp to any non-moving metal part of the engine block. DO
NOT CONNECT TO FUEL LINE. Always double check that you have the proper connections.
5. The Jumpstarter Status panel contains 3 LEDs:
Check Voltage LED (red) – If illuminated check that the vehicle being jumpstarted is 12V.
This jumpstarter is suitable for 12V vehicles only.
Ready to Jumpstart/Reverse Connection LED (bi-colour)
Green: Ready to jumpstart
Red: Reverse connection. Check the clamps are correctly connected (see Step 4)
None: If neither LED is illuminated, check that the clamps are correctly connected with
good contact. If the LED's remain unilluminated it may indicate that the vehicle’s
battery is below 2.6V, the jumpstarter will only activate when connected to a
battery above 2.6V. In this circumstance ensure all connections are correct and
then press the OVER RIDE button to manually engage the jumpstarter.
6. Turn the vehicle’s ignition to ON and start the vehicle.
7. After the engine has started, disconnect the Black clamp and then the Red clamp.
8. Recharge jumpstarter.