Do you have a question about the Projecta HP900 and is the answer not in the manual?
Provides critical safety warnings regarding the use of the jumpstarter, including risks of explosive gas and incorrect connections.
Details crucial information about charging the jumpstarter before first use, after each use, and maintaining charge.
Details the jumpstarting performance for HP900 and HP1200 models, including estimated jumpstarts per charge.
Explains how to monitor the jumpstarter's charge level using the LED indicator and status button.
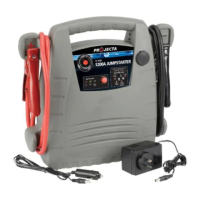
Highlights the features of the heavy-duty, fully insulated leads, emphasizing length and quality for performance.
Describes the high-quality AGM battery, noting its maintenance-free and sealed design for convenience and safety.
Details the over-voltage protection and alarm system that prevents damage from incorrect voltage connections.
Outlines the options for recharging the jumpstarter using a 240V AC outlet or a 12V vehicle DC socket.
Explains the automatic charge control that stops charging when full and maintains optimal charge without risk.
Describes the reverse polarity protection and alarm that prevents damage from incorrect clamp connections.
Details the built-in surge protection that allows safe jumpstarting of vehicles with sensitive electronics.
Explains the portable power function using the 12V DC accessory socket for various appliances.
Provides specifications for the battery, including capacity and short circuit current for HP900 and HP1200.
Lists specifications for the 12V DC power outlet, including cigarette lighter socket and circuit protection.
Specifies the length, cable size, and polarity protection for the jumpstarter leads.
Details recharging specifications for 240V and 12V sources, including control and charge levels.
Provides physical dimensions (height, width, depth) and weight for the jumpstarter unit.
Explains the meaning of the LED indicators for charge level: Green (Ready), Yellow (Recharge recommended), Red (Immediate charge).
Overview of the heavy-duty, fully insulated leads, highlighting their length and quality for optimal performance.
Explains the automatic charge control feature, allowing the unit to remain connected to the charger without risk.
Details the 12V DC cigarette lighter output, including automatic overload and short circuit protection.
Identifies the 'Override Button' on the jumpstarter unit, used for manual engagement.
Locates the charging socket on the back of the jumpstarter unit for connecting chargers.
Identifies the sealed internal battery within the jumpstarter unit.
Highlights the surge protection feature for safely jumpstarting vehicles with sensitive electronics.
Illustrates the 240V AC and 12V DC recharging methods for the jumpstarter unit.
Explains the battery meter, showing how LEDs indicate the battery charge level.
Identifies the 'Battery Status Button' used to check the jumpstarter's current charge level.
Describes the 'Ready to Jumpstart/Reverse Connection LED', 'Full/Charging LED', and 'Check Voltage LED'.
Instructs to charge the jumpstarter for 24 hours before its initial use and after each subsequent use.
Advises checking the jumpstarter's battery status using the LED indicators before making connections.
Instructs to turn the vehicle's ignition off before connecting the jumpstarter clamps.
Details the correct procedure for connecting the positive (+) and negative (-) clamps to the vehicle battery and engine block.
Explains the function of the Jumpstarter Status Panel LEDs: Check Voltage, Ready/Reverse Connection, and Full/Charging.
Guides the user to turn the vehicle's ignition on and start the engine after connecting the jumpstarter.
Provides instructions for safely disconnecting the black and red clamps after the engine has started.
Reminds the user to recharge the jumpstarter immediately after completing the jumpstarting process.
Details how to connect the AC charger output to the jumpstarter's charging socket and plug into a 240VAC outlet.
Explains the charging LED behavior: red for charging, green for fully charged, and the initiation of maintenance mode.
States the estimated charging time for the jumpstarter, ranging from 20-30 hours for a 50% depleted battery.
Recommends charging the jumpstarter before first use, after each use, and keeping it permanently on charge when not in use.
Instructs to connect the 12V charging lead from the vehicle's cigarette lighter socket to the jumpstarter's charging socket.
Explains that starting the car allows the alternator to charge the jumpstarter and car battery simultaneously.
Provides notes on 12V DC charging, stating it reaches 90% capacity and that appliances can be run during charging.
Lists estimated running times for various appliances powered by the jumpstarter based on consumption.
Explains the auto-reset circuit breaker protecting the 12V DC socket against overloads and short circuits.
Details how Battery Status LEDs (Green, Yellow, Red) indicate charge level and corresponding battery voltage.
Advises ensuring no appliances are connected and the unit is not charging for accurate battery status readings.
Explains how to calculate appliance run time based on jumpstarter capacity (Ah) and appliance current draw (A).
Addresses slow charging from a vehicle's cigarette lighter socket due to thin cables and voltage drop.
Troubleshoots why 12V DC sockets may not work, checking appliance rating and the internal circuit breaker.
Provides troubleshooting steps for when the jumpstarter fails to start a vehicle, covering charge, connections, and voltage.
Details the one-year warranty against material and workmanship defects, excluding wear, abuse, and damage.
Explains the process for making a warranty claim, including product return, cost, and required documentation.
Clarifies consumer rights under Australian Consumer Law, including replacement, refund, and repair entitlements.
Provides contact details for distributors in Australia and New Zealand.
| Brand | Projecta |
|---|---|
| Model | HP900 |
| Category | Remote Starter |
| Language | English |