8
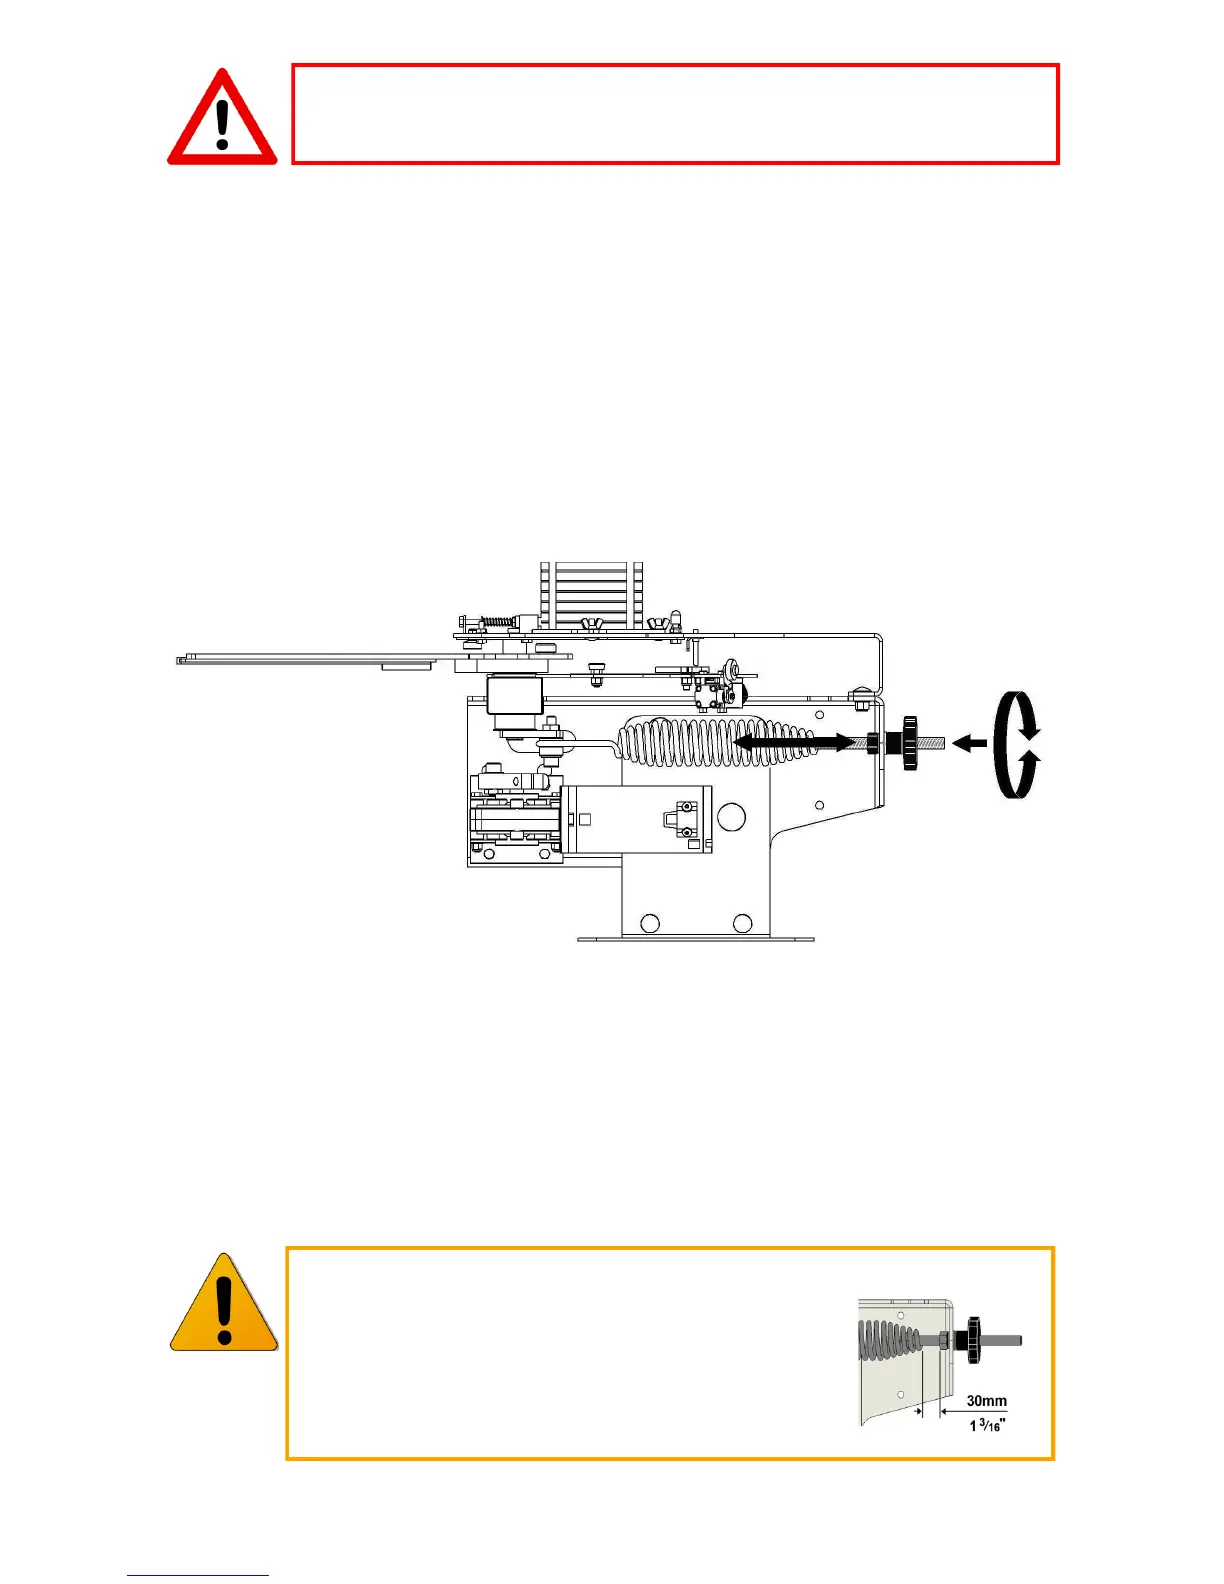
Adjustment: Spring Tension
Spring adjustment is always easier if the spring aachment point is at its rearmost
posion, this relieves the spring of a large proporon of it’s tension making adjust-
ment much easier as well as reducing wear on the spring adjustment mechanism.
To achieve this, rst perform the Safe Mode Procedure (see page 6) to put the ma-
chine into safe mode and then nudge forward unl the throwing arm projects for-
ward from the front of the machine. At this point stop nudging and disconnect the
baery.
Decrease tension—Using the handwheel loosen spring to desired posion. Hand
ghten inside nut to back of frame and clamp with a further turn of the handwheel.
Increase tension—Loosen handwheel one turn, then adjust the inner nut to allow
the spring room to pull back. Using the handwheel ghten spring to desired posi-
on. Hand ghten inside nut to back of frame and clamp with a further turn of the
ALWAYS disarm the machine before carrying out loading, adjustment or
maintenance.
Important: leave 30mm (1 3/16”) thread length
between inside nut and spring coil. Increasing
spring tension up to full length of thread will seri-
ously detriment the performance of the machine
and will cause spring damage or failure.
 Loading...