

J
jlewisAug 16, 2025
How to reduce high luminescent cross talk in Promega Laboratory Equipment?
- ZzochoaAug 16, 2025
Use high-quality white or black opaque plate. If using 384-well plates, confirm that the 384-well aperture has been installed.
How to reduce high luminescent cross talk in Promega Laboratory Equipment?
Use high-quality white or black opaque plate. If using 384-well plates, confirm that the 384-well aperture has been installed.
What to do if the Promega Laboratory Equipment shows 'door opened'?
If the instrument door was opened during a run or something prevented the instrument door from fully closing as the Multiwell Plate Sample Tray was retracting, restart the run or check the instrument door for any obstructions.
What happens if there is a power failure during a run with Promega Laboratory Equipment?
In the event of a power failure, turn OFF the instrument and the Tablet PC. When power is resumed, turn the instrument and Tablet PC back ON. The results that were generated during the run (before the power failure) will be saved.
Why do the injectors sputter or drip in Promega Laboratory Equipment?
If the injectors sputter or drip because of reagent buildup in injector lines, run the flushing protocol (Section 4.B).
What to do if the injectors are not injecting in Promega Laboratory Equipment?
If the injectors are not injecting because there is no reagent in injector lines, confirm that the inlet tubing is inserted into the bottom of the reagent container. If the injector tubing is clogged and may need to be replaced, reprime the injectors. (Section 4.B).
How to troubleshoot a start problem on Promega Laboratory Equipment?
If you encounter a start problem due to an invalid value, make sure to select at least one well on the plate map. If the problem is protocol validation, ensure the multiwell plate was inserted and is properly seated. If you cannot connect to the instrument, check if the Tablet PC is connected, turned ON, or turn ON the instrument. If the error persists, contact Promega Technical Services.
What to do if the Tablet PC touch screen is not working with Promega Laboratory Equipment?
If the Tablet PC touch screen does not appear to be working: 1. Verify the plug is securely connected to the Tablet PC. 2. Verify that the instrument is plugged into the USB port on the Tablet PC. 3. Restart the Tablet PC, and launch the GloMax[®] Discover software. 4. If the issue is not resolved, contact Promega Technical Services (techserv@promega.com).
What to do if Promega Laboratory Equipment says linear curve fit requires at least two curve points?
If you are attempting to analyze a linear curve or linear standard curve with fewer than two known curve points, specify more standard curve points in the analysis so at least two concentrations are present in the standard curve.
What to do if Promega Laboratory Equipment says dose response curve fit requires at least four curve points?
If you are attempting to analyze a dose response curve with fewer than four concentration points, specify at least four curve points in the analysis with independent concentrations.
What to do if the plate is stuck or jammed in Promega Laboratory Equipment?
To attempt to recover the plate, press Door, press Self Test on the ‘Settings’ screen or press Recovery in the Tools menu (Section 3.G). If the issue is not resolved, contact Promega Technical Services (techserv@promega.com).
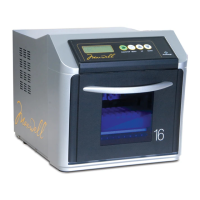
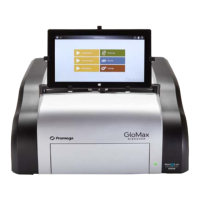
Details about detection modes, read types, sample formats, tablet PC, speeds, dimensions, weight, power, warranty, and compliance.
Details on detector, wavelength range, detection limit, dynamic range, cross talk, and filters.
Details on detector, light source, read position, wavelength selection, wavelengths included, and detection limits.
Details on detector, light source, spectral range, filter wheel, wavelengths included, detection limits, and dynamic range.
Details on number of injectors, dispense volume, plate compatibility, injection speed, waste volume, and void volume.
Details on shaking pattern, intensity, and orbit.
Details on temperature range.
Details on operating system, RAM, disk space, and other software requirements.
List of included items such as instrument, tablet PC, cables, adapters, and tools.
Lists optional accessories like dual injectors and filter paddles.
Explains various safety symbols like electrical hazard, pinch point, UV light, and spill warnings.
Provides crucial handling and operational advice, like wiping spills, handling with care, and avoiding certain environments.
Step-by-step guide to connecting and setting up the instrument and tablet.
Overview of the main interface screen and its buttons for navigation and functions.
Instructions for unpacking and physically installing the optional injector system.
Procedures for priming, using, and maintaining the injector system.
General instructions for maintaining the instrument, including spill cleanup and door operation.
Detailed steps for cleaning the instrument's interior and exterior components.
Guidelines for cleaning and maintaining the tablet PC's touchscreen and display.
Table listing common error messages and their corresponding resolutions.
Lists common issues like injector problems, plate jams, and screen issues with causes and solutions.
Guidelines for safely inserting and removing USB flash drives during operation.
Instructions and recommendations for configuring the tablet PC's settings.
| Category | Microplate Reader |
|---|---|
| Detection Modes | Luminescence |
| Light Source | Xenon flash lamp |
| Detection Technology | Photomultiplier Tube (PMT) |
| Interface | USB |
| Power Requirements | 100-240 V, 50/60 Hz |