Do you have a question about the promethean UST-P1 and is the answer not in the manual?
Publication copyright, manufacturer disclaimer, and trademark acknowledgements.
Crucial safety and usage instructions for safe projector operation and long-term use.
Defines warning symbols and text styles to alert users to hazardous situations.
Guidelines for safe handling, placement, and avoiding hazards like lamp brightness.
Notices on projector positioning, tilt angle, and ventilation for safe installation.
Rules for power cord use and battery removal from the remote control.
Guidance on safe procedures for replacing the projector's lamp.
Instructions for cleaning the projector mirror and case.
Information on mercury content and proper recycling of the product.
Advisories to read regulatory notices before installing and using the projector.
List of items included with the projector upon unpacking.
Instructions for contacting the dealer for missing items and cautionary advice.
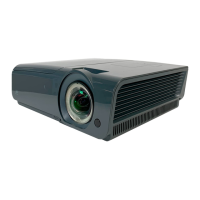
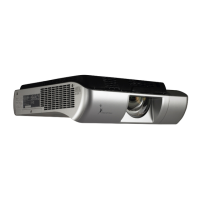
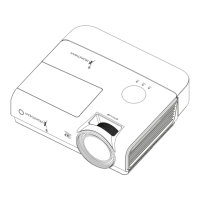
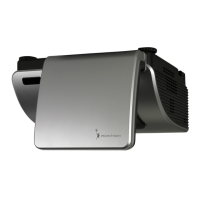
Detailed labeling of projector components visible from the front-right perspective.
Note on the significance of unobstructed ventilation openings for lamp cooling.
Labels and descriptions for all input and output ports located on the rear panel.
Recommendation for connecting input sources to achieve optimal picture quality.
Crucial safety advice to disconnect power before making any cable connections.
Details on the tilt adjustor for angle positioning and ceiling support holes.
Requirements and recommendations for selecting and installing ceiling mounts.
Diagram identifying all buttons and features of the projector's remote control.
Advice on using the remote control effectively, considering lighting and obstructions.
Detailed explanations for each button on the remote control.
Information on the effective distance and angle for remote control operation.
Confirmation that all projector operations are managed exclusively via the remote control.
Step-by-step guide for correctly inserting batteries into the remote control.
Important cautions regarding battery type, disposal, and removal during storage.
Procedure for starting up and shutting down the projector and connected devices.
Method for selecting the active input source when multiple devices are connected.
Critical warning to allow the projector to cool before unplugging the power cord.
Instructions for establishing a password to prevent unauthorized projector usage.
Guidance on keeping the password secure and contacting support if lost.
Steps to toggle the security lock function on or off through the OSD menu.
How to input the password using the remote's cursor buttons.
The screen displayed after enabling the lock; instructions for forgotten passwords.
Guidance for leveling the projector and adjusting the picture angle using the tilt-adjuster.
Ensuring cables are safely managed to prevent tripping hazards.
Using the projector's focus control to sharpen the projected image.
Correcting the trapezoid effect using the remote control's keystone buttons.
Introduction to the OSD system for making image adjustments and changing settings.
Instructions for using remote cursor buttons to move through and modify OSD menus.
Explanation that OSD options may vary based on the connected video source.
Procedure to select the desired language for the On-Screen Display.
Visual guide to the OSD menus, showing settings and their ranges.
Detailed overview of sub-menus within Image, Computer, Video, Installation I, and Installation II.
How to enter and navigate the Image menu for display adjustments.
Settings for Display Mode, Color, Brightness, Contrast, Sharpness, and Gamma.
Accessing the Advanced menu and resetting Image menu settings to defaults.
Steps to reach the Advanced menu from the Image settings.
Adjusting the color space and color temperature for optimal image.
Guide to entering the Color Manager sub-menu for detailed color tuning.
Accessing and using the Color Manager sub-menu for fine-tuning colors.
Adjusting Hue, Saturation, and Gain for specific color components.
How to enter and navigate the Computer menu for PC input adjustments.
Adjusting display position, frequency, and tracking for PC input.
Utilizing the Auto Image function for automatic phase, tracking, size, and position adjustments.
How to enter and navigate the Video menu for video source adjustments.
Settings for Video AGC, Saturation, Tint, Film Mode, and Overscan.
Enabling or disabling the closed captioning feature.
Tip to resolve video jagging by adjusting the Film Mode setting.
How to enter and navigate the Installation I menu.
Options for OSD language, screen blank color, and projection methods.
Steps to access the ActivBoard Installation and Advanced menus.
Procedure to reset most settings in Installation I to factory defaults.
Accessing and navigating the ActivBoard Installation sub-menu.
Configuring white board aspect ratios and selecting test patterns.
Notes regarding the availability of image adjustment options for white board modes.
Steps to reach the Advanced menu via the Installation I menu.
Configuration options for security lock, wall color, and presentation timer.
How to adjust the digital zoom level for the projected image.
Details on the Presentation Timer feature and its settings.
How to enter and navigate the Installation II menu.
Settings for auto source detection and power on/off controls.
Adjusting fan speed and lamp mode for optimal performance and lamp life.
Methods to access Advanced, Factory Reset, and Status menus.
Steps to reach the Advanced menu via the Installation II menu.
Accessing OSD Menu Setting and Peripheral Test menus for configuration.
Procedures for resetting lamp hours and enabling low power mode.
Settings related to 3D display and network connectivity.
Note on enabling 3D playback via DVD device settings.
Configuring OSD location, translucency level, and display timeout.
How to perform diagnostic tests for the remote control, color, and USB connection.
Procedure to reset the lamp hour counter to zero after lamp replacement.
Options for configuring 3D Sync Invert and 3D Format.
Setting up network state, DHCP, IP address, subnet mask, gateway, and DNS.
Confirming the entered network configuration settings.
Overview of remote management capabilities through network connection.
Using wired LAN for control and compatibility with third-party systems.
Information on compatible external controllers and their support.
Steps for physically connecting the projector to a PC via an RJ45 cable.
Navigating Windows to access Network Connections for setup.
Accessing and configuring the properties of the Local Area Connection.
Setting up the Internet Protocol (TCP/IP) properties for network communication.
Setting the projector's IP address, subnet mask, and default gateway.
Instructions for accessing the projector's web page for remote management.
Display of the Crestron control interface for managing projector settings.
Reference for input length limitations for various Crestron control parameters.
Using Telnet over LAN/RJ45 for RS232 command control.
Steps for setting up and using the Telnet function for RS232 commands.
Procedure to enable the Telnet Client feature in Windows Vista/7 through Control Panel.
Information on Telnet protocol, supported ports, and the Telnet utility.
Details on connection limitations, payload size, command length, and timing for Telnet control.
How to reset all projector menu settings to their original factory defaults.
Information displayed in the Status menu: source, video info, lamp hours.
Detailed instructions for safely replacing the projector's lamp module.
Important safety notes regarding lamp mercury content and proper disposal procedures.
Critical safety warning about allowing the projector to cool down before replacing the lamp.
Steps to remove screws and the lamp compartment cover to access the lamp.
Reverse steps for installing the new lamp, ensuring correct alignment and connection.
Importance of proper seating and connector connection for the lamp module.
Procedure to reset the lamp hour counter to zero after replacing the lamp.
Method for cleaning the projector mirror using a blower and lens cleaning cloth.
Important cautions for cleaning, including cooling time and material usage.
Steps for cleaning the projector's exterior case with a damp cloth and mild detergent.
Caution against using abrasive cleaners that may discolor or fade the case.
Warnings about water entering the projector during cleaning and required actions.
How to secure the projector using a Kensington slot and security cable.
Utilizing the security bar to prevent unauthorized removal of the projector.
General troubleshooting tips, including checking connections and power.
Advice on pinpointing issues, managing parts, and recording troubleshooting steps.
Table mapping LED states to specific error codes and conditions.
Solutions for common image display issues like no image, blurriness, or distortion.
Troubleshooting steps for issues related to the projector lamp.
Troubleshooting steps when the projector does not respond to the remote control.
Guidance on preparing the projector for service and returning it for repair.
Specifications for model variations, display type, and native resolution.
Details on weight, dimensions, operation temperature, and power consumption.
Specifications for connectivity ports and security features.
List of safety certifications the projector has obtained.
Diagram and table illustrating projection distance relative to projected image size.
Table of resolutions and sync frequencies supported for NTSC, PAL/SECAM, and VESA signals.
Table of resolutions and sync frequencies for VESA and Apple Macintosh signals.
Table of resolutions and sync frequencies for SDTV, EDTV, and HDTV signals.
Information on 3D timing support and considerations for display card compatibility.
Illustrations showing the projector's external dimensions with key measurements.
Information regarding FCC compliance, limits, and potential radio frequency interference.
Statement confirming compliance with Canadian ICES-003 standards.
List of various safety certifications the product has achieved.
| Native aspect ratio | 16:10 |
|---|---|
| Projection distance | - m |
| Projection technology | DLP |
| Supported aspect ratios | 4:3, 16:9, 16:10 |
| Contrast ratio (typical) | 3000:1 |
| Screen size compatibility | - \ |
| Projector native resolution | WXGA (1280x800) |
| Throw ratio | 0.35:1 |
| Focal length range | - mm |
| Service life of light source | 5000 h |
| Service life of light source (economic mode) | 8000 h |
| Full HD | No |
| HD-Ready | Yes |
| HDMI version | 1.4 |
| Serial interface type | RS-232 |
| USB 2.0 ports quantity | USB 2.0 ports have a data transmission speed of 480 Mbps, and are backwards compatible with USB 1.1 ports. You can connect all kinds of peripheral devices to them. |
| Noise level | 33 dB |
| Placement | Desktop |
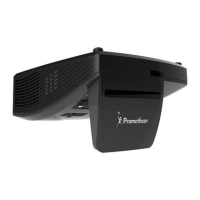
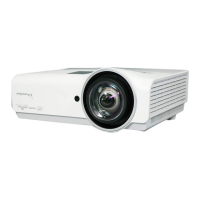
| Product type | Ultra short throw projector |
| Product color | Black |
| Power source | AC |
| Power consumption (standby) | 0.5 W |
| Power consumption (typical) | 300 W |
| Depth | 287 mm |
|---|---|
| Width | 374 mm |
| Height | 110 mm |
| Weight | 3700 g |
| Package depth | 440 mm |
| Package width | 519 mm |
| Package height | 291 mm |
| Package weight | 9000 g |